TIMETEC TA ELECTRONIC TIME CARD REPORT ENHANCEMENT

Thursday, September 28, 2017 TimeTec 0 Comments


Introduction
There are various types of report that can be generated in TimeTec TA for organizations to manage their workforce. The most popular report is the Electronic Time Card (ETC) which is a record comprising of employees’ detailed clocking activities in a month such as calculated work time, overtime, work hour shortage and etc. Below are the enhancements made:

New Features
Previously, Electronic Time Card can only be generated in Portrait orientation. We have now allowed the report to be generated in Landscape orientation to accommodate customers’ need.

1.png

Remark can also be previewed in ETC reports now (ONLY in Landscape Orientation). Users can manually input the remark (max 250 characters) in the Attendance Sheet and it will automatically be displayed in Landscape generated ETC.

2.png

3.png

0 comments:

Have any questions or inquiries about FingerTec? Drop your input here.

Ingress Release Note (v3.1.2.16 & v3.1.2.9)

Wednesday, September 27, 2017 TimeTec 0 Comments


FingerTec always strives for the best to accommodate users with the best experience. This brings to the release of v3.1.2.16, which contains 3 new added features while in release v3.1.2.9, there are 18 new features and enhancements, 1 feature removed and 5 bugs fixed as shown below.

Ingress v3.1.2.16 14-09-2017
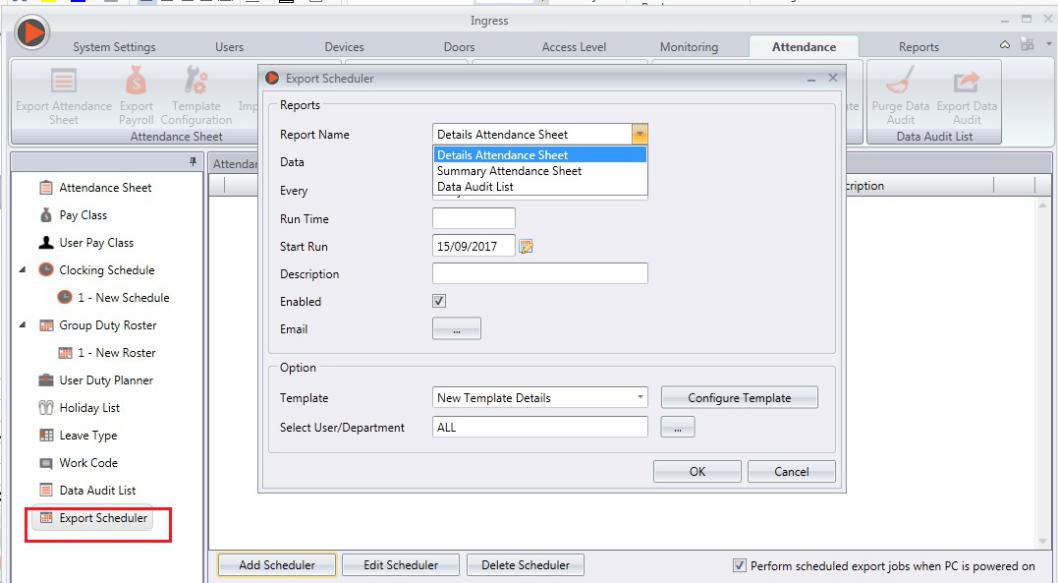
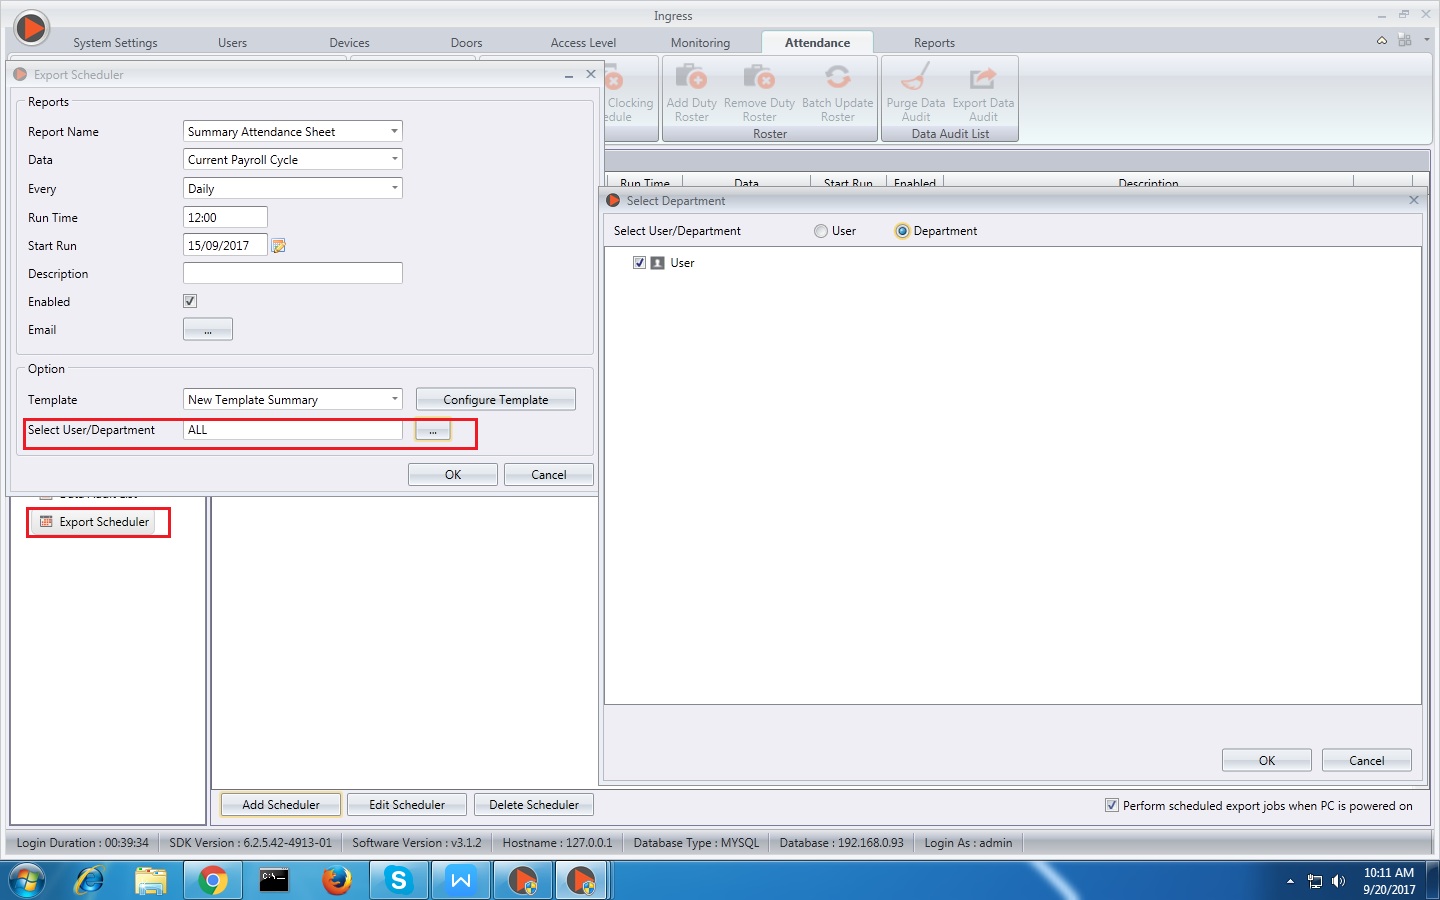
1. Added filter by Department option in Export Scheduler (alternative for filter by User).
1.jpg

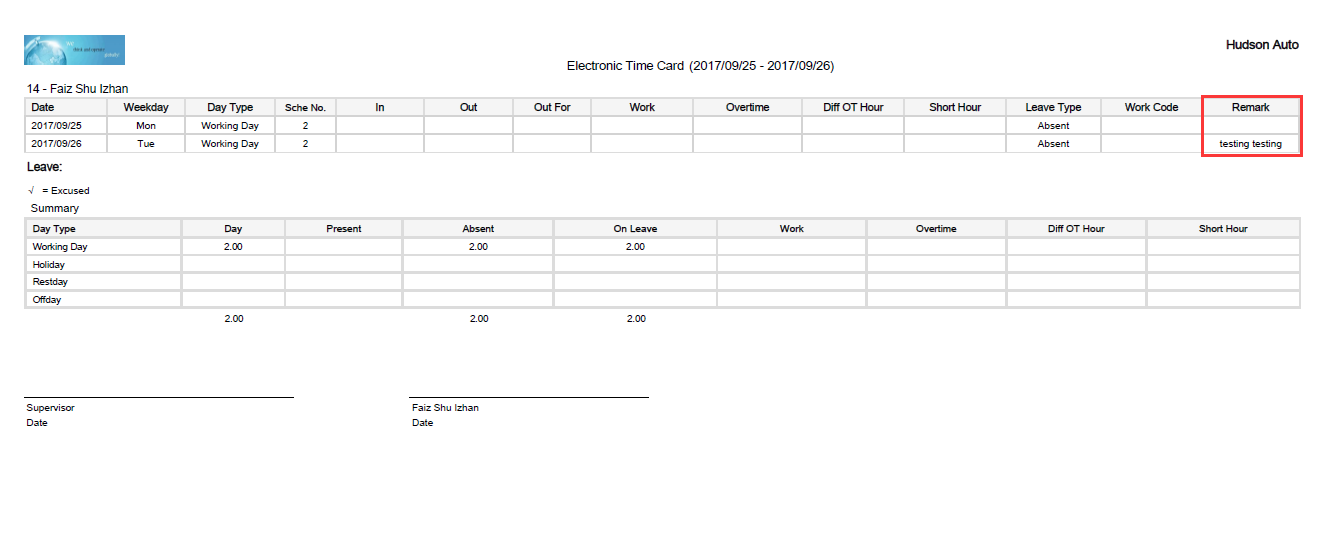
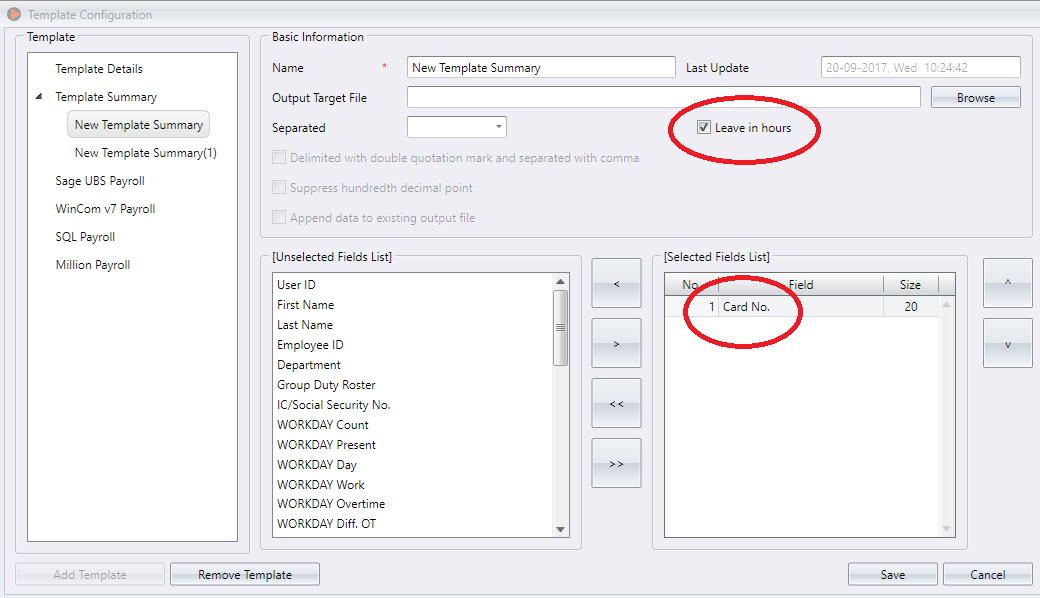
2. Added ‘Leave in Hour’ option and ‘Card Number’ field in Export Attendance Summary.
2.png

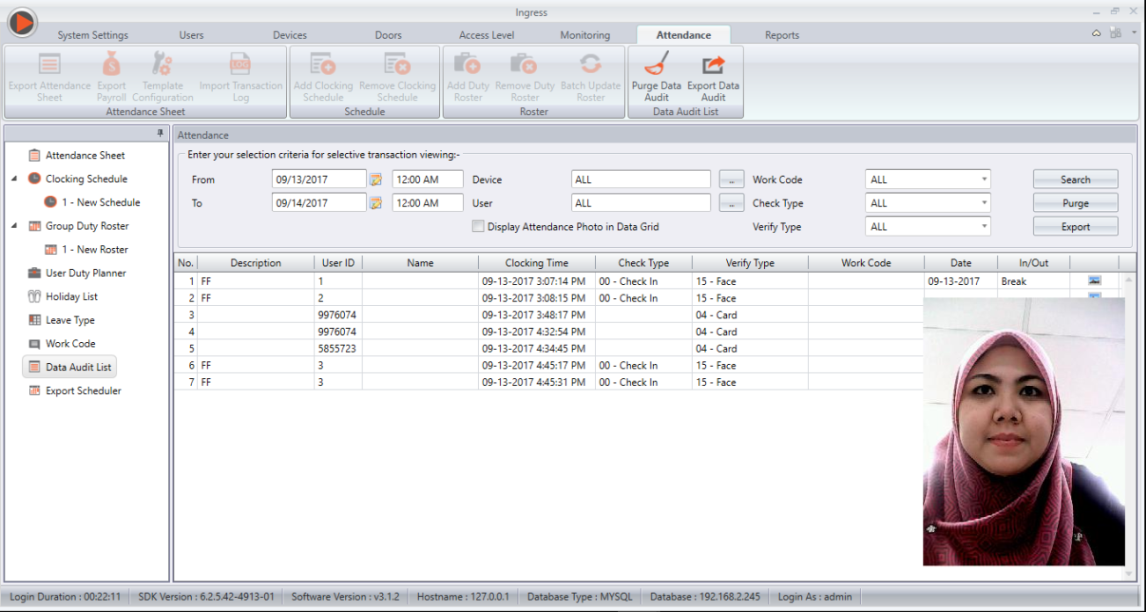
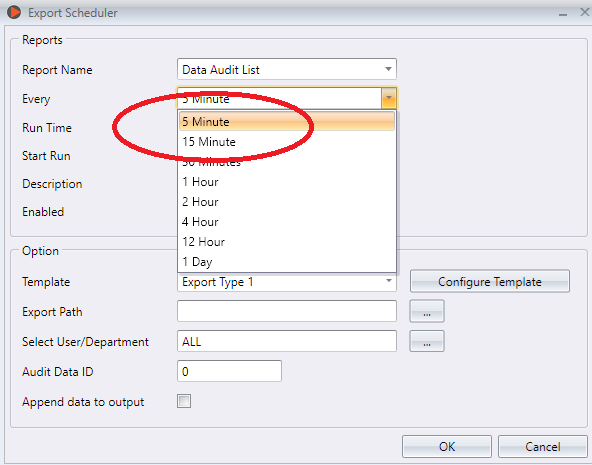
3. Added ‘5 mins’ and ‘15 mins’ selection in Data Audit List Export.
3.png


Ingress v3.1.2.9 30-08-2017
1. Added Export Scheduler for Automatic Export of Attendance and Transaction data in Attendance Module.
1b.jpg

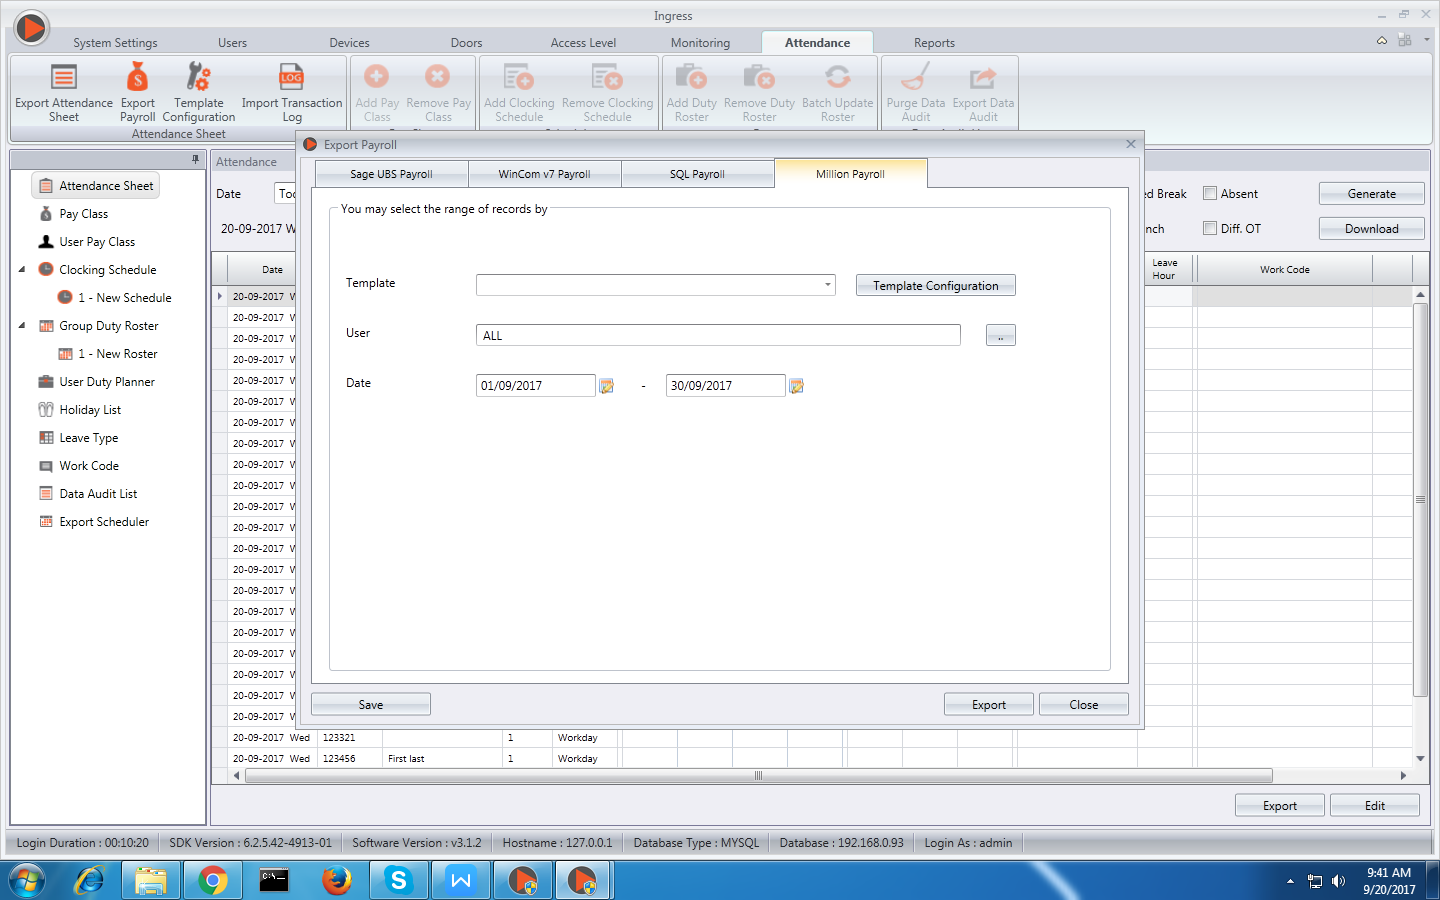
2. Added new payroll - Million Payroll (Malaysia and Singapore only).
2b.png

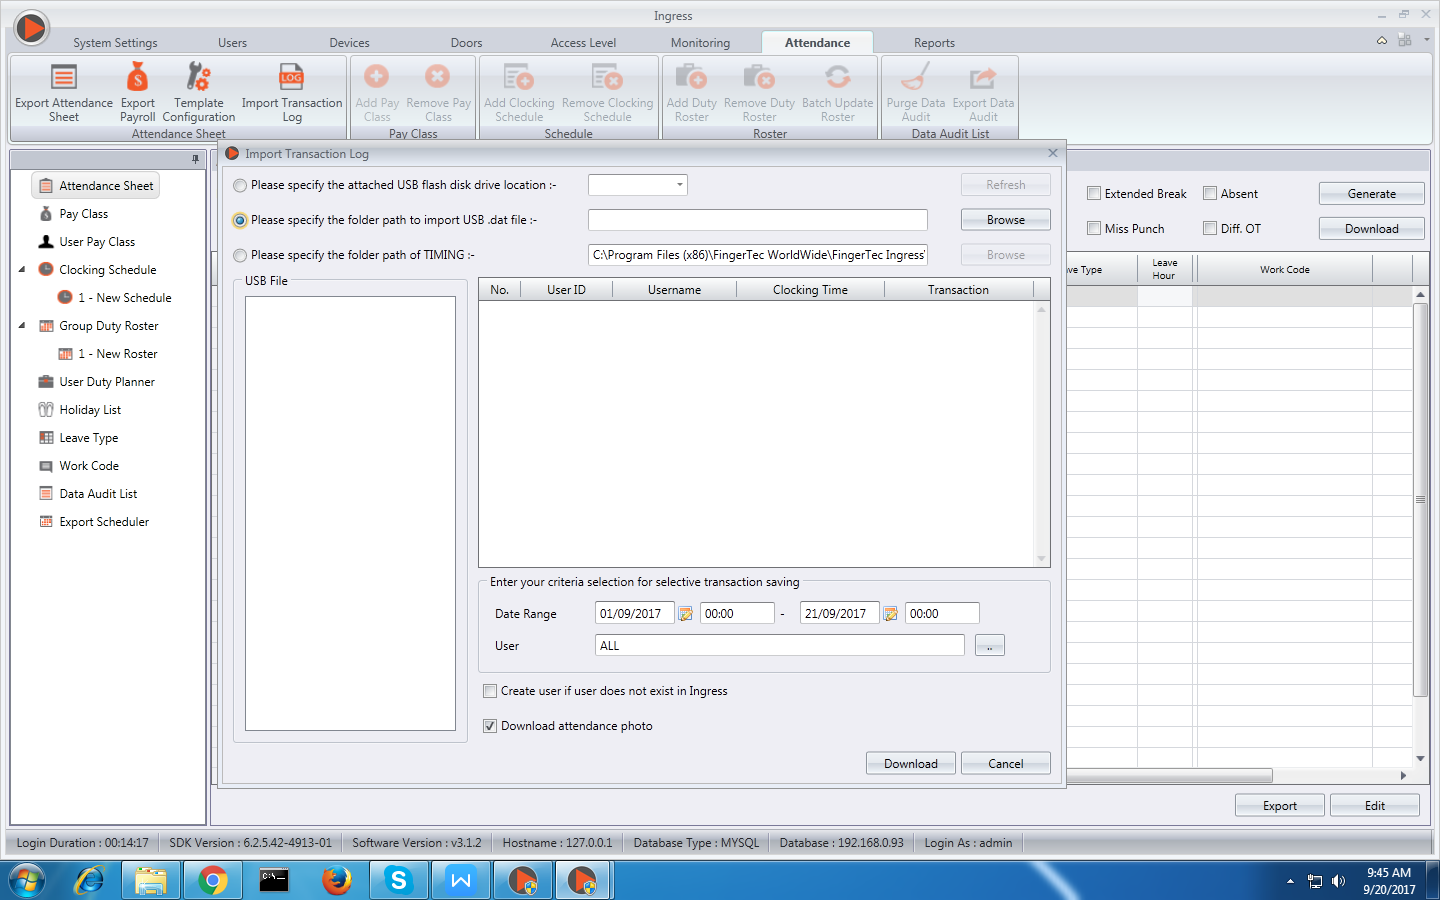
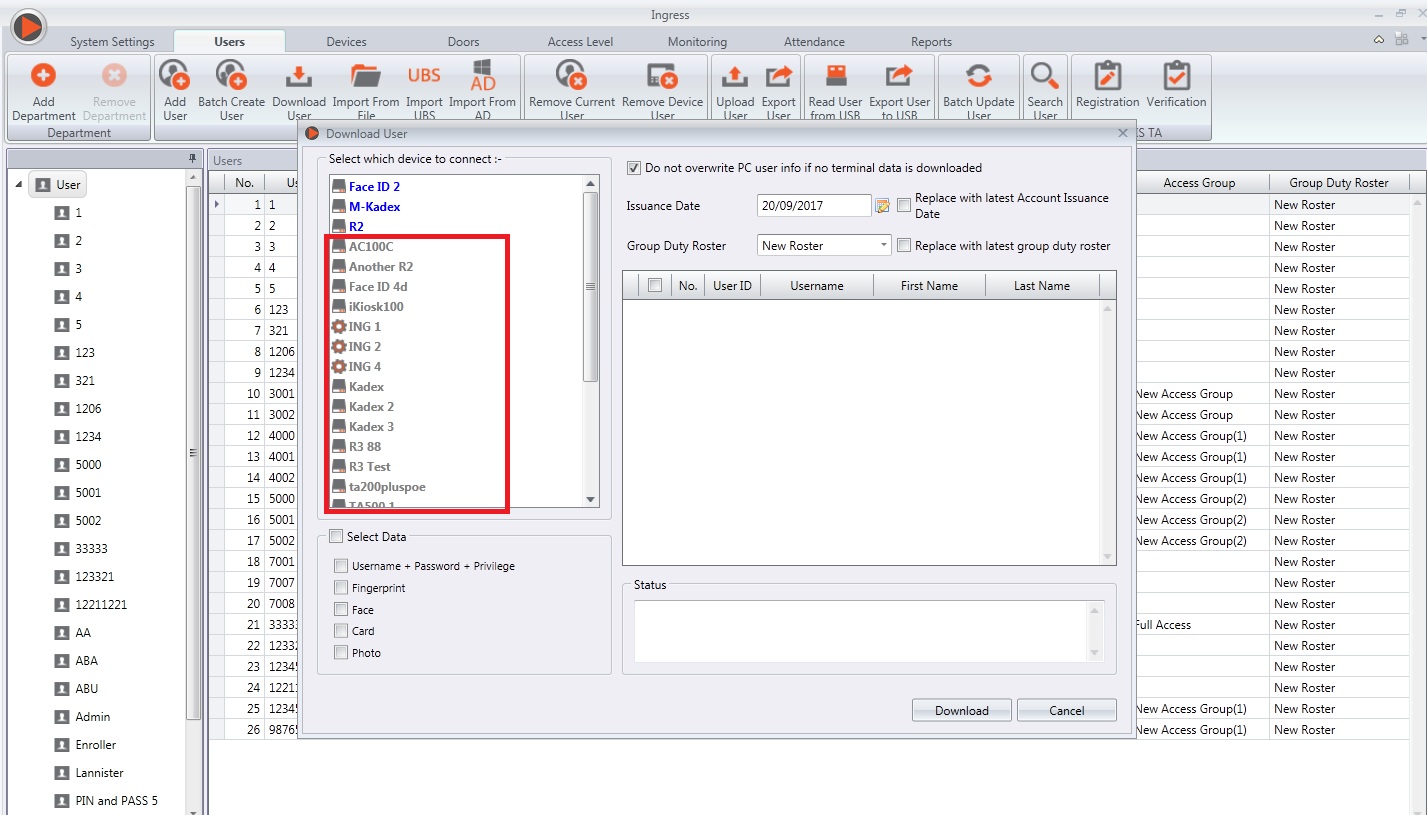
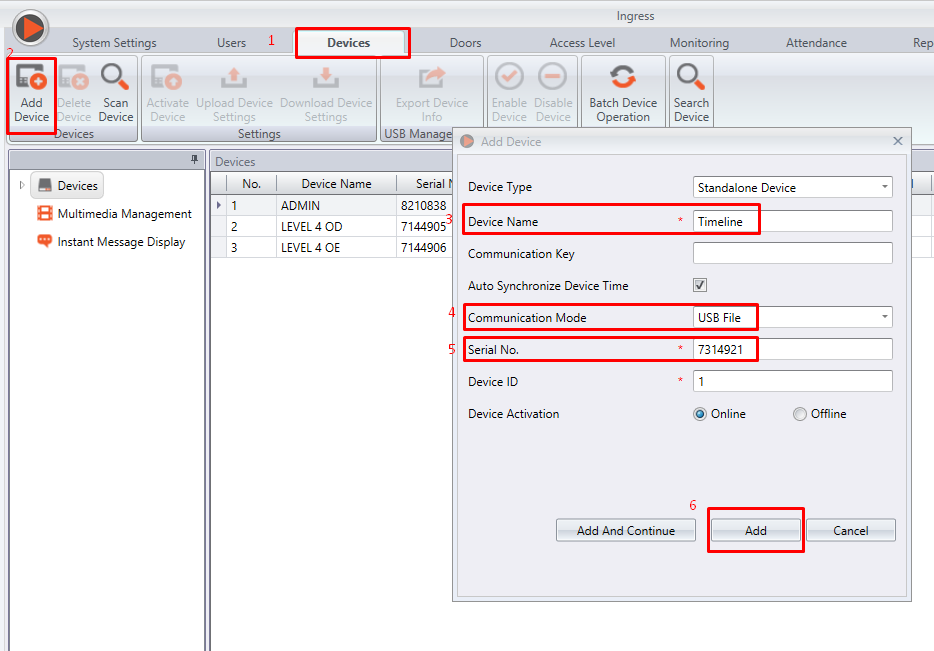
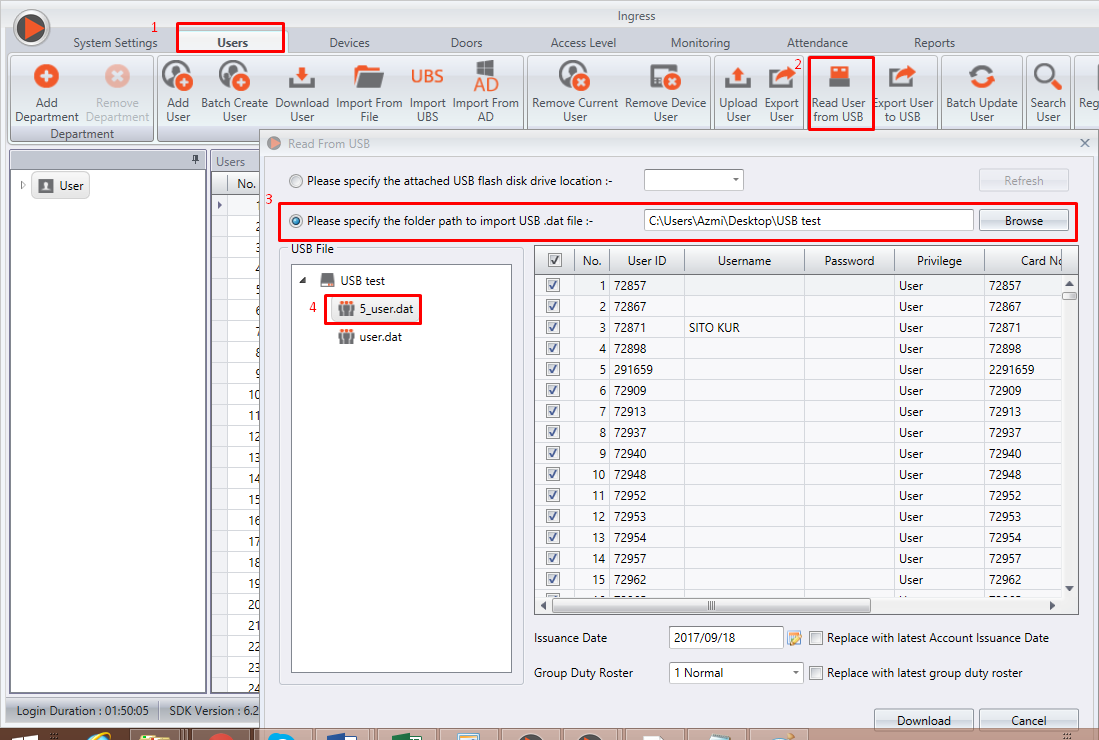
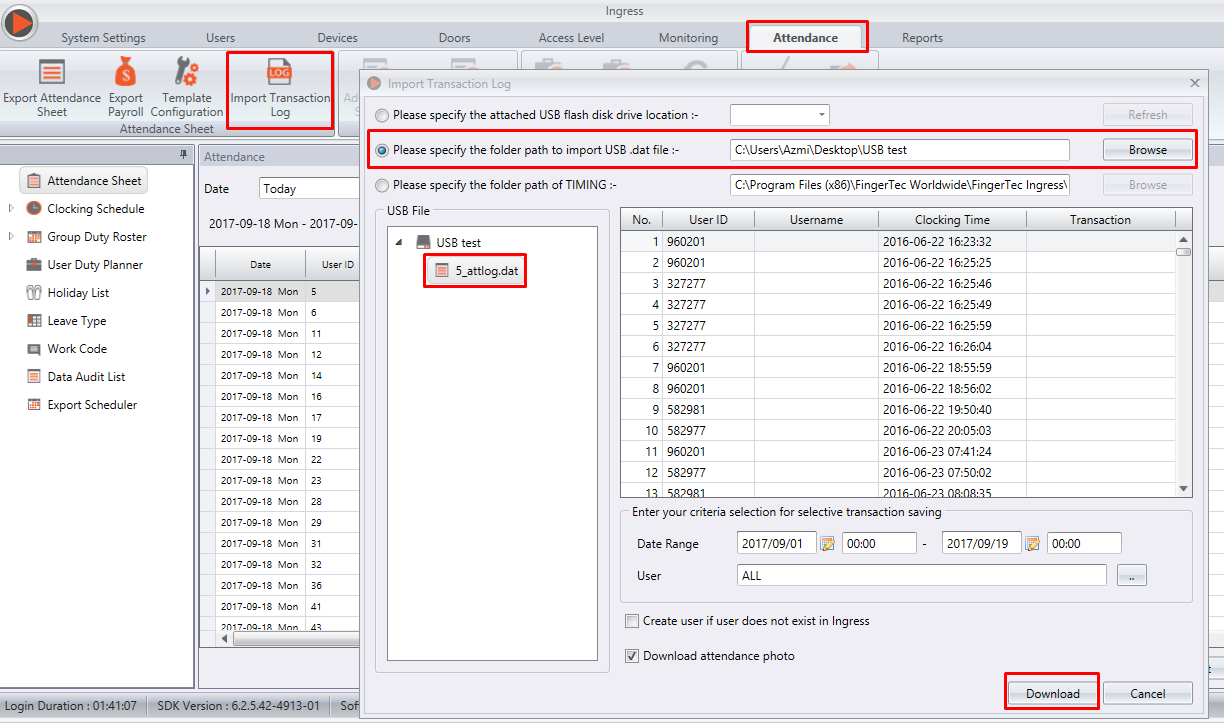
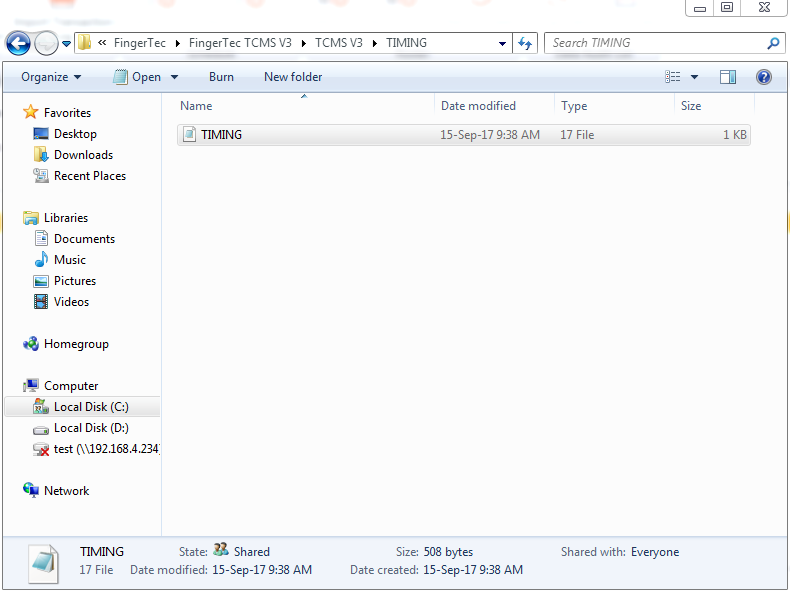
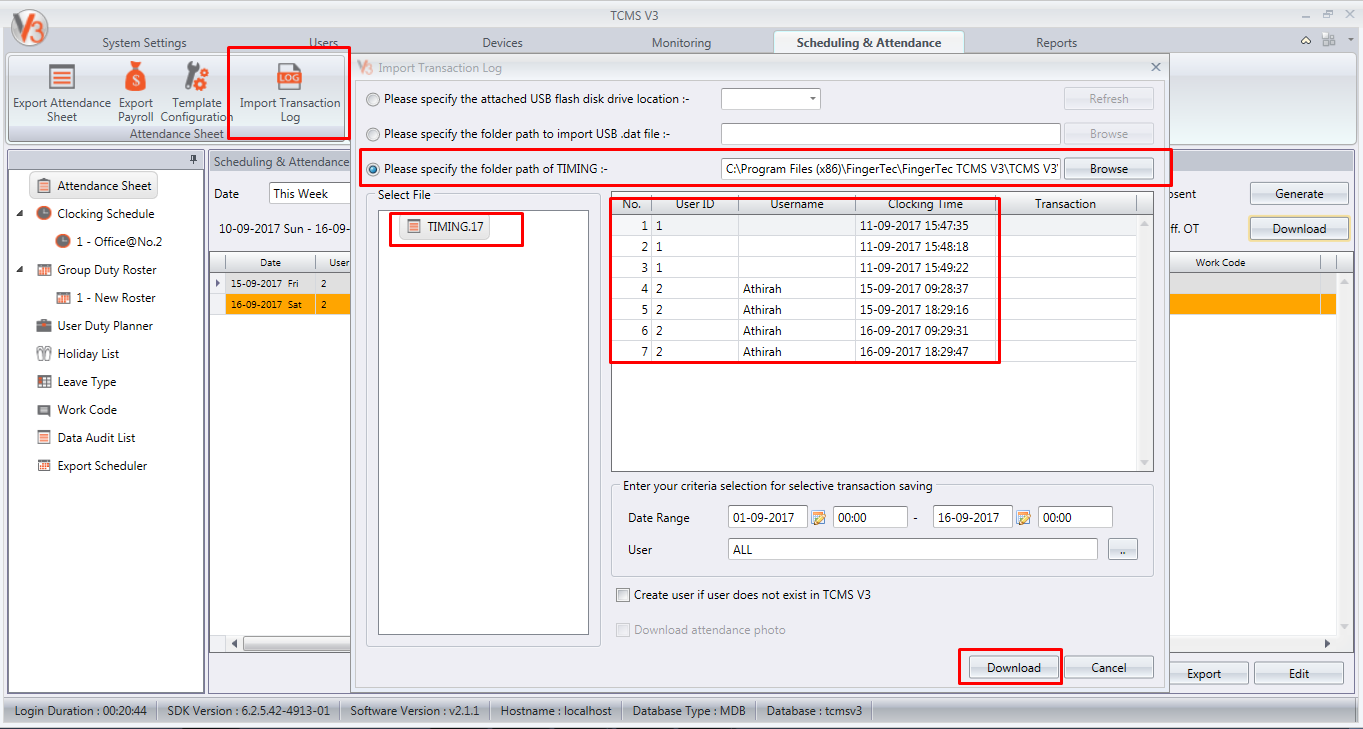
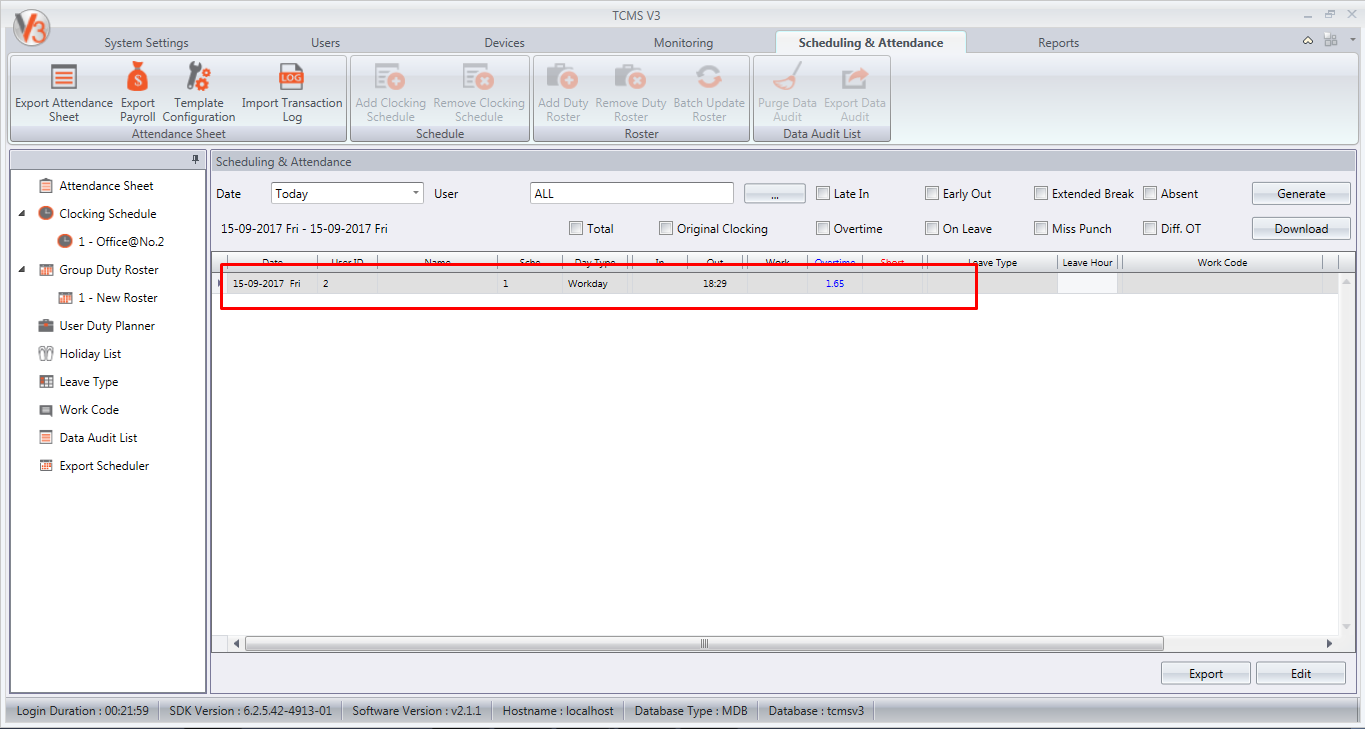
3. Added new option to browse the path of User/Attendance USB file for import to software. Previously, the software was only able to detect User/Attendance file from a USB drive. But as of now, users can specify the folder path that contains the supposed USB file from any virtual machine (VM).
3b.png

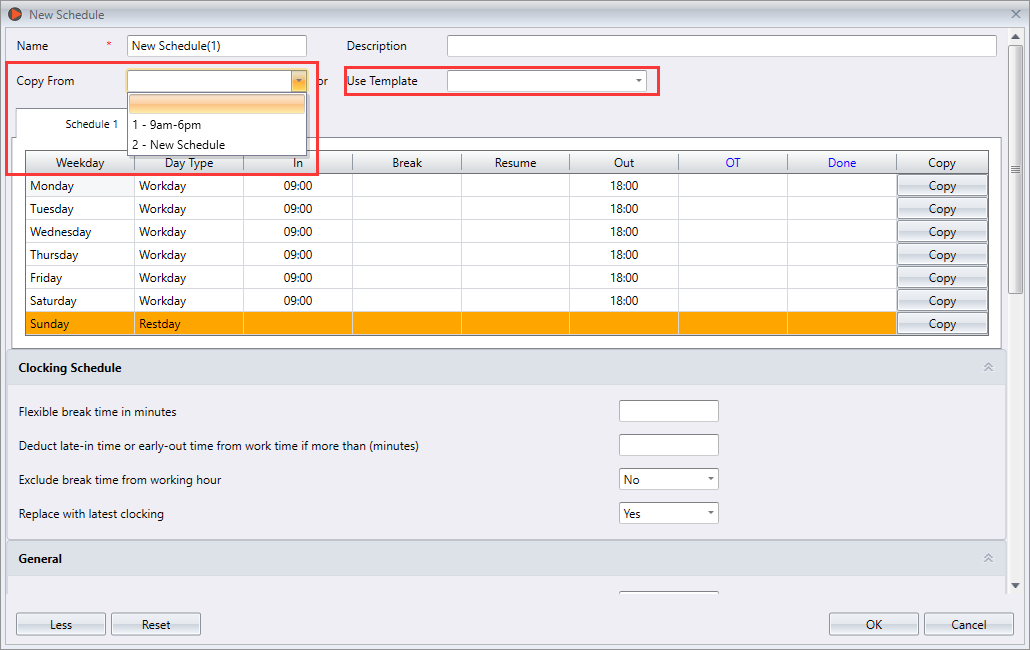
4. Added predefined schedule templates to select from while creating new schedules. Click ‘More’ when adding a new schedule to explore this feature. 
4b.png

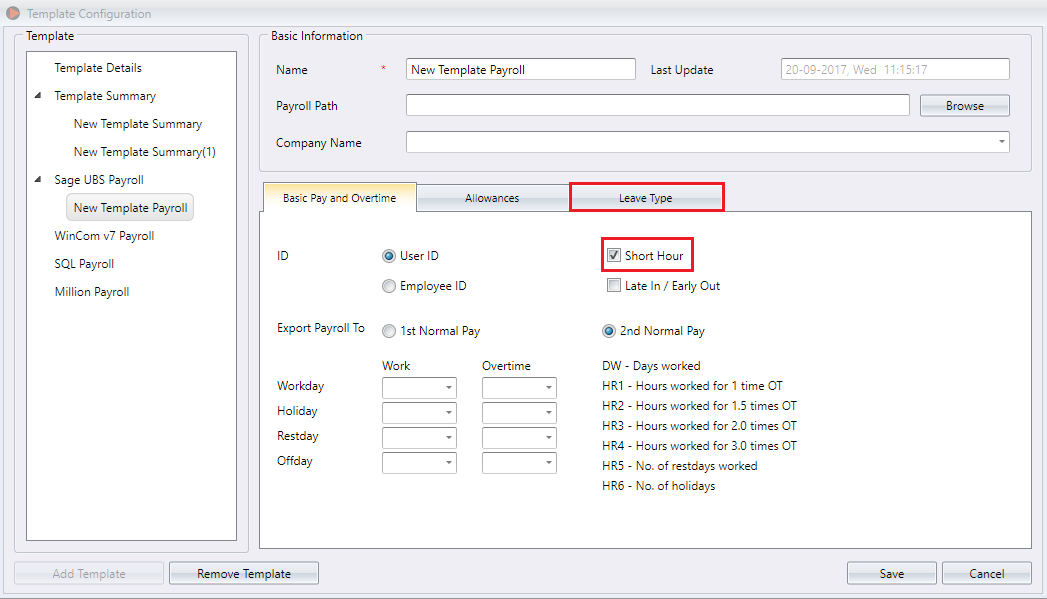
5. Added Export Short Hour & Leave Type in Sage UBS Payroll.
5b.png

6. Added selection on exporting for 1st and 2nd half of Sage UBS Payroll.
6b.png

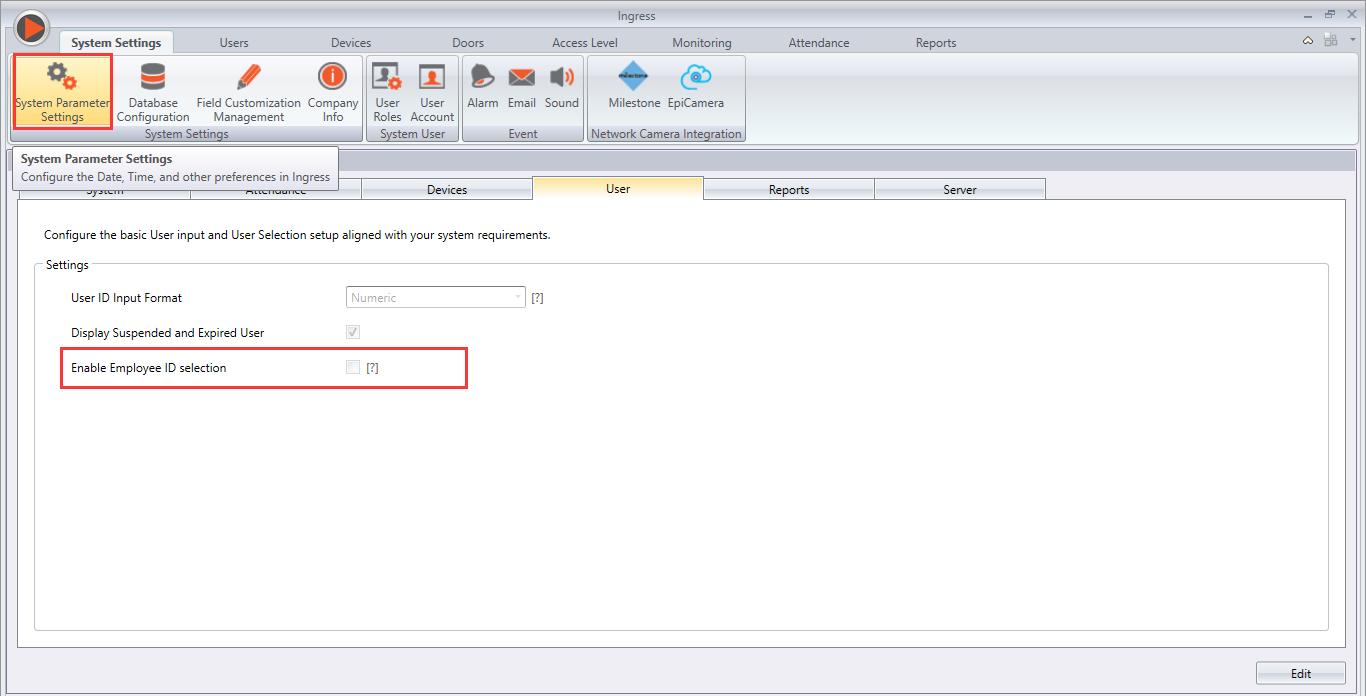
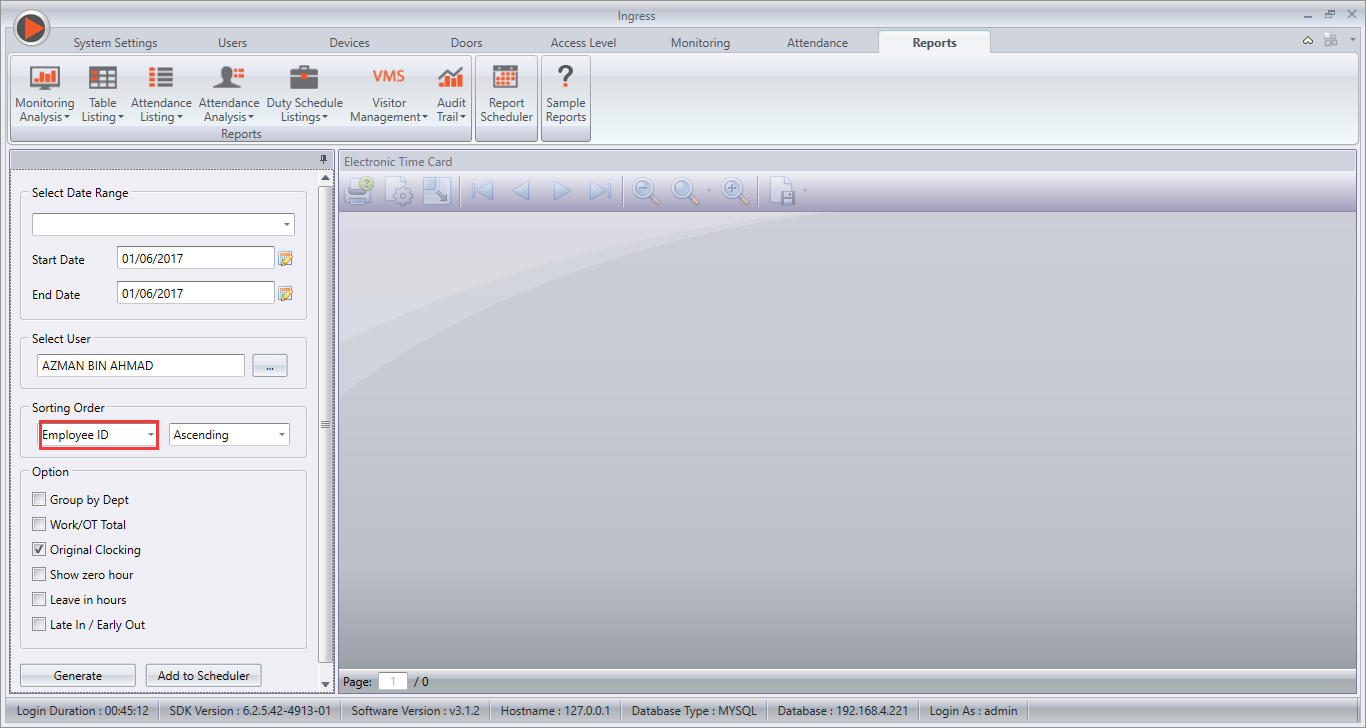
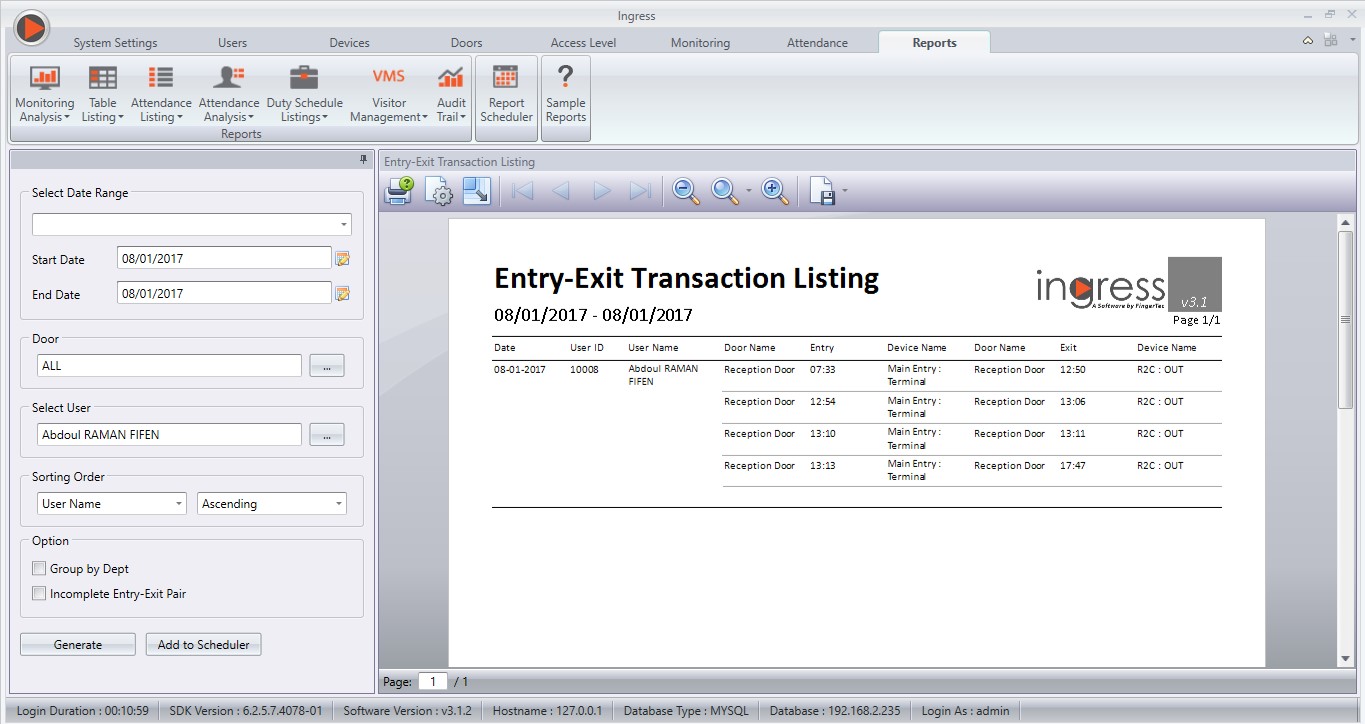
7. Added user selection filter by Employee ID in Reports module. To enable this function, go to System Settings > User > Tick ‘Enable Employee ID selection’.

7c.png

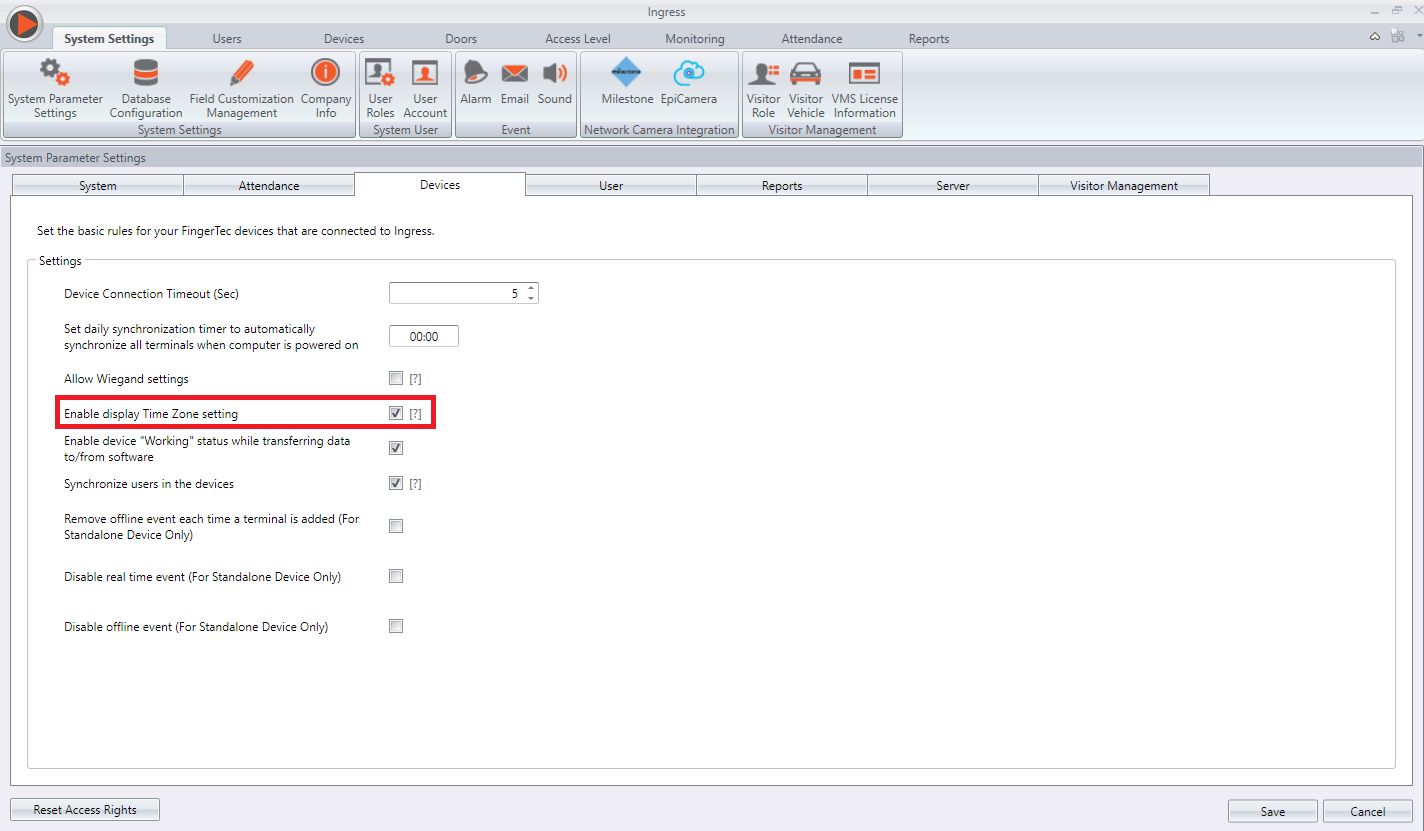
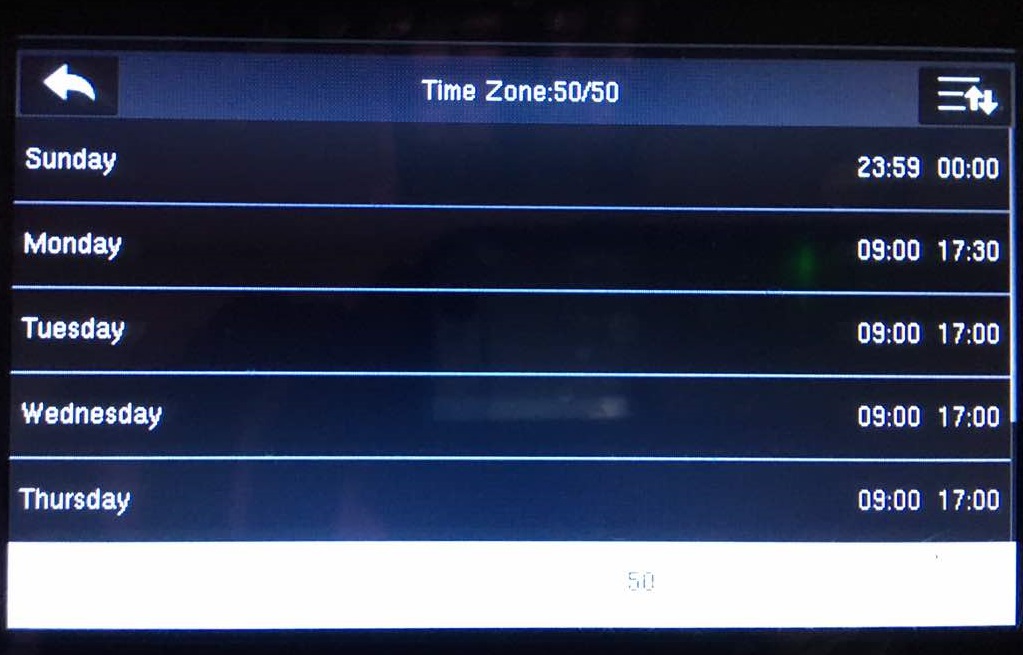
8. Added new option ‘Enable display Time Zone setting’ in System Settings module (Devices).
8b.png

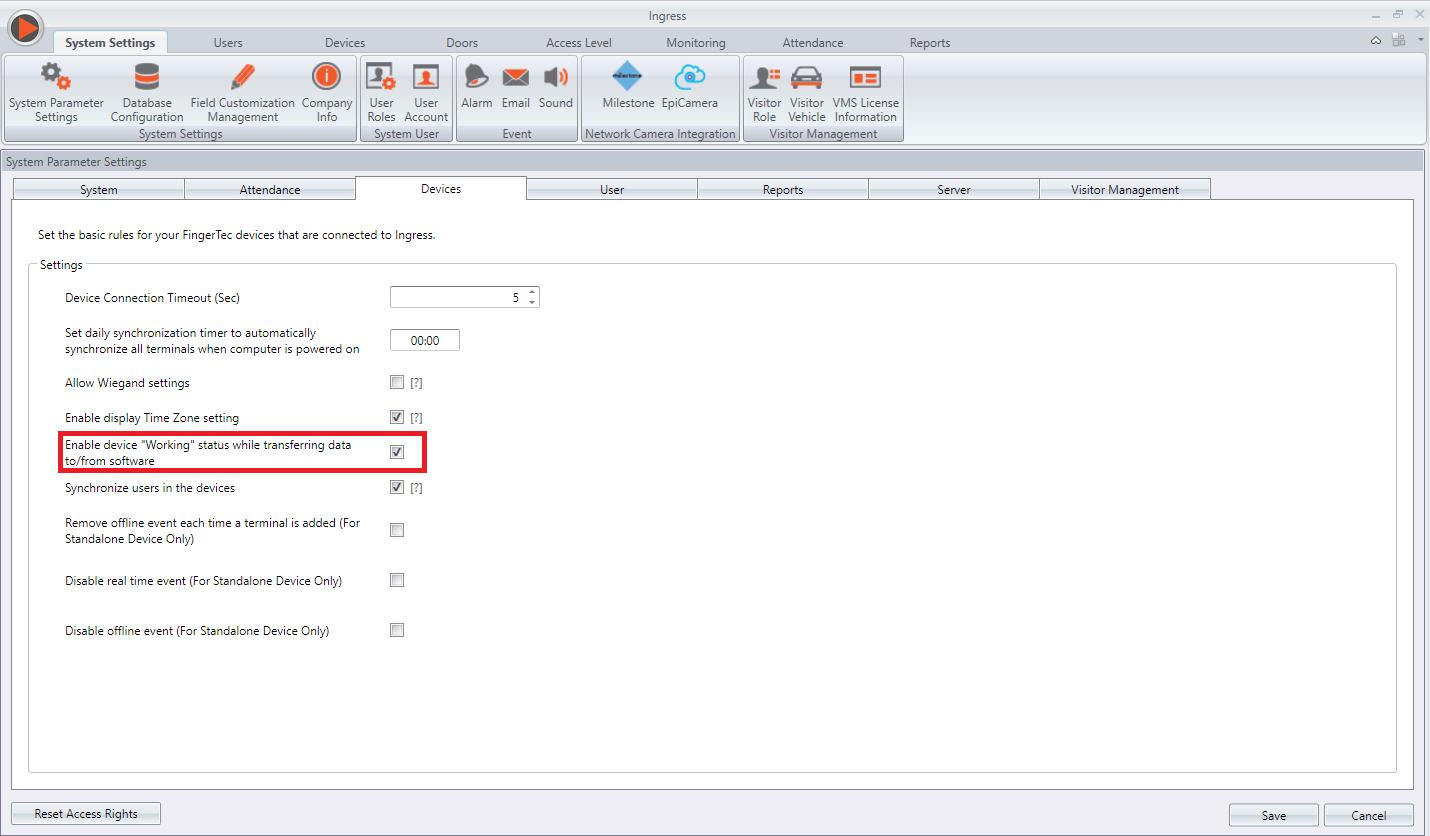
9. Added new option ‘Enable device “Working” status while transferring data to/from software’ in System Settings module (Devices).
9b.png

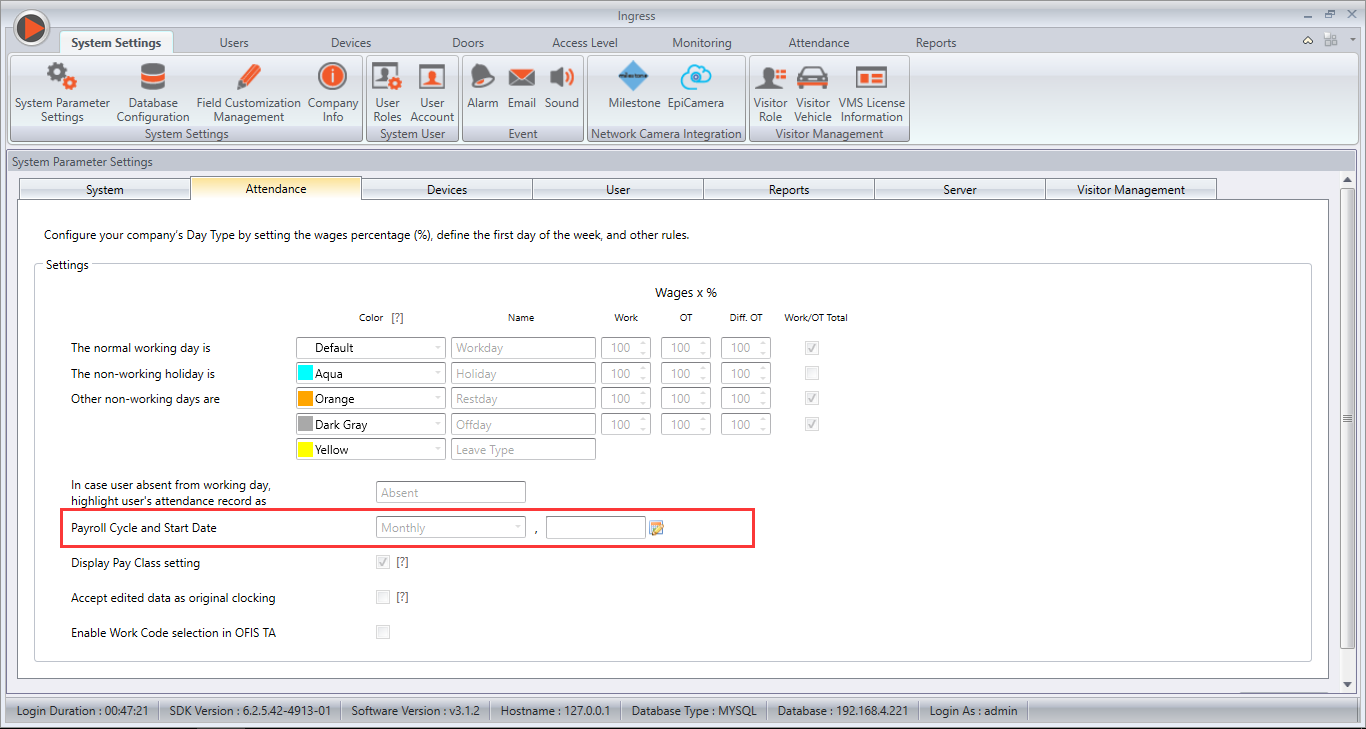
10. Allows the defining of Monthly Payroll Cycle Start Date on System Settings module (Attendance).
10b.png

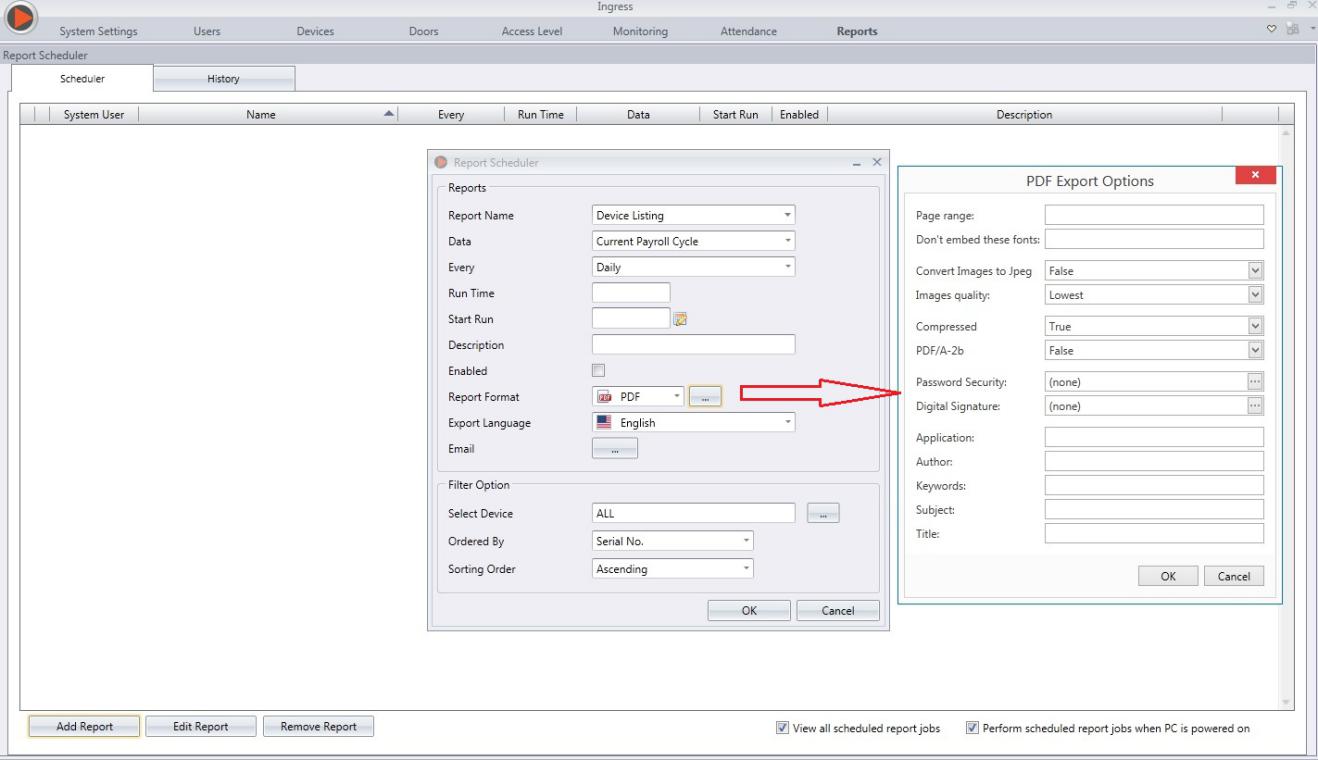
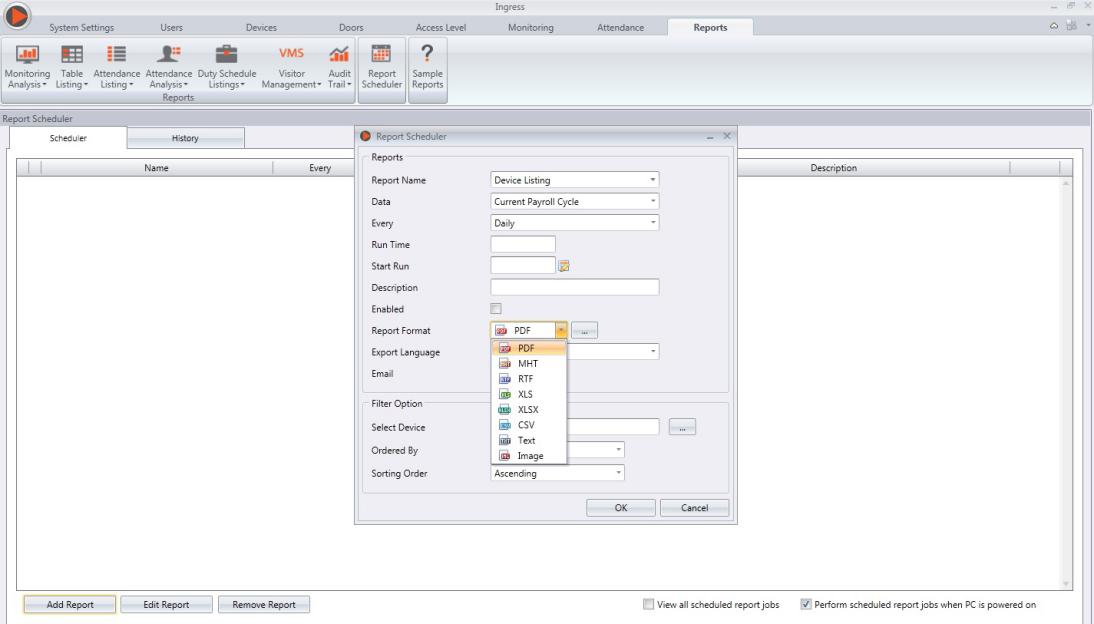
11. Allows the configuration of advanced export format option in Report Scheduler.
11b.jpg

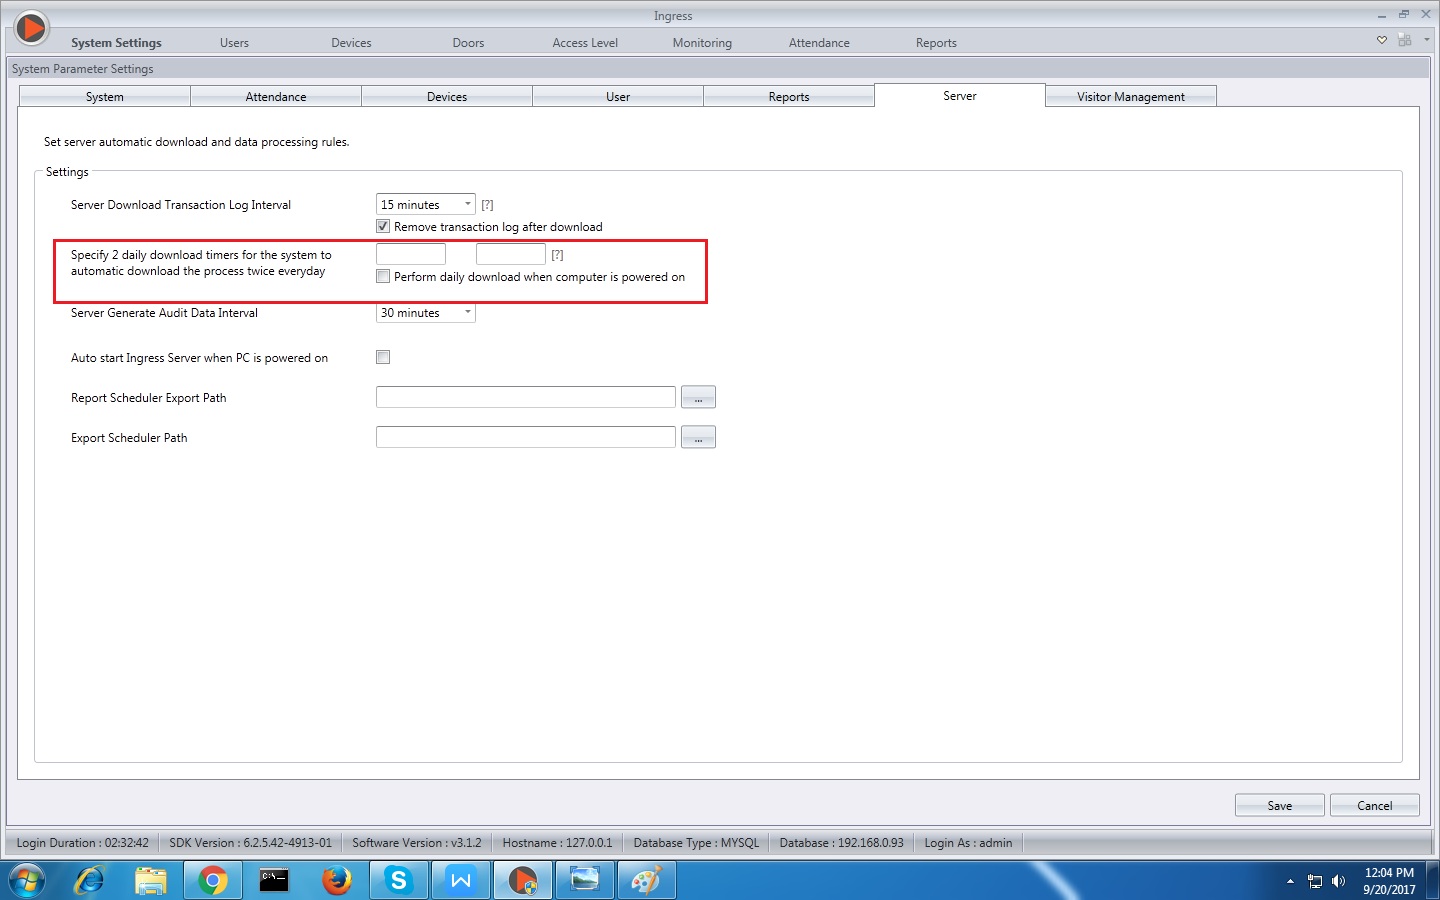
12. Enhanced to support up to 2 Database backup intervals in System Settings module (Server).
12b.jpg

13. Enhanced User Monitoring to display user status as ‘Valid’ / ‘Expired’ in Monitoring module.
13b.jpg

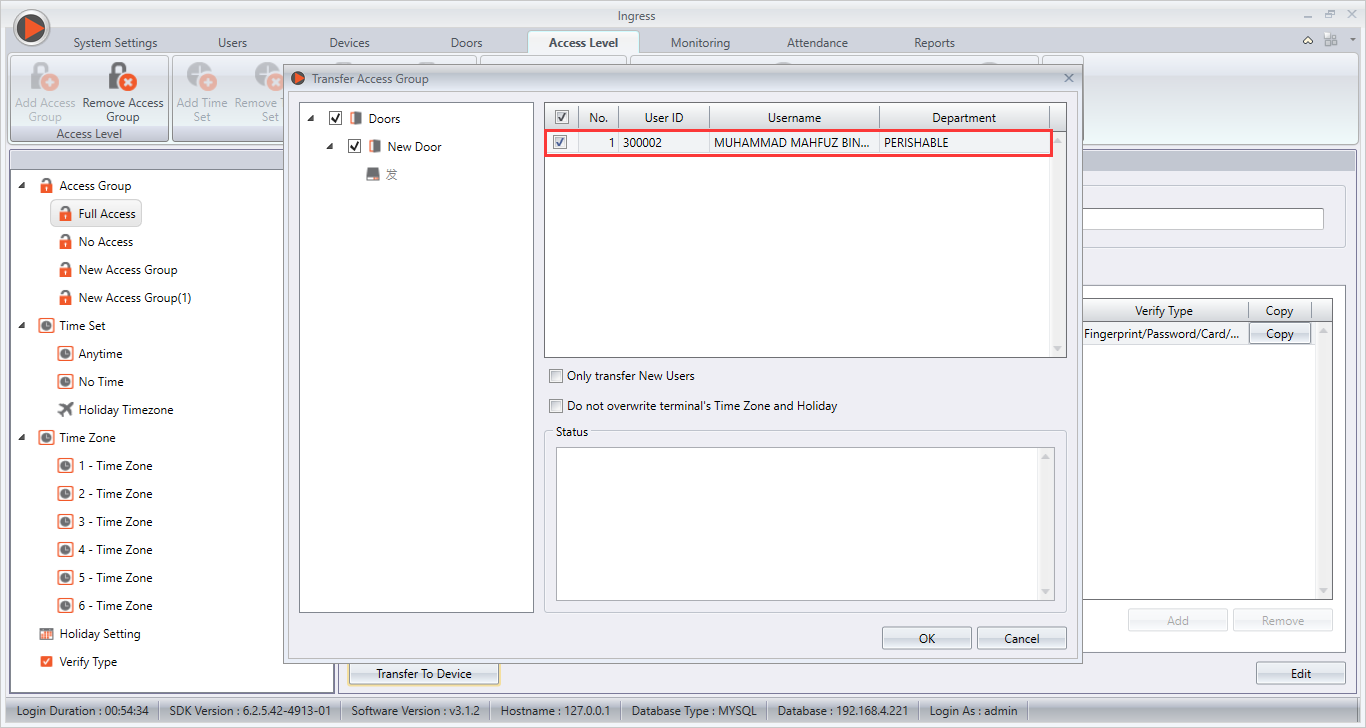
14. Revamped Transfer Access Group in Access Level module. This enhancement allows the users to select preferred User IDs to be transferred along with the Access Level to the terminal. 
14b.png

15. Revamped System Parameter Settings in System Settings module.

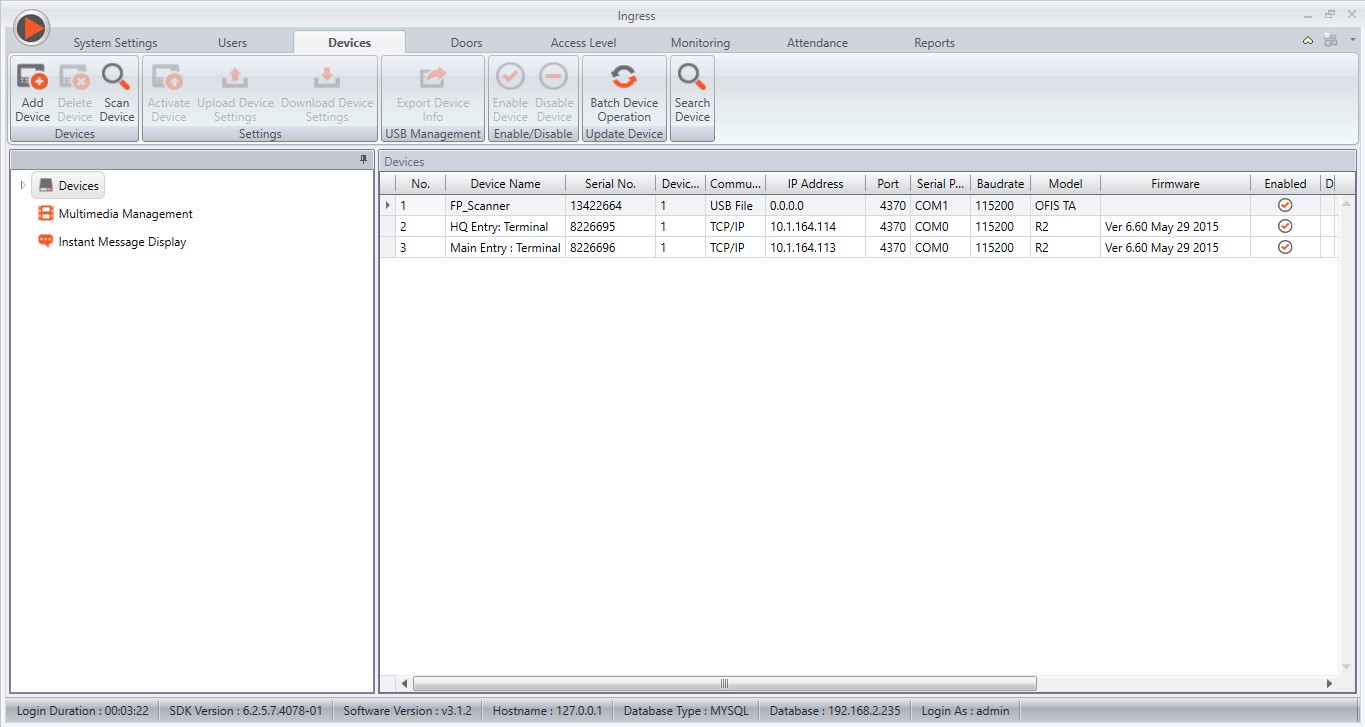
16. Enhanced device list ordering to alphabetical.
16b.jpg

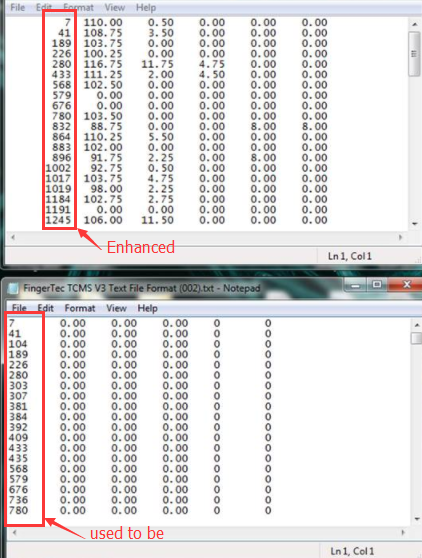
17. Enhanced export attendance summary for .txt file, whereby the format for Numerical User ID is aligned to the right.
17b.png

18. Enhanced attendance sheet filter history by User Account. As of now, the filter settings on attendance sheet will be specifically saved to each user account.

19. Removed .XPS report format from the existing export format list.
19b.jpg

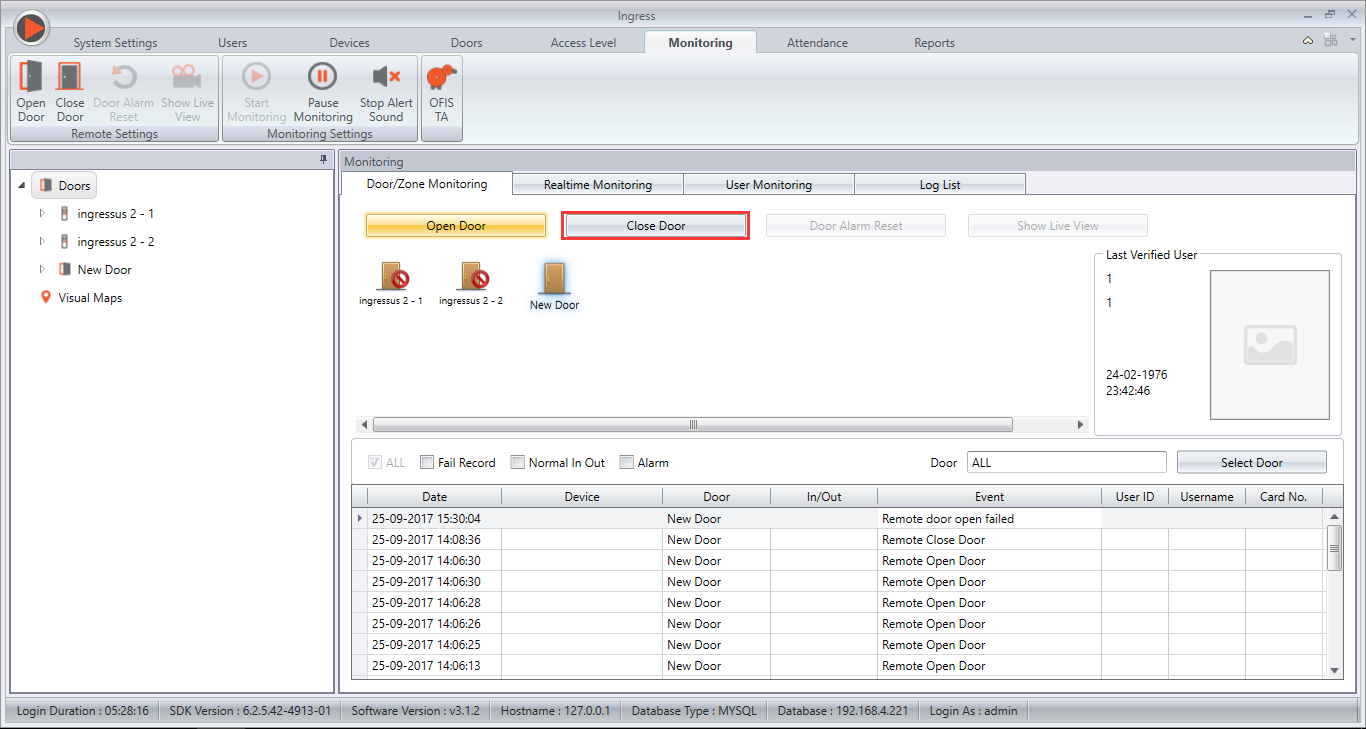
20. Fixed ‘Remote Close Door’ function in Monitoring module.
20b.png

21. Fixed unable to open exported .XLSX file in Attendance Sheet module. 

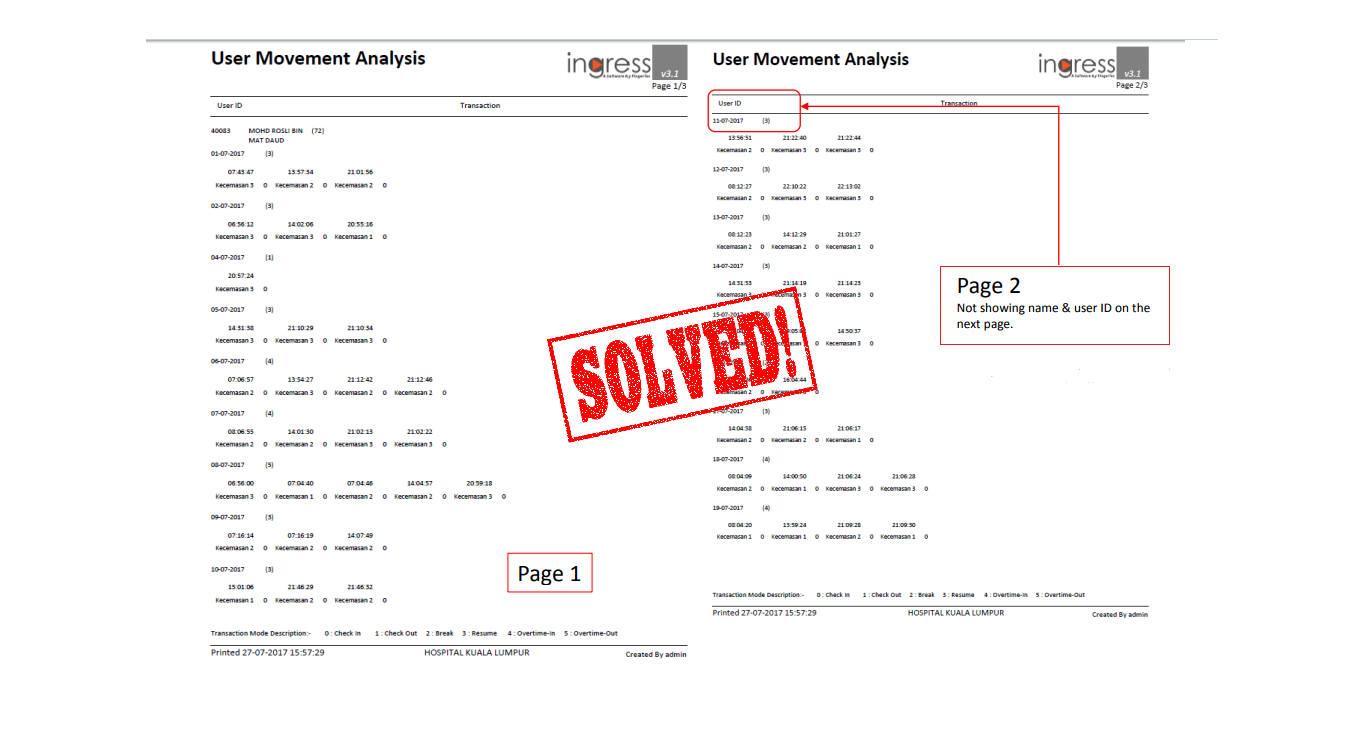
22. Fixed User Name and User ID display on User Movement analysis within multiple page.
22b.png

23. Fixed upload Verify Type in Access Level module.

24. Fixed download new terminal Captured Attendance photo to Data Audit List.
24.png

Get the software update here

0 comments:

Have any questions or inquiries about FingerTec? Drop your input here.

Import User and Attendance Record with USB (.dat File) from the Folder Path

Thursday, September 21, 2017 TimeTec 33 Comments

Note: This new option is also available in the TCMS V3 software version v2.1.1.9 and above.

Introduction
In the newly released Ingress version v3.1.2.12,  we’ve added a new option to browse the path of User/Attendance USB file for importation to software. Before this, the option is only available with the USB flash disk drive location, where you need to copy the downloaded User and Attendance record from the terminal with .DAT file into the USB flash disk and plug it into the PC to read all the information.
Advantage


With this new feature, you can save the user data and the transaction log (with .DAT file) that you have downloaded inside the computer itself. At the same time, you can share the .DAT file through Email, Skype or any cloud storage.
Process


Before you can import the .DAT file, you need to add and activate the device with the Ingress software.
Go to Ingress > Device tab > Add Device. Key in the Device Name, change the Communication mode to USB file and key in the correct Device Serial number and Device ID before you can activate the device.

1.png


Once you’ve activated the device, you can start to import the User data and Transaction log by following the below instructions. You must first save or copy the .DAT file inside the PC at any folder or drive.


Import User Data.
Go to Ingress > User Tab > Read User from USB. Select and tick the option ‘Please specify the folder path to import USB .DAT file’ and select the folder where you save the .DAT file.

*Important note : All downloaded USB file (in .dat format)  must be encrypted.  Files that is not encrypted wont be able to be read in TCMSv3 software.

2.png


Import Transaction Log.
Go to Ingress > Attendance tab > Import Transaction Log. Select and tick the option ‘Please specify the folder path to import USB .DAT file’ and select the folder. System will automatically detect the .DAT file and you can preview all the transaction logs that you have downloaded.

33 comments:

Have any questions or inquiries about FingerTec? Drop your input here.

Set Permanent Door Open in Face ID 2 FMM

Thursday, September 21, 2017 TimeTec 1 Comments


Introduction

Permanent door open is a type of door operation whereby the door will stay open and anybody can access it without verification. Usually this feature is applicable to  premises that need to accept many non-staff into their space such as shops, building receptions, and banks. With this option, the door will stay open for your visitors’ convenience but  the staff can still verify their daily work attendance without any problems.
Operation
Here are some examples for shop operations that can use permanent door open feature.
1.       The shop opens at 9.00 am, hence the staff will start to arrive starting at 8.30 am
        i)       Verification needs to open the door before 9.00 am
        ii)      Attendance will be recorded.
2.       The door will operate with Permanent Door Open feature during work hour from 9.00 am to 5.30 pm.
        i)       The door will stay open during this period
        ii)      Verification of staff’s attendance will work as normal


Wiring configuration
The wiring for the device is still the same, which is using NC COM connection directly to the device. If you are using our Adaptec Plus or Adaptec-X please use this convenient installation. This is not applicable on Weigand connection.
wiring 1.png
 

Option Settings
There are some settings  you need to do on the device. Please refer below for further information.
Menu > Access Control

menu access control.jpg

2. Set the Time Zone. To set the duration time lock to open.

2.jpg

3. Time Zone option view

3.jpg

4. Faceid 2 FMM has 50 different time zones that can be used to control a premise’s  user access. For Permanent Door Open function, we strongly recommend you to use Time Zone number 50 to avoid mix up with other Time Zones.  

4.jpg
5. Set the duration time for lock to open on Time Zone 50.
Refer to the diagram below, the time for permanent door open feature will operate from 9:00 am to 5:30 pm every day. Except for Sundays when the shop is closed, so the permanent door open feature will not operate.

5.jpg

6. Press Back and go to Access Control Option

6.jpg

7. Go to “NO Time Zone” and select Time Zone 50.

7.jpg

Now, it’s all set! But, don’t forget to check that everything works properly.

1 comments:

Have any questions or inquiries about FingerTec? Drop your input here.

How to Assign Device as Entry – Exit or In - Out

Thursday, September 21, 2017 TimeTec 0 Comments


Introduction

Ingress software has been loaded with a new feature named Entry-Exit Report. This report displays every user who performed In and Out activities at a device. However, this report only works if you installed an In and Out reader system at your premise. Therefore, you will at least need 2 devices installed at a door, one each for entry and exit.

Advantages

By configuring this particular settings, the administrator of the software can monitor the In and Out activities of the user.

Process

1) Complete the installation of an In-Out reader system at your premise. In Ingress, add those devices in the Device tab
Remark: If you’re using both master devices at the same door [ ex: R2 and R2], kindly add both devices in the Device tab. However, if you’re using a master and a slave device [ ex: R2 and R2c], you only need to add the master reader.

1.jpg

2) Then, go to Door tab > Add the devices at the door and assign which device to be the entry device

2.jpg
Once you assigned the device as an entry device, it will recognize the other device installed at the same door as the exit device. When everything is in place, now you can get the details of the In-Out activities from the Entry – Exit report names Entry-Exit Transaction Listing.

3.jpg

0 comments:

Have any questions or inquiries about FingerTec? Drop your input here.

Retrieve deleted transaction data in TCMS V3 / Ingress from TIMING file

Tuesday, September 19, 2017 TimeTec 0 Comments


Introduction
There are a few reasons as to why you don’t want to keep your data inside the terminal. Maybe because of the memory or the lack of it or perhaps you want to do housekeeping to maintain the optimum performance of your terminal. However, there are times when you accidentally deleted the important data. Worry not, the data is backed up into a file named TIMING file that is kept inside TCMS V3 or Ingress.

Benefit
TIMING file is a backup file for each transaction that the user removed from a terminal after the downloading process. Below are the tips on how to access this file.

Procedure
1.       During the download process, users will click on “Remove transaction log after downloaded” to remove transactions in the terminal.

1-download remove.png
2.       The below message will be prompted after the transaction has been successfully downloaded into the software.

2-successful.png

3.       The TIMING folder will be in the path below :

For TCMS V3: C:\Program Files (x86)\FingerTec\FingerTec TCMS V3\TCMS V3\TIMING
3-folder timing.png


For Ingress: C:\Program Files (x86)\FingerTec WorldWide\FingerTec Ingress\Ingress\TIMING
3-ingress timing folder.png

4.       To import transaction logs using the TIMING file, please go to Import Transaction Log and specify the TIMING folder path accordingly and select which TIMING file you wish to download.

4-import transaction from timing.png

5.       You will then see that the data is downloaded and generated into an attendance sheet and your data now is available again.

5-attendance sheet.png

0 comments:

Have any questions or inquiries about FingerTec? Drop your input here.