Connect your Third-Party Terminals with Cloud-based Attendance Solution, TimeTec TA

Thursday, March 29, 2018 TimeTec 0 Comments


TimeTec TA is a comprehensive cloud-based attendance management system designed to record and monitor employee attendance for companies of all sizes. The solution is offered on web and mobile application in both iOS & Android platforms, providing convenience to users of different access levels. By deploying TimeTec TA, managers and supervisors can view all employee clocking details in real time and they also can receive notifications on tardiness, out of office, reason for outstation clocking, and etc of each employee as it happens. On the other hand, employees are given the choice to view their own attendance reports and to apply for Overtime Approval via TimeTec TA mobile app without hassle. In a nutshell, TimeTec TA brings employee attendance system to another level with cloud-based solutions that promotes efficiency and transparency at the same time.

To further promotes flexibility in its deployment, TimeTec TA presents users with various clocking options to choose from including linkage to biometrics devices, web clocking via PC as and GPS clocking, Beacon & NFC tag for clocking through TimeTec TA App.

The good news is, TimeTec TA allows connection to third-party attendance devices, such as ZK-Teco models Face800 and iClock360 for data collection and attendance management. However, there are some steps that need to be completed before the connection can be established between TimeTec TA and the third party devices. Please refer to the following information to ensure an effortless terminal connectivity to TimeTec TA.

To find out the compatibility of your ZKTeco terminals to TimeTec TA, kindly forward the following information to TimeTec 24/7 customer support email at: support@fingertec.com

Terminal model and the terminal information, such as serial number and firmware version: You can obtain the terminal info by using FingerTec Device Info tool by following the steps provided at:

Device information from the terminal menu. You can find the information of your terminals, including the firmware version, Push Version, etc., in system/device info option of your terminal’s menu.

C:\Users\Admin\AppData\Local\Microsoft\Windows\INetCache\Content.Word\Device Info.jpg

Upon receiving the requested information, we will provide confirmation on the product’s compatibility along with a guide through the next steps.
When the compatibility has been confirmed, there are 2 changes required to establish a connection between ZKTeco terminals and TimeTec TA.

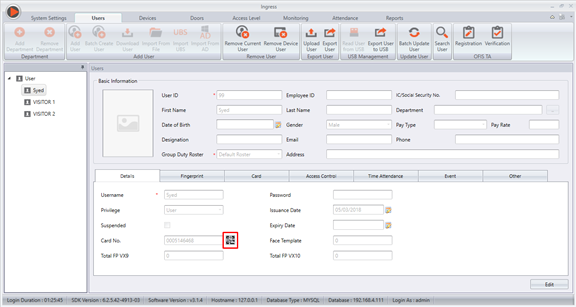
1. Device Serial Number: We will provide you with a tool to update the serial number of your terminals.All you need to do is to forward your current device serial number to support@fingertec.com.

2. Device Firmware Version: To ensure that all features of TimeTec TA are supported by ZKTeco terminals, we will be providing you with a firmware update tool and a guide to successfully update your terminal firmware to work with TimeTec TA.

Are you ready to explore TimeTec TA cloud-based attendance solution first hand? Email us to know more and you can get your 10 user-licenses for FREE when you open an account with TimeTec TA. Don’t hesitate, go cloud and experience the freedom in data management.

0 comments:

Have any questions or inquiries about FingerTec? Drop your input here.

TimeTec TA – Configuring Open Schedule with Over Night Shift Roster

Monday, March 26, 2018 TimeTec 2 Comments


 Introduction
Many companies have started applying a non-fixed working time and work on shift basis for their employees. While the deployment of the new schedules is underway, many of their managers are not familiar on how to configure this shift type in time and attendance system like TimeTec TA. So in this tip, we will be discussing about the function of Open Schedule with Over Night Shift that allows all users to enter any shift schedules that have been set in their group roster in TimeTec TA application automatically.

Benefits
These schedule configurations are applicable to any operating department that requires their staff to work 24 hours a day based on a dedicated shift roster such as Security Department or Manufacturing Company. For example, a group of security guards have two shifts: a Morning Shift that starts from 7AM to 7PM and a Night Shift that starts from 7PM to 7AM. By using this schedule settings, the system will detect any guards who comes to work at 7AM or 7PM and label them as the morning shift workers.

Process and Settings
To apply this Schedule settings, you need to have the following criteria:
1. Have more than 1 working shift.
2. Staff can work for any shift when they assigned.
3. There are overnight shifts in the clocking time.

Case Study 1
For example, a Security Department that operates around the clock 24 hours per day. There are 2 teams of workers in the department, with the following timetable:

Morning – 7AM to 7PM
Night – 7PM to 7AM

Step 1 – Configure a shift schedule using Daily schedule type. (Schedule tab > Clocking schedule > Add schedule)


For the system to function correctly, please ensure that the schedule timing for each shift DOES NOT OVERLAP with one another.

Example of schedules WITHOUT overlapping time :
Morning – 7AM to 7PM / Night – 7PM to 7AM OR,
Morning 7AM to 3PM / Evening 3PM to 11PM / Night 11PM to 7AM

Example of schedule WITH overlapping time:
Morning – 7AM to 7PM / Noon – 12PM – 12AM / Night 7PM to 7AM

Step 2 – Configure group roster for Open Shift / Open Schedule / Flexible Shift. (Schedule tab > Assign Schedules and Users into Roster > Click Add (+) )


Step 3 – Assign user with this dedicated roster. Then you can start to Generate the Attendance Sheet to view the record.
 

Note:
Initially by default, the system is already assigned with the Qualify minutes before any shift starts at 60 minutes. It means, for schedule 7AM to 7PM, a user can come to work anytime between 6AM to 8AM and the system will be able detect the correct schedule number.
 
Whenever you set ‘Qualify minutes before shift starts’ time, the ‘Replace with latest clocking’ feature will be disabled. Therefore, to ensure that ‘Replace with latest clocking’ feature continues working properly when setting time for ‘Qualify minutes before shift starts’, you need to untick ‘Replace with latest clocking’ for column Out and Done.

2 comments:

Have any questions or inquiries about FingerTec? Drop your input here.

How to pair FingerTec QR110 Slave Reader with FingerTec Master Readers

Monday, March 26, 2018 TimeTec 0 Comments


Introduction
QR110 QR Code Scanner is FingerTec latest product that comes with a new verification method: QR Code along with the capabilities to scan RFID/MiFare access cards as well. As a slave reader, QR110 will need to be paired with FingerTec Ingressus controllers and master readers such as R3,  R2, Q2i and etc before the whole system works.
Supported model:
Q2i, R3, R2, Face ID 3, Kadex, m-Kadex, Ingressus I/II/IV
QR110 is built with a 26-bit Wiegand communication. Even though FingerTec master devices comes with 34-bit and 26-bit Wiegand, by default all FingerTec Master Devices is set with 26-bit Wiegand Communication.

For information on QR110 (MiFare), please refer to this post:
How To Pair QR110 (MiFare) With FingerTec Master Readers

Please follow the steps below for QR110 (RFID) installation:
Process:
1) Connect the wirings between QR110 and FingerTec Controller and Biometrics Devices
  • For Ingressus I,II, and IV, please connect the respective devices to the following QR110 ports (D1, D0, GND, VCC) as shown in the circuit diagram below:   


QR 110 to Ingressus

For Master Readers (R2, R3, Kadex, m-Kadex, Q2i, Face ID 3), please connect the respective
devices to the following QR110 ports (D1, D0, GND, VCC) as shown in the circuit diagram below:


Example : R2 Connection to QR110
2) If there is no response on Master device when you wave card or scan QR code on QR110, please check the Wiegand bit Format in FingerTec Device
  • In R2 and Kadex, please go to Menu > Option > System Option > Wiegand Input Setting > FP device > Input Format = WG26 Without ID  > OK > Input = ID > OK > Restart


  • In R3 and Q2i, please go to Menu > Comm > Wiegand > Input Option > Define = 26 > Bit counts = 26 > Input = NO. > Restart
*QR110 is not compatible with Q2i (FEM 510)
  • In Face ID 3, please go to Menu > Comm > Wiegand Input > Wiegand Format =  Wiegand 26 > Input = Card No. > Save > Restart.
  • In m-Kadex, this model does not come with an interface design. Therefore, a software tool is required to enable it into a Wiegand 26-bit format. Please download the software tool here


and proceed to input the IP address of m-Kadex into the software tool. Once updated, the
m-Kadex device will now accept 26-bit Wiegand Connection. (This method can also be applied
to R2 and Kadex) Please refer to the screenshot below for more information:


  • In Ingressus I, II, and IV, the devices will automatically detect and configure its Wiegand Connection once connected to QR110. Therefore, removing the need for any manual setting.


After the configuration is done, the FingerTec devices will then be paired with QR110.

0 comments:

Have any questions or inquiries about FingerTec? Drop your input here.

How To Easily Change User ID In Ingress and TCMS V3 Without Affecting the User’s Transaction Logs

Monday, March 26, 2018 TimeTec 1 Comments


Introduction:
Occasionally, restructuring of data might be needed within an organization as new rules and regulations are added into the company’s policy. Hence, it is important that Admins be informed of some useful housekeeping procedures in order to better manage the User IDs of their staffs.

Therefore, we’ve prepared a guide on how to change the User ID in Ingress and TCMS V3 without affecting the User’s Transaction Logs. Although the changing of User ID is rather straightforward but if done incorrectly, the process might cause data loss. Please follow the steps below to do it properly.

Process:
1. In Ingress/TCMS V3 software, go to System Settings > System Parameter Setting > User tab > Tick on Enable Editable User ID. This is to ensure that you are able to edit the User IDs under Users tab accordingly.


2. In Users tab, double click on the user that you wish to change the User ID, then click Edit > Insert new User ID > click Save. You will be prompted by the screen below notifying you to download all the user’s transaction logs from the device before changing the User ID. This is mainly to ensure that the existing transaction logs are synced correctly.

Select the device that you wish the apply the change on and click OK in order to proceed with the process. The data in the selected device will be purged after the download process is completed and the new data will be synced to the device automatically. Hence, it is recommended that you create a backup before proceeding with this step.
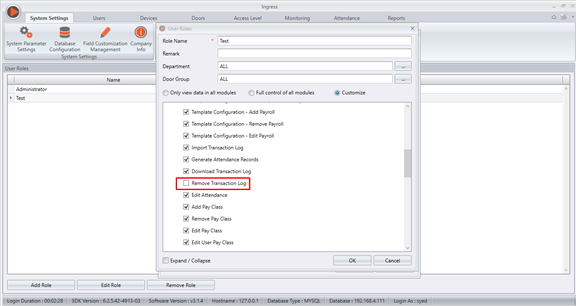
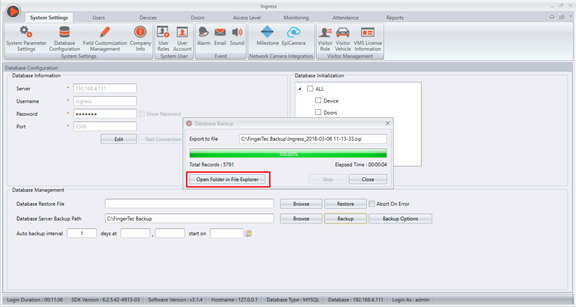
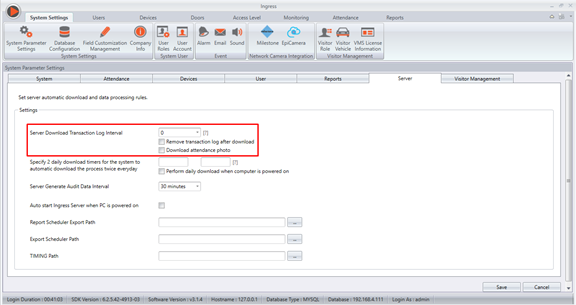
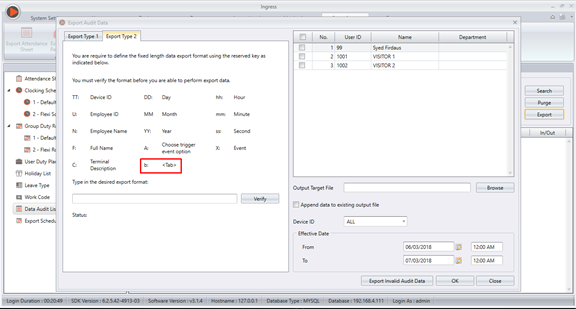
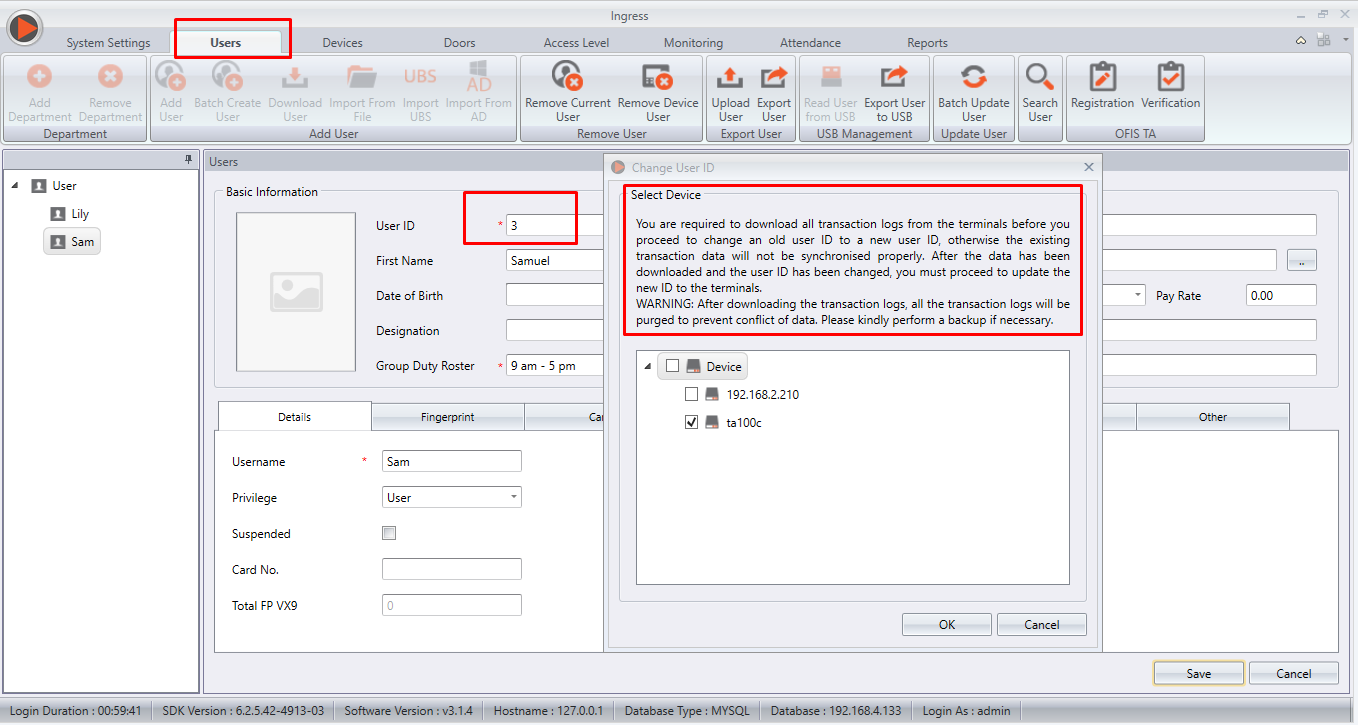
Reminder to download the transaction logs from the device

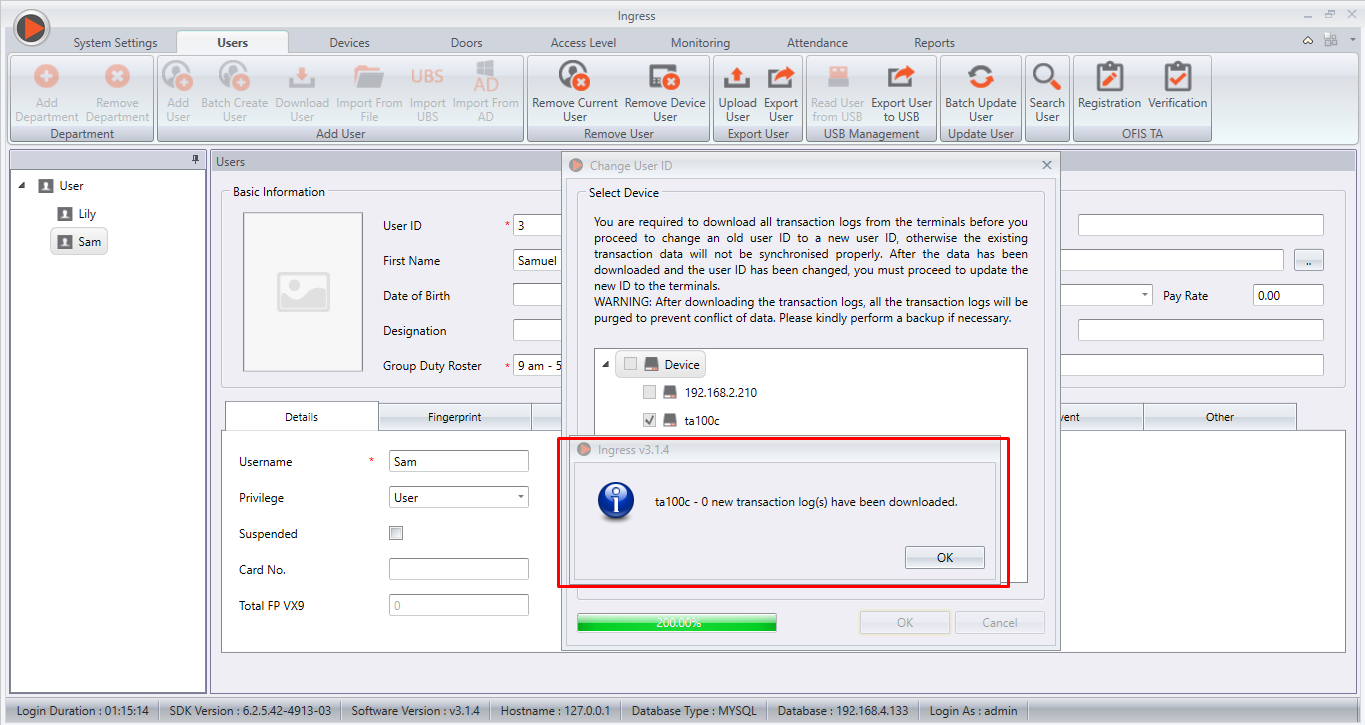
After the Transaction Logs have been successfully downloaded, please click OK.

A window will then prompt notifying that the User ID has been successfully updated to the software and device.

3. After clicking OK, you may verify the update process by checking the attendance sheet on whether the User ID  still has the existing Transaction Logs.
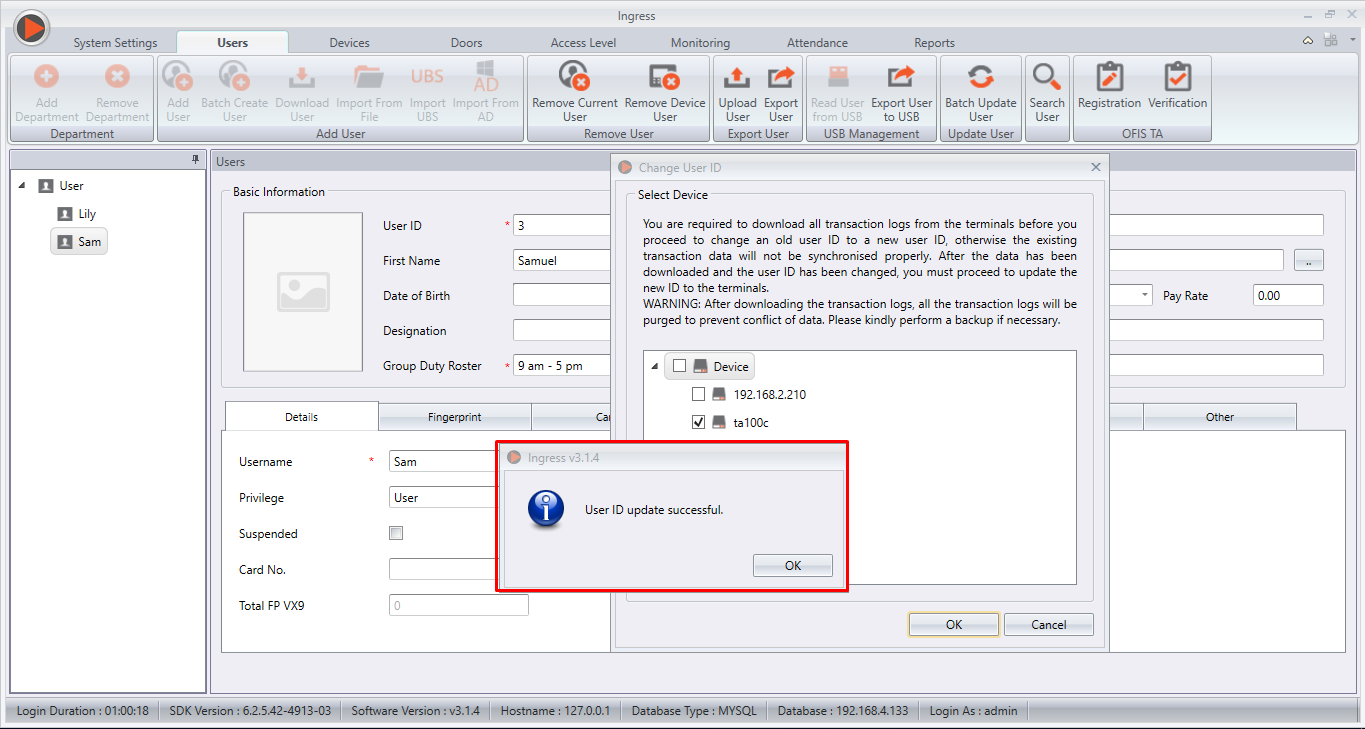
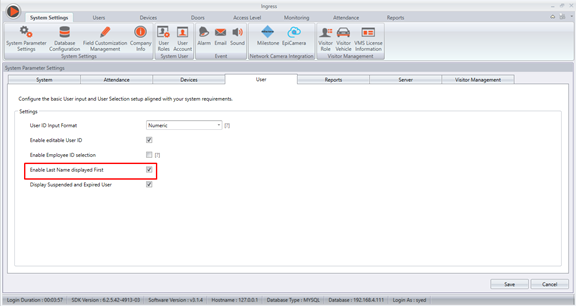
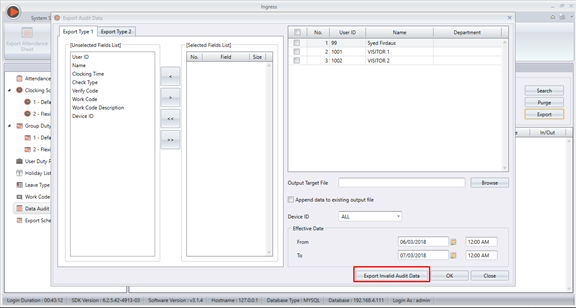
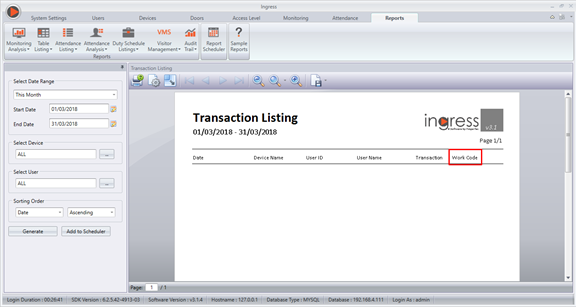
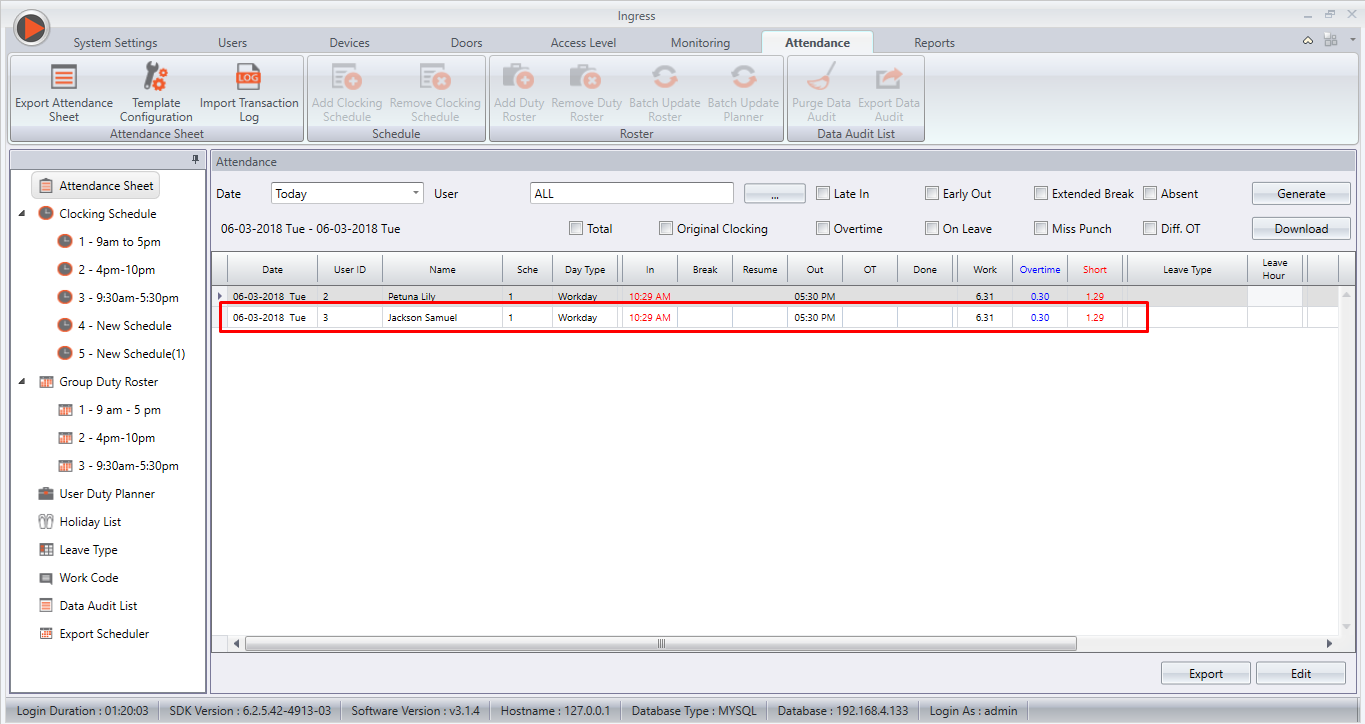
Example: User ID 1 has been changed to User ID 3 while still containing the Transaction Log from User ID 1

And yes, you are DONE! These simple steps only require a few minutes from your side in order to complete the process.

1 comments:

Have any questions or inquiries about FingerTec? Drop your input here.

TimeTec TA: How To Manage Geofence Feature For Out of Area Clocking

Monday, March 26, 2018 TimeTec 0 Comments


Introduction:
Geofence is a virtual geographical perimeter or barrier made for a specific location, i.e your office. By setting a Geofence in TimeTec TA, employees can clock their attendance using GPS clocking only if they are within the permitted area. However, on certain occasions, employees’ clocking might take place outside of the Geofence perimeter. Therefore, in order to cater to such events, we’ve prepared a guide on how to manage the Geofence feature for Out Of Area Clocking. Below are the steps required to carry out the process: 

Process:
A) Configure The GPS Geofence Settings
Firstly, you will need to configure your employees clocking boundary limit in order for the employees to clock their attendance via GPS clocking within the permitted area. You may refer to the link provided below for guidance on how to configure the GPS Geofence settings:


B) Configure the Approval Method for Out Of Area Clocking
For System Administrator - 
1. To configure the Approval Method for Out Of Area Clocking, please go to User > Manage Approval Rules > Add > Out of Area Setting

2. Set Users for the Approval Rules - 
Name the Approval Process and select the application where the Approval Process will take effect, which in this case will be TimeTec TA. Then, select the Users to apply onto these Approval Rules. (Note that there are three options to for the selection of the users: Select Only Particular Organization Structure, Select Only Certain Users or Select All Users.)


3. Set Approver(s) for the Approval Rules - 
System Administrators can choose either Auto Approve if no approver is needed or select Set Approvers if he/she requires a specific personnel to execute the approval process. For Set Approvers method, note that there are three options that can be selected by the System Administrators:
-       Sequential
-       Random
-       Any Approvers

i) Auto Approve (Automatic approval without the need for an approver) 
 

ii) Sequential Approval (A multilayer approval that requires all level of users to approve before the request can be processed. Note that this procedure will require the first level of approvals to be carried out before moving on to the next level)
 

iii) Random Approval (Requires all selected users to approve but without any multilayer order)
 

iv) Any Approval (Does not require all selected users to approve as long as the permission is received from any one of the selected number of users)
  

4. Set Validity Period for the Approval Rules - 
 
Next, the System administrator will have to configure the validity period for the approvers to respond. The Validity Period can either be set based on the number of hours or number of days. For example, if the period is set as 4 days, the application that has not been approved within 5 days will then expire.

5. Once the rules have been submitted, you will see that the approval rules are now added and will be initiated on the effective date.
  

C) Applicants: User Request for Out of Area Clocking Approval 
1. Once the approval rules have been set, users can start applying for Out Of Area Clocking approval.

Login to your TimeTec TA App > verify by using GPS clocking > click Clocking > provide reason for the Outside permitted clocking > Submit

Remark: The request can only be applied by using GPS clocking and only if the users verify their attendance outside of the permitted area.       
2) Users can then view their Out of Clocking Area Request Status Details either via Web Browser or Mobile Application.

Web Browser:
Login to the user credential > Approval > Request > The status will be shown in this tab whether it is “Approved”, “Pending”, “Rejected” or “New” if no one has approved the request.
  

Mobile Application:
Go to system option > Approval

D) Approver
Within the Approver view, go to Approval tab to view any New requests. Click at the Status to view the request details. Note that Approvers can also view the request in the Notification feature.

Set Approvers
1. Sequential Approval
i) For Sequential Approval, the approver will need to follow their turn in order to approve the request. The system will notify the admin if it is not yet their turn to approve the request.
  

ii) The approver with sequence 2 will view the approval status as ‘Pending’ in the Approval section after the approver with sequence 1 has approved the request.


iii) Once the approver with the last sequence has approved the request, a pop-up message will appear to notify that the request has been approved and the request status will be changed to ‘Approved’.


2. Random Approval
For Random Approval, all the approvers will need to approve the request before the request status can be changed to ‘Approved’. Note that the approvers do not need to wait for their turn in order to approve the request and if any one of them rejects the request, the request status will then change to ‘Rejected’.


3. Any Approval
For Any Approval, the request status will change to ‘Approved’ if any of the approver has approved the request. Note that only if all the approvers has rejected the request, will the status of the request then be changed to ‘Rejected’.

4. Auto Approve
The request will be auto approved by the system without any permission required from the approvers.

0 comments:

Have any questions or inquiries about FingerTec? Drop your input here.

Ingress Release Note (v3.1.4.11)

Thursday, March 08, 2018 TimeTec 2 Comments


For Ingress v3.1.4.11 release, there are 15 new features and enhancements as well as 8 bugs fixes that resolve errors found in previous versions. Kindly refer below for the new features and bugs fixed:

New Features and Enhancements:
1. Fixed wrong color display when port-forwarding device not connected at device module. When port-forwarding device is lost connection to Ingress software, the connection status will become 'Not Applicable' and the connection indicator will turn to grey color.

2. Added QR Code option in Users Card No.. With this option, the system will now generate a QR Code when the Card No. information is entered and users can then obtain the Card No. information by scanning the QR Code.

3. Added "Group by Dept" option for Month by Month Analysis report. By enabling this option, users will then be arranged according to their department within the report.

4. Added Sum of "Late In" and "Absent" for each department in Tardiness Report. When checked, the total days of Late In and Absent will then be displayed on the Tardiness Report. 

5. Added new system role privilege to hide/display "Remove Transaction Log" while downloading the transaction logs. This feature is added to ensure that users do not mistakenly delete the transaction data from FingerTec device.

6. Added new option: “Enable Last Name displayed First” in System Settings. By enabling this option, the user’s last name will be displayed first then followed by his/her first name.

7. Added the option to select folder path for TIMING file in System Setting's Server Module. Users can now choose the folder location to save TIMING file that has been downloaded from FingerTec device if they enable ‘Remove transaction data after download’ option.

8. Added total allowed holiday(s) count in Holiday Listing within Attendance Module. Users can now view the total holidays left in the Holiday List section.

9. Added new Export Payroll Type - "Kakitangan" for Malaysia. For companies in Malaysia, a new Payroll Type called “Kakitangan” is now introduced in the new update.

10. Added option to open File Location whenever the backup process is completed. Users can now access the folder location of the backup database file.

11. Added new Batch Update Planner for User Duty Planner.

12. Added option “Download attendance photo” in System Settings.

13. Added option to Export Invalid Audit Data.

14. Added Display Progress Bar while generating a report.

15. Added "Tab" separator in Export Type 2 under Export Audit Data.

16. Added Work Code information in Transaction Listing Report.

Bugs Fixed:
1. Fixed Access Level Report showing no records found when no department is selected.

2. Fixed RS232 device failed to download.

3. Fixed Attendance Clocking data on 00:00 considered as yesterday for Flexi Schedule.

4. Fixed Migration Wizard in FingerTec Cloud Center failing to migrate Transaction Data.

5. Fixed Export Attendance displaying Wrong Date Format for Export Attendance function to MS Excel file.

6. Fixed after unticking ‘Original Clocking’, the Download, Generate and Export button will be accessible for Admins without the appropriate rights.

7. Fixed Export Attendance data with CSV format separated by comma instead of semicolon for export summary and details.

8. Fixed Export Payroll unable to save the user accordingly within each template for WinCom v7, SQL and Million.

Get the Software Update HERE

2 comments:

Have any questions or inquiries about FingerTec? Drop your input here.