i-Neighbour Module Setting Guide

Thursday, February 28, 2019 TimeTec 0 Comments


Introduction:
Module Settings is a feature in i-Neighbour that allows the Admins to enable/disable one or multiple modules within a neighbourhood for the Resident’s usage. Once a module is disabled, Residents in turn will no longer have access to the module. Likewise to allow access, Admins can simply enable the module back on.

To prevent being overwhelmed by the various features available in i-Neighbour especially for newly signed up neighbourhoods, Admins can also take advantage of this feature by enabling the modules accordingly as one becomes more familiar with the system. As such, please follow the quick steps below to proceed with the configuration.

Note: Upon disabling a module, all previous data will be completely removed and cannot be retrieved.

Steps Required:
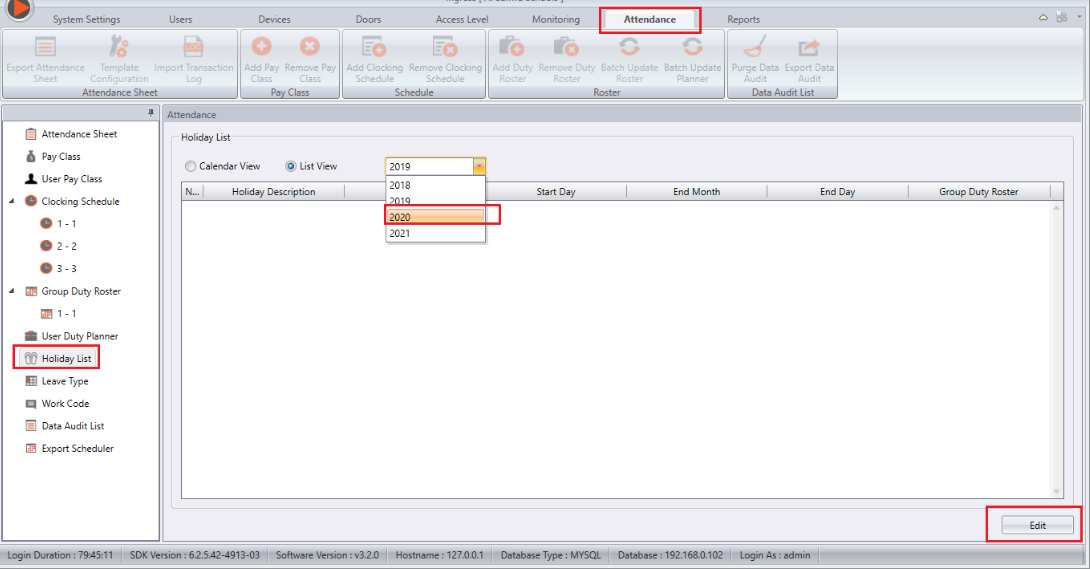
1) Login to the i-Neighbour’s Admin Portal > Neighbourhood > Setting > Module Settings


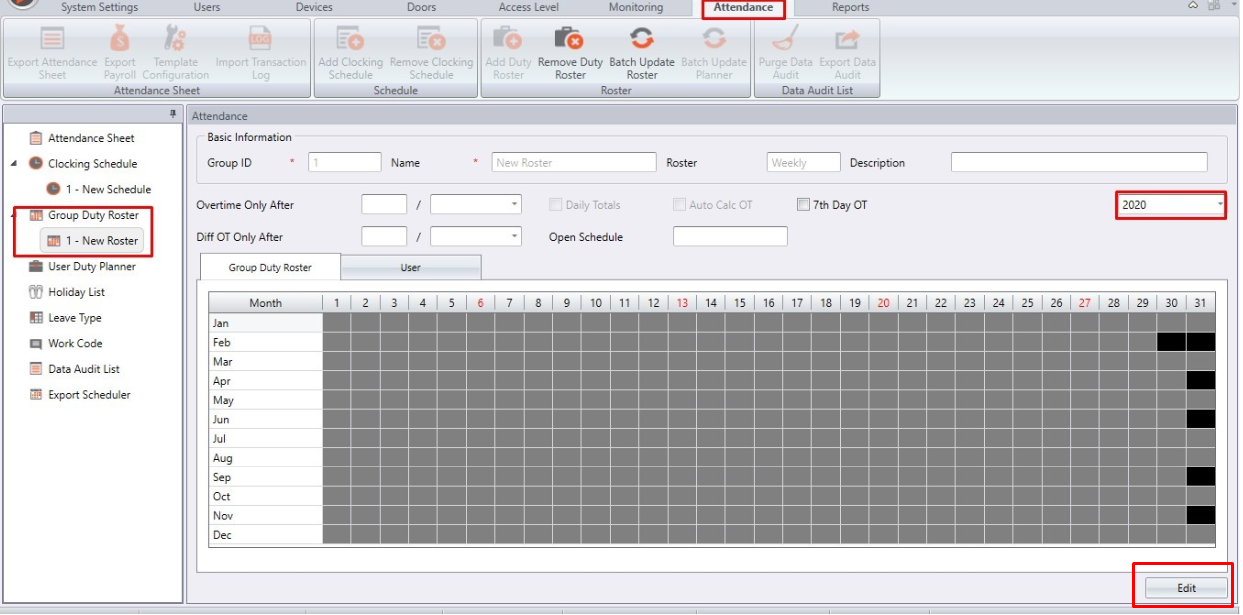
2) Next, to enable/disable a module, click on the “Edit” button.

`


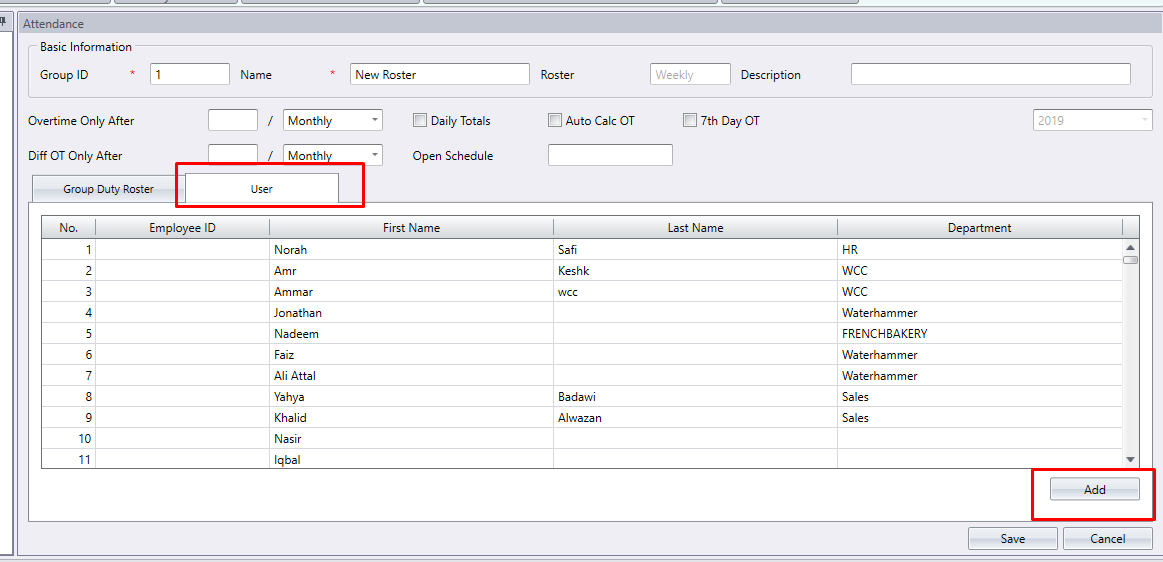
3) Once done, you can proceed to enable/disable the supposed modules by clicking on them. Note that the modules that are enabled will be highlighted in blue while the modules that are disabled will be shown in grey.


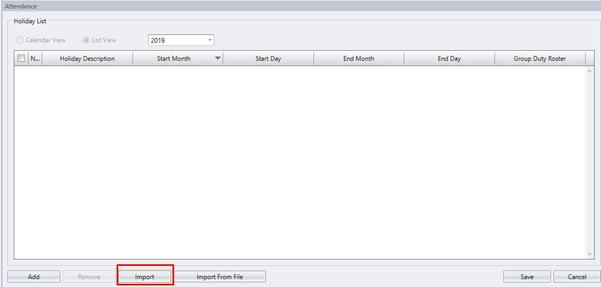
4) Lastly, click on save to confirm the changes and that’s it! You’re all set.


Note: If some of the screenshots or steps viewed here are different from the ones in the current system, this is due to our continuous effort to improve our system from time to time. Please notify us at info@i-neighbour.com, we will update it as soon as possible.

0 comments:

Have any questions or inquiries about FingerTec? Drop your input here.

WiFi Configuration Guide For FingerTec TA100C

Friday, February 22, 2019 TimeTec 9 Comments


Introduction:
WiFi is considered as one of the most required technological aspects for a modern lifestyle. As such, there are many WiFi compatible devices offered in the market today that can connect to the Internet. The WiFi option also allows for an easier biometric device installation without the need for wiring as well as facilitates a faster and stable real-time transfer of attendance data. That said, FingerTec likewise provides a variety of biometric devices which can support WiFi connection, i.e. TA100C, TA200 Plus, Q2i, TA700W and all Face ID Models.

Hence in this technical tip, we will be providing a step by step guide on how to connect FingerTec TA100C device to a WiFi Hotspot.

Process: 
1. In FingerTec TA100C device, proceed to Menu > Comm > Wireless Network. *Note that Wireless Network in the Comm section will only be displayed after the WiFi Settings has been enabled for the device.

2. Once done, the list of available WiFi Hotspot in range will be displayed in the Wireless Network section.
 

3. Choose the Network that you want to connect to and proceed to Insert the Network Password. Once done, select Connect to WiFi. Please note to use the Right Key button to switch between Alphabetic Characters and Alphanumeric Characters.

4. Moving on, the device will then proceed to connect into the network. If the error “Searching for IP Address” still persists after two minutes; please check your WiFi password again or your Wi-fi router setting.

5. The connection Status will display the text ‘Connected’ after the device has successfully connect to the WiFi router.

6. You can also press the M/Ok button to view the WiFi Connection details as shown in the screenshot below. Here, the WiFi Signal Strength and Device IP address will be displayed as well.
 

7. If you have an IP address that you wish to insert Manually at the device, you can do so by turning “Off” the DHCP feature at Menu > Comm > Wireless Network > Advanced. Next, proceed to key in your Network IP address. Note that by default the DHCP setting is turned On for all FingerTec devices.

Note: If some of the screenshots or steps viewed here are different from the ones in the current system, this is due to our continuous effort to improve our system from time to time. Please notify us at info@timeteccloud.com, we will update it as soon as possible.

9 comments:

Have any questions or inquiries about FingerTec? Drop your input here.

How To Configure Holiday Setting and New Year Roster Via TCMS V3/Ingress

Friday, February 22, 2019 TimeTec 20 Comments


Introduction
New Year’s Eve may sounds exciting to all of us. But sincerely, there are some of our beloved customers are worried about the Duty Roster and also the Holiday settings in the software since there might be some changes or reschedule of work that need to be done for the upcoming New Year.

This manual is created to help you to have a better idea on how to configure the New Year Duty Roster and also to import the Holiday list from the previous years to make sure you can celebrate your New Year’s Eve with joy!

Process 
A. Group Duty Roster for New Year
If there’s no setting for the Group Duty Roster for the New Year, the downloaded clocking data will not be generated into the Attendance sheet due to no schedule can be referred to by the system.

To set the Group Duty Roster for New Year, go to Attendance > Group Duty Roster, then select the desired year at the top right of the window.


Proceed to click on Edit button. The following screen will be prompted. Here, you can choose to import the roster or create the new Group Duty Roster by the assistance of the Auto Schedule functions. If the settings of the year that you have selected earlier are similar to the previous year, you may open the previous year’s settings as your reference.

Press ‘OK’ to proceed. The New Year Roster is now ready with the proper schedule that has been arranged according to how you set in the previous steps. 

Please double check the roster setting of the New Year and then, save it.


Finally, DO NOT forget to add users that belong to this Duty Roster.

You are now can generate and view the New Year attendance in the Attendance Sheet as usual.

B. Holiday Setting for New Year
For Holiday setting, the TCMS V3 and Ingress software will allow you to import the holiday list from the previous years to the current year/next year calendar. This is to ease the users so that any redundant works are not required since there are public holidays that will fall on the same date every single year like New Year and Christmas.

Go to Attendance > Holiday List > List View, select the year that you wish to import the holiday list.


Click on Edit button, then select Import.


In this ‘Import Holiday’ pop up window, you can choose the desired year and all types of holidays on that selected year will be listed. Tick any of the holidays you wish to import and click on Import button.


The selected holidays are now imported to the new year calendar. Click Save once you have checked that all settings are correct.


Note: If any of the screenshots or steps in this manual are different from the current system, it is due to our continuous effort to improve our system from time to time. Please notify us at info@timeteccloud.com. We will update it as soon as possible. 

20 comments:

Have any questions or inquiries about FingerTec? Drop your input here.

TCMS V3 / Ingress - Displaying Header for Text and CSV file when Exporting Attendance Data

Friday, February 22, 2019 TimeTec 2 Comments


Introduction
FingerTec has recently introduced a new feature for Ingress and TCMS V3 software, where users can show the header in a text or CSV file when exporting the Attendance data.

This enhancement gives the flexibility for the user to import the attendance data into the third-party software for payroll calculation. There are a few payroll systems in the market that required the header to be included into the imported file in order for the system to accept the file.

Process
1) Go to the Attendance tab > Attendance Sheet > click Export.


2) You can select either Template Details or Template Summary and then, click Add Template.


3)  Configure all preferred details that you need to export from the field tab.


4) Then, go to Option tab > tick Display Header Row > click Browse button.


5) Browse the output target file > choose either .txt or .CSV file format.


6) Choose the template that has been configured > select User > choose Date Range > click Export.


Following screen is the sample of the result:


Note: If any of the screenshots or steps in this manual are different from the current system, it is due to our continuous effort to improve our system from time to time. Please notify us at info@timeteccloud.com. We will update it as soon as possible.

2 comments:

Have any questions or inquiries about FingerTec? Drop your input here.

i-Neighbour App: OCR Feature Not Working As Intended

Monday, February 18, 2019 TimeTec 0 Comments


Introduction:
Optical Character Recognition (OCR) is a feature in i-Neighbour, whereby printed texts are digitized to allow for editing, storing and display. As such, i-Neighbour OCR is capable of producing a high degree of recognition accuracy for most fonts, and it supports a variety of digital image file format inputs for your benefit. However on certain occasions, the OCR feature might encounter a few issues in which the printed text cannot be read. Hence, we’ve prepared a short guide on how you could solve this particular problem. Below are a few steps to fix the OCR feature on your guardhouse tablet.

Steps Required:
1.  Check The Physical Placement Of The Card Holder On The Guardhouse Tablet Panel
- The Tablet Card Holder should be placed at the center position as shown in the picture below.

Card Holder placed at center position of the Tablet Stand

- Please also ensure ample light condition at the guardhouse. On the other hand, severe reflection may cause glare on the card’s letter thus leading to issues in digitizing the printed texts.

2. Check The i-Neighbour OCR Settings Page
- Please ensure that the country selected is correct.
Every country has a different display in terms of the IC/Driving License. As such, take note to select the appropriate country when applying this particular feature.

- Check whether the Toggle Button is turned off.
At the OCR Settings, please turn on the Toggle Button in order to activate the OCR function. Refer to the picture below for more information.
3. Carry Out Software Calibration
- To ensure that the OCR feature functions properly, it is encouraged that Admins of the neighbourhood carry out the Software Calibration process at More > Settings > OCR Settings > OCR Calibration, before activating it. Refer to the screenshots below for more information.
-Tap on Settings at the bottom left.
-Tap OCR Settings to proceed with the OCR Setup.
-Enable the OCR Toggle Button.
-E.g. Select Malaysia as the country.
-Tap the Settings button to proceed.
-Select which card that the OCR feature will be capturing, i.e. Driving License.
-Set the Driving license at an optimum position.
-Crop the captured image according to the form of the Driver License accurately.
-Tap Next to proceed.
-Moving on, crop the picture of the individual in the Driving License.
 -Tap Submit to proceed.
-Once done the configuration of the OCR Settings. Tap Ok to proceed.
-Before proceeding further, please use the Test Capture function to test the OCR Settings.

-If done correctly, you can then view the Name and ID No./Driving License as captured by the OCR feature.

If you are still having problems after completing all of the steps stated above, please contact us via: support@i-neighbour.com

Note: If some of the screenshots or steps viewed here are different from the ones in the current system, this is due to our continuous effort to improve our system from time to time. Please notify us at info@i-neighbour.com, we will update it as soon as possible.

0 comments:

Have any questions or inquiries about FingerTec? Drop your input here.

Ingress Release Note (v3.2.0.7)

Monday, February 11, 2019 TimeTec 2 Comments


For this month, FingerTec has released Ingress software v3.2.0.7 which adds 11 new features and
4 bugs fixes to enhance the user experience when using Ingress Software.

New Features and Enhancements:

1. Added WDMS Integration

2. Added Show the list date of change on User Duty Planner
3. Added Define weekend (sat and sun or fri and sat) for Attendance tab in system settings.

4. Added selection filter user by department or group duty roster in System Settings
5. Added work code description into attendance sheet when select from job costing

6. Added header selection in attendance details and summary
7. Added more information and action if device added unsuccessfully

8. Removed Select All in attendance sheet
9. Added User Verify Type

10. Added Sage UBS export in txt format
11. Added Search option in Access Group
Bugs Fixed:
12. Fixed Unable to view original clocking data in the report for any edited data
13. Fixed Incorrect deduction of Overtime for Restday for Flexi Schedule
14. Fixed User Unable to download user data via USB pendrive from TA500
15. Fixed Unable to choose specific user after searching user.

2 comments:

Have any questions or inquiries about FingerTec? Drop your input here.