

How to Create Patrol Schedule for TimeTec Patrol

Introduction
Scheduling guards is not an easy task because different sites may require different schedules and timings. TimeTec Patrol caters to that complexity by automating the whole scheduling process. Thus, a lot of time and money can be saved instantaneously. Furthermore, with this cloud solution, guards can view their upcoming routes easily via smartphone. This article provides a step-by-step guide on how to configure a schedule in TimeTec Patrol.
Process
1. After logging in as an Admin on the TimeTec Patrol web portal, go to Schedule.


3. Insert schedule number and schedule name, then select the schedule type whether weekly or customize.

4. Weekly type will be the default schedule where it will automatically provide 7 days. You may key in the time slot for your patrol rounds accordingly for each day. Click the + sign to add another time slot for that day.

5. Customize type will allow you to add the number of days according to your shift rotation pattern. For example, if the sequence will alternate every 2 days, you may set the schedules for the first 4 days while the following days will follow the sequence of the initial 4 days. Click on the + sign to add another time slot for that day while clicking on the + Add More button will add another day slot.
Note: It is recommended to use the customize schedule type and configure it for one day only, use the weekly type if the same schedule will be used every day, as the following days will repeat the same schedule as day 1.

6. Once the time slot has been set, click on the guard icon to assign patrol routes and guards.

7. In the Edit Routes and Guards window, you may select the patrol routes and guards to assign to the time slot. Please note that only the route that does not exceed the time range will be visible for selection. Should you notice the required route is not available, you may set the time range of the schedule to be longer or amend the patrol route duration to be shorter. Submit once configuration is completed for each time slot.

8. Set the “Start schedule on” date for when the schedule begins to run. “Roll the schedule for coming” is to set the duration of the schedule to repeat the rotation. Minimum rotation can be set for 1 week while the maximum is up to 12 months. Should the schedules need to be used again after 12 months from the date the schedule starts running, you may amend the “Start schedule on” date and generate the schedule again.
For “Notify if routes didn’t start after”, you may select the recipients to be notified if guard(s) fail to start their tour. TimeTec Patrol app will send an alert message via push notifications to the personnel-in-charge.

9. Once the schedule configuration is completed, you may go to the Patrol Schedule Details tab to review the patrol schedule's detail configuration. Click edit if you want to change the guards or route assignments for a specific date.
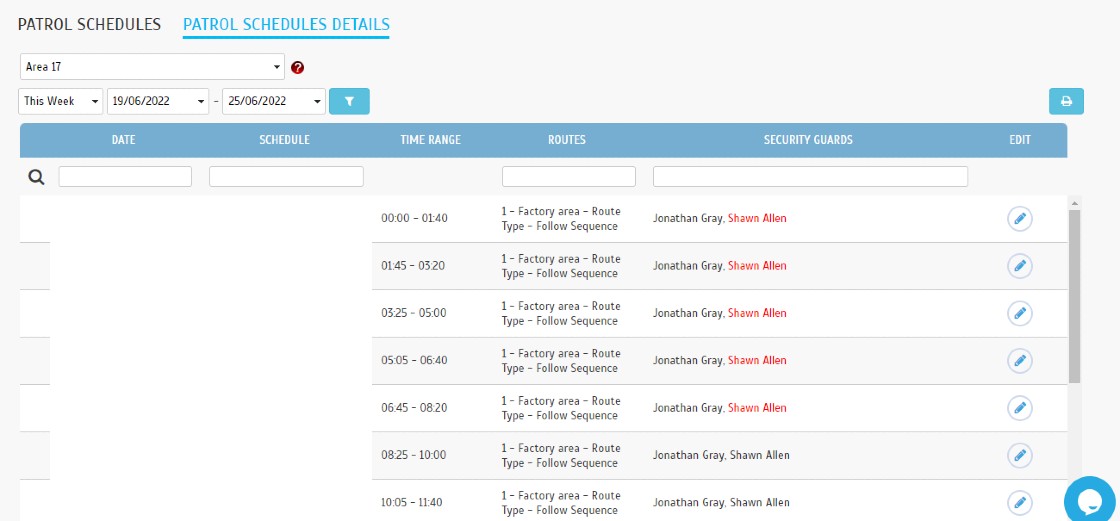
Note: If some of the screenshots or steps viewed here are different from the ones in the current system, this is due to our continuous effort to improve our system from time to time. Please notify us at info@timeteccloud.com, we will update it as soon as possible.


0 comments:
Have any questions or inquiries about FingerTec? Drop your input here.