FingerTec Firmware Update

Wednesday, November 30, 2011 TimeTec 0 Comments

The latest firmware for TA100, TA103R, Timeline 100, TA100C, AC100, AC100C, I-Kiosk 100 (FEM 600), I-Kiosk 100 Plus (FEM 600), Q2i & TA200 Plus (FEM 600), M2 and R2 is now ready for download. 
To download, click here.


NEW FEATURES AND UPDATES

1. Webster & TimeTec Enabled
The firmware is updated with the Webster & TimeTec function. This will enable the terminal to be compatible with Webster & TimeTec. However the terminal cannot be immediately used with Webster or TimeTec. Users will need to register with FingerTec and we will provide you with a firmware to update the terminal upon registration. For steps on how to obtain the TimeTec firmware, please refer to the FingerTec Technical Newsletter (http://www.fingertectips.com/2011/11/fingertec-timetec-trial-version.html) for more information.

Model Involved: TA100, TA103R, Timeline 100, TA100C, AC100, AC100C, I-Kiosk 100 (FEM 600), I-Kiosk 100 Plus (FEM 600), Q2i & TA200 Plus (FEM 600), M2 and R2


2. Different USB data output for both Black & White Screen Model and Multimedia Model.
We have recently released a new fingerprint algorithm, BioBridge VX10.0. (http://www.fingertec.com/newsletter/Aug2011/FN-01.html) As you may already know, the new algorithm speeds up the fingerprint verification process of the terminal and it maximizes the fingerprint templates capacity to 10,000 for any multimedia model with FEM 600 core board only. 

With the new firmware, you may transfer the fingerprint templates using the USB pen drive directly into another terminal. To transfer the fingerprint templates using the USB pen drive, go to the Pen Drive Management at the terminal, insert the pen drive and select Download User. After the download is completed, remove the pen drive and insert to the other intended terminal. Go to the Pen Drive Management and select Upload User. 

The FingerTec black and white display terminals only supports fingerprint BioBridge VX 9.0 algorithm. You can transfer fingerprints using the USB pen drive among the black and white display terminals but not to the multimedia terminals, which runs on the BioBridge VX 10.0 algorithm. To upload BioBridge VX9.0 algorithm fingerprint templates to a multimedia terminal, you will have to configure the multimedia terminal into BioBridge VX 9.0 algorithm before you can proceed with the transfer. In event that you would like to enroll the fingerprint using a multimedia terminal and later transfer the fingerprint template to a black and white display terminal, you will need to configure the multimedia terminal into BioBridge VX 9.0 before you start to enroll the fingerprint. 

Please take note that the BioBridge VX10.0 algorithm cannot be mixed and matched with fingerprint templates from BioBridgeVX9.0 algorithm. The templates derived from the BioBridge VX9.0 will prompt an error during the verification period if it were uploaded to the terminal via the BioBridge VX10.0 or vice versa.

Model Involved: TA100C, AC100C, I-Kiosk 100 (FEM 600), I-Kiosk 100 Plus (FEM 600) and Q2i & TA200 Plus (FEM 600).


3. Customized External Siren’s Minimum Ring Period To 30 Seconds.
The FingerTec TA100C and TA200 Plus model comes with an external siren or a scheduled bell feature. Configuration of time settings can be done in terminal prior to connecting it to any bell system with an independent power supply. Once the time is configured, the terminal would trigger the bells at the specific times. 
From the previous firmware, we know that external siren’s minimum ring period is 15 seconds. With the new firmware, we change the external siren’s minimum ring period to 3 seconds.
To set configure the external siren’s ring period setting, please press Menu > System > Misc Set > Bell.
Model Involved: TA100C and TA200 Plus.


Initiated by: Henry Pang
Written by:Vincent Chan

0 comments:

Have any questions or inquiries about FingerTec? Drop your input here.

Connecting the H2i with an AdapTec Plus

Thursday, November 17, 2011 TimeTec 0 Comments

With the recent release of our new product AdapTec Plus, many might wonder what is the role of AdapTec Plus in supporting the terminal. The AdapTec plus is a combination of a power supply with enhanced access control functionalities. It supports FingerTec’s encrypted 26-bit Wiegand communication output; providing enhanced security level for extra protection. With the data encryption, the life span of the terminals can be prolonged without the risk of short-circuiting. 

The H2i’s firmware has been updated to work with the AdapTec Plus. The latest firmware is available for download here

To assist our resellers further, we have prepared a simple step-by-step instruction to guide you through the setup of connecting the H2i with the AdapTec Plus.

Connecting the H2i to the AdapTec Plus
To connect the H2i to the AdapTec Plus, please refer to the below diagram. 

Updating the H2i to send an encrypted Wiegand output signal
By using the FingerTec Terminal Functions Update Tool v1.6, we can configure the H2i to send an encrypted Wiegand output signal to the AdapTec Plus.

1. Download the FingerTec Terminal Functions Update Tool v1.6 here.
2. Unzip the file and start up the FingerTec Terminal Functions Update Tool v1.6


3. Insert the IP address of the terminal and click Connect
4. When the connection is successful, the General and Access Control tab is will be accessible.


5. Click the Access Control tab and tick the checkbox for AdapTec Plus.


    6. Click Update to update the new feature into the H2i.


    7. When the update is completed, click Restart to restart the H2i.


    Your H2i will now be able to work with the AdapTec Plus. If you are still facing problems with this process, kindly contact support@fingertec.com for further assistance.


    Initiated by: Henry Pang
    Written by:Vincent Chan

    0 comments:

    Have any questions or inquiries about FingerTec? Drop your input here.

    FingerTec TimeTec – Trial Version

    Wednesday, November 16, 2011 TimeTec 1 Comments


    FingerTec’s TimeTec Trial Version is intended to allow FingerTec’s resellers as well as end-users to test out TimeTec before actually making a purchase. The trial version is strictly accessible to FingerTec’s Authorized Resellers & Distributors, and End-Users of FingerTec only.


    Update: We will no longer be offering TimeTec Web Trial. Please proceed to TimeTec Cloud page for the 30-days FREE Trial version.

    The instructions below are intended to help you understand the workflow, types of testing environment and what you need to prepare before you start the test.

    FINGERTEC MODELS THAT SUPPORT TIMETEC

    You will need to connect the FingerTec terminal to the TimeTec server in order to test it. The list of models that are compatible with TimeTec are as below: 
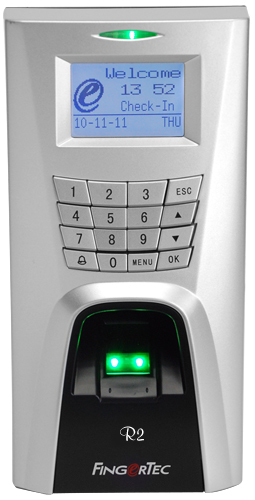
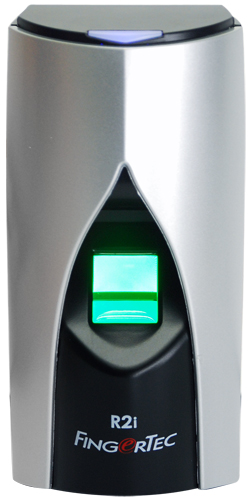
    • Black and white display models: R2, TA103 series, TA103R series.
    • Color screen models: AC100C, TA100C, Q2i, TA200Plus, iKiosk 100, iKiosk 100 Plus.
    • Face recognition models: Face ID 2 only supports fingerprint transfer but not face templates transfer.
    Once you've determined your FingerTec model, you’ll need to provide us with the terminal’s information so that we are able to prepare a customized TimeTec firmware. Only FingerTec’s resellers and distributors can update the firmware to FingerTec terminals. We will prepare the TimeTec Trial Product Activation Key for the test unit to connect to the TimeTec server.
    • Serial Number
    • Model
    • Firmware Version
    • Company Name
    • Country
    • Contact Person
    • Email
    Note: The TimeTec Trial Version is only valid for 3 months upon installation. It is solely for evaluation purposes. If you wish to use it permanently, please contact our Sales Department at info@fingertec.com


    TESTING PLATFORMS
    We provide 2 types of TimeTec Trial platform:
    Platform 1: FingerTec TimeTec Online Test Server
    Platform 2: Download, install and test TimeTec at your own server. 

    To find out which platform suits you the best, view the below brief descriptions.

    Platform 1: FingerTec TimeTec Online Test Server (Recommended for end-users or resellers/distributors without a physical server)

    FingerTec provides a free testing server located at http://www.timetec.co. TimeTec is installed at the testing server and readily available for approved users. 
       
    Learn the benefits of using the FingerTec TimeTec Online testing server! Tapping on FingerTec TimeTec Onlne Testing Server, you can experience TimeTec without having to install it and MySQL database. It is cost-free and hassle-fee test without having to setup any physical server or buy any static IP address. However, the only downside of using Platform 1 is that users cannot view the MySQL database to see TimeTec’s data structure. This is important if you are going to integrate payroll or 3rd party HR software into TimeTec. For this, you'll need Platform 2.

    STEPS TO GET STARTED:

    1. Make sure your FingerTec terminal is compatible with TimeTec. Please provide us with your terminal’s information and we will generate a TimeTec firmware for you. 
    2. Update the FingerTec terminal with the latest firmware. You may download the firmware here. (Only FingerTec resellers/distributors can download and update firmware for FingerTec terminals).
    3. FingerTec will provide the TimeTec server login username and password to enable users to log into FingerTec TimeTec Online Test Server. The link to FingerTec TimeTec Online Test Server is www.timetec.co
    4. Upon receiving the TimeTec firmware from FingerTec, update the said firmware to the terminal (Only FingerTec resellers/distributors can download and update firmware to FingerTec terminals). 
    5. Insert the TimeTec server IP address (182.239.42.29) and port number (80) into the FingerTec terminal. You may refer to the TimeTec user manual for details on how to configure settings for the FingerTec terminal. 
    6. FingerTec will provide the TimeTec Trial Product Activation key. 
    7. Start up the Internet browser (Google Chrome/Mozila Firefox/IE6) to access www.timetec.co and login by using the provided username and password.  
    8. You are now ready to use the FingerTec TimeTec Online Test server. For more information about TimeTec please refer to the TimeTec manual

    Platform 2: Download, install and test TimeTec with your own server (Recommended for resellers/distributors with physical server and Static IP, system integrators, software developers and IT specialists)
    Testing the TimeTec software in your own server allows you to explore all functions and operations of TimeTec and perform demonstration to your customer. This platform also allows setup of your own testing server for your customer to experience TimeTec. Access into MySQL database is available to view and understand the table’s structures for system integration and 3rd party software development. 
    Testing the TimeTec in your own server requires you to have information about the FingerTec terminals.

    Requirements for Own Server Installation:
    1. A Physical Server
    Processor: 1GHZ
    - RAM: 1GB
    - Space: 1GB
    - OS: Win XP Professional 32-bit/Windows 2003 server 32-bit/ Vista Home Premium, Business, Enterprise,  and Ultimate 32-bit or 64-bit/ Windows 7 Home Premium, Business  and Ultimate 32-bit or 64-bit/ Windows Server 2008 32-bit

    2. A Static IP address
    TimeTec requires a Static IP address to link FingerTec terminals via the Internet.

    If you are running the server to link up FingerTec terminals within same local area network with no Internet connection involved, you do not need to use Static IP for TimeTec server; Normal IP address suffice.
    If you are not connecting the TimeTec to any FingerTec terminals, you do not need static IP, Normal IP address suffice.


    STEPS TO GET STARTED:

    1. Make sure your FingerTec terminal is compatible with TimeTec. Please provide us with your terminal’s information and we will generate a TimeTec firmware for you.
    2. Update the FingerTec terminal with the latest firmware. You may download the firmware from http://tips.fingertec.com/tips-download-firmware.php (Only FingerTec resellers/distributors can download and update firmware for FingerTec terminals).
    3. Upon receiving the TimeTec firmware from FingerTec, update the said firmware to the terminal (Only FingerTec resellers/distributors can download and update firmware to FingerTec terminals).
    4. You will need to purchase a Static IP address from your local Telecommunication Company. Ignore this step if you wish to use the Local Area Network (LAN) to connect to the FingerTec terminals. 
    5. Configure the FingerTec terminals with TimeTec server IP, terminal IP, gateway and subnet mask. You may refer to the TimeTec user manual for details on how to configure settings for the FingerTec terminal. 
    6. FingerTec will provide the TimeTec Trial Product Activation key and you may start to connect your terminal on TimeTec.
    7. To run FingerTec TimeTec, you must first install the following into the server:
      -        FingerTec TimeTec

      -        MySQL database

      -        MySQL connector

      -        Microsoft .NET Framework 4.0

      -        Crystal report components (32-bit or 64-bit Windows OS)

      To download an all-in-one installation pack, click here 
    8. Besides this, you can also opt to download the relevant /required files from the following links:
      COMPULSORY download item:
      -        FingerTec TimeTec installation file 
      OPTIONAL components to be downloaded (ignore if you’ve already have or installed the components in the server):
      -        MySQL database installation 
      -        MySQL connector installation 
      -        Microsoft .NET Framework 4.0installation
      -        Crystal report components (use either one, select according to the server Windows OS)
    9. To view the TimeTec user manual, click  to here download.
    10. Install the TimeTec server, the MySQL database and the ODBC connector. For more details regarding the installation, you may refer to the TimeTec manual
    11. Start up the TimeTec server and insert the TimeTec Trial Production Activation key to connect to the terminal. 
    12. You are now ready to test the TimeTec on your server. For more details on how to use the TimeTec, you may refer to the TimeTec manual.


    To get your TimeTec Trial Account, just email us with the information above, and we will contact you for the follow-up procedures. Please note that the TimeTec Trial Account is currently available only for authorized resellers, distributors and end-users only.

    For more information about TimeTec, click here.


    Initiated by: Henry Pang
    Written by: Henry Pang

    1 comments:

    Have any questions or inquiries about FingerTec? Drop your input here.

    R2 & R2i: A Troubleshooting Guide

    Wednesday, November 09, 2011 TimeTec 37 Comments

    FingerTec R2 & R2i is a unique IN - OUT access control solution. The R2i is a cost effective exit reader that does not perform any verification; instead, it communicates with the master R2 terminal to verify the user before unlocking the door for exiting. 
    Recently there have been some feedback from our esteemed customers regarding some difficulties while using the R2 & R2i. To use the R2 & R2i together, a few settings must be configured correctly. 
    FingerTec has compiled a list of possible scenarios that the users might face while using the R2 & R2i. Resellers are advised to take note of the following solutions in order to reduce the down time while providing efficient support to end-users.  
    • Problem 1: The R2i is unable to detect the fingerprint.
      • Solution 1: Please check the R2 (master device) setting. Make sure the option with R2i is set as Y. Press Menu > Options > System Opt > Adv Option > with R2i set as Y.
      • Solution 2: Check the R2/R2i communication cable. Make sure it is properly connected.
      • Solution 3: Check scanner prism. Make sure the prism is clean. Replace the  prism if it is scratched or cracked.
      • Solution 4: Update the latest firmware. You may download the latest firmware here
      • Solution 5: Replace with a new R2i unit. If all the above solutions fail to work, please replace with a new R2i unit.

    • Problem 2: The R2i is hanging.
      • Solution 1: Update the latest firmware. You may find the latest firmware here.
      • Solution 2: Check the R2/R2i communication cable. Make sure the cable length is not more than 1 meter long. The maximum length for the cable should be 1 meter only.

    • Problem 3: The R2i has a slow response time.
      • Solution 1: Remove all data in the R2 (Master Device) and update it with the latest firmware. To remove the data in R2, Press Menu > Options > System Opt  > Adv Option > Clear All Data. Make sure you have backed up all the data in the terminal into the TCMS V2 before clearing the data. To update to the latest firmware, you may download the latest firmware here. 
    • Problem 4: The R2i can detect fingerprint but the R2 doesn’t verify the fingerprint.
      • Solution 1: Check the scanner prism. Make sure the prism is clean. Replace the prism if it is scratched or cracked.
      • Solution 2: Update with the latest firmware. You may download the latest firmware here
    • Problem 5: The R2i will only verify the fingerprint after 5-6 tries. 
      • Solution 1: Check the R2/R2i communication cable. Make sure it is properly connected.
      • Solution 2: Check the scanner prism. Make sure the prism is clean. Replace the prism if it is scratched or cracked.
      • Solution 3: Update with the latest firmware. You may download the latest firmware here
      • Solution 4: If all the above solutions fail to work, please replace with a new R2i unit.
    If you are still experiencing problems with your R2i, kindly contact FingerTec’s Support Team at support@fingertec.com to assist you with your problem.


    Important Note:
    Starting from 10th November 2011, FingerTec R2 will come with a default firmware that is R2i enabled. However, the settings in the Advanced Options for R2i will be set to N (No). Only enable this option if the R2 is connected to the R2i and ensure that it is disabled if it is not connected to the R2i. If the option is enabled without being connected to the R2i, the R2 will automatically restart by itself with the error message “FP Reader Error”. To enable or disable this option Press Menu > Options > System Opt > Adv Option > with R2i set as Y (Yes) or N (No).


    Initiated by: Henry Pang
    Written by:Vincent Chan

    37 comments:

    Have any questions or inquiries about FingerTec? Drop your input here.