How To Enable Attendance Approval And Approve Attendances in TimeTec TA
INTRODUCTION -
TimeTec TA has introduced a new feature which enables the approval process of the user’s attendance report to be performed within the system. Therefore, users with administrator privilege could check user attendance data before deciding whether to approve or reject the attendance report. This feature is suitable for companies that require a supervisor to verify the attendance report of his/her employees. Even better, the approval function can be performed by Admins on both web and mobile platforms for added convenience.
In this article, we prepared a guide on how to enable the Attendance Approval feature and approve employees’ attendances in TimeTec TA.
PROCESS -
Note: Only users with Administrator role in TimeTec TA could approve the user’s attendance in TimeTec TA.
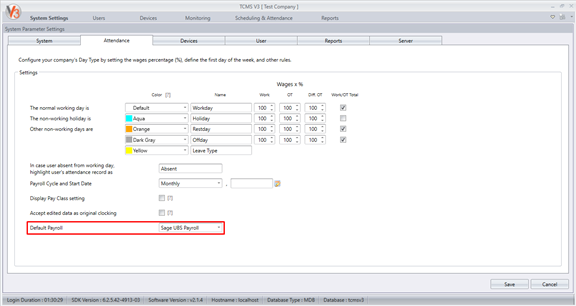
1) Enable this option in System Settings - Attendance Approval allows Admin to make approval on staff attendance.
2) Go to Attendance > Attendance Approval - Admin with the special Approval rights (provided in System Role) will be able to approve attendance; Approved attendance can be unapproved.
3) Admin can also choose to notify the user once they have approved/unapproved user’s attendance.
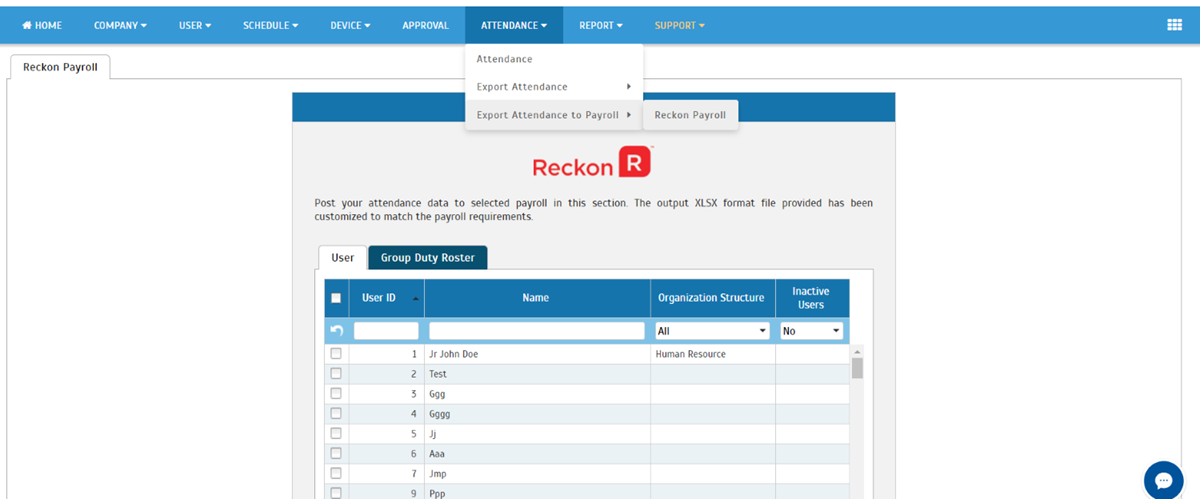
4) Only approved attendance can be exported through the Export Attendance, Export Attendance to Payroll and Export Attendance Scheduler features.
5) Once approved, the data is not allowed to be updated by edit attendance, download data from terminal, update user’s group roster, update schedule setting, generate attendance manually and etc.
6) To update approved attendance, users must first proceed to unapprove the attendance.
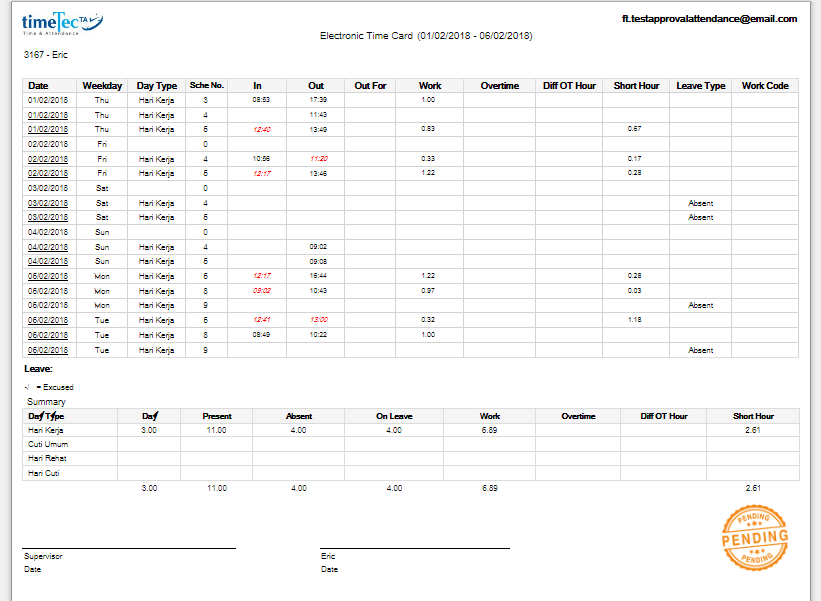
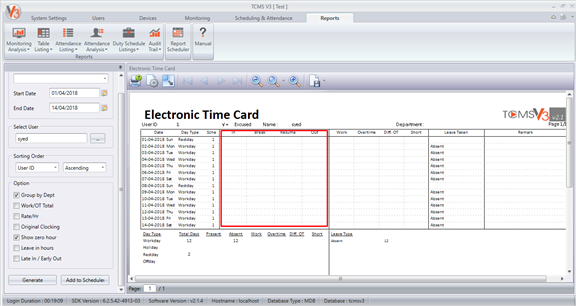
7) Electronic Time Card shows Approved/ Pending status.
For more details of what’s available with this feature, please refer to the step-by-step guide below. There are 4 sections to this topic:
A) How to Enable/ Initial Setup
B) How to Approve (Web)
C) How to Approve (Mobile app)
D) Reports & Export Attendance Data after approval
A) How to Enable/ Initial Setup
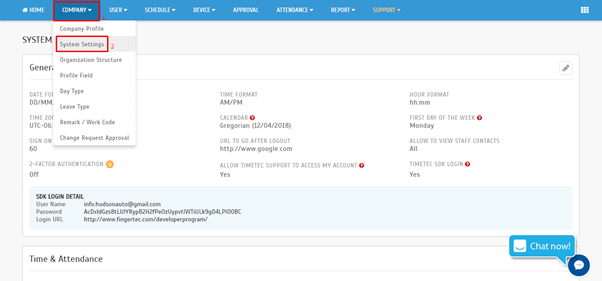
1. Login to TimeTec TA (Web) and go to Company tab > click on System Settings.
2. Next, go to Time & Attendance section and then click on Edit button.
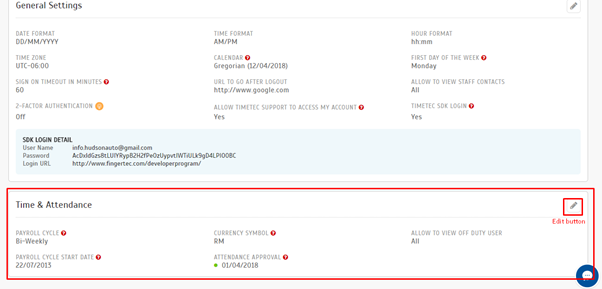
3. Tick on the Attendance Approval option and then choose a date to start enabling this option. After that, click on the Tick button to save the configuration.

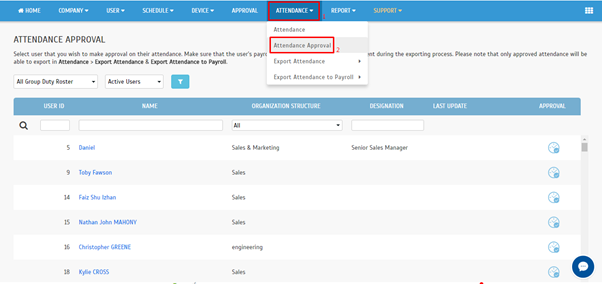
4. Once you enable this feature, you will be able to view Attendance Approval in the Menu (it’s hidden if option is not enabled).
5. Next, configure the Approvers by reviewing whether Approve rights have been given to the relevant Admin roles. Go to User> Manage System Roles & Admin > System Role and select to Add/Edit.
Note: There are 2 separate rights involved, approve in Web and approve in Mobile.
i) Admin given right to “Approve” is allowed to approve attendance in Web
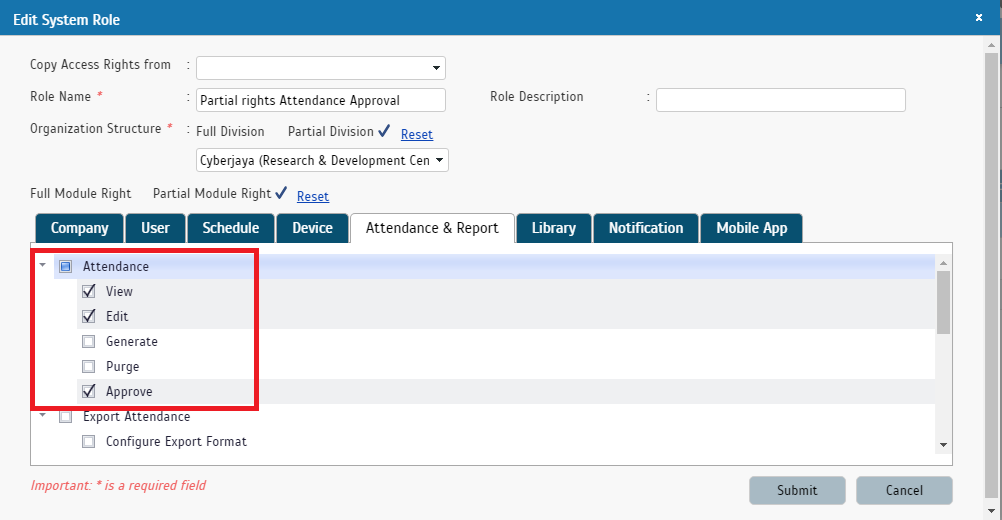
ii) Admin given right to “Approve” is allowed to approve attendance in Mobile app
 B) How to Approve (Web)
1. If you are the supervisor/manager charged with approving staff attendance, go to Attendance > Attendance Approval in the Menu (it’s hidden if this option is not enabled in the account).

2. At the User Listing, click on the Clock icon to view attendance details of the chosen user and to approve or unapprove attendance.
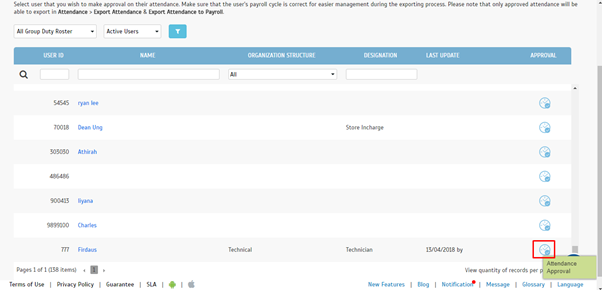
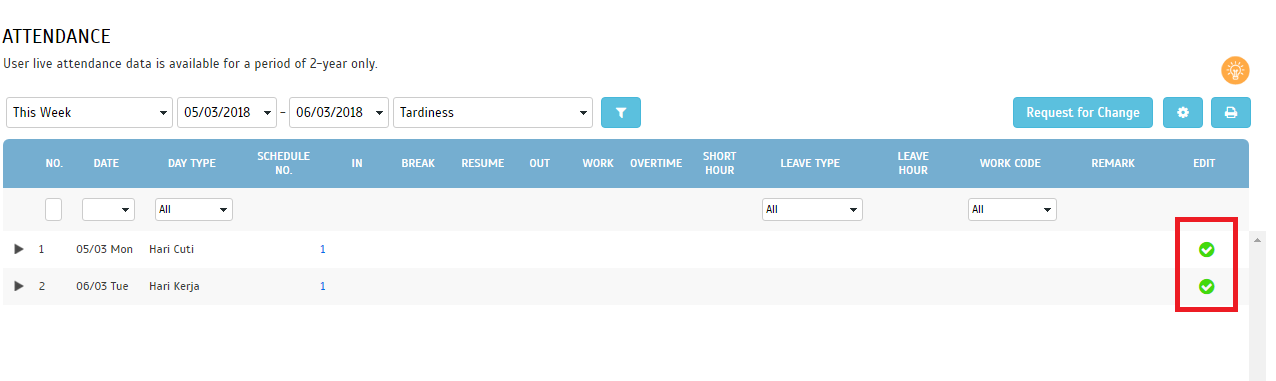
3. Next, the screen will display Attendance details. Use the filters to retrieve your relevant date range. Select/tick the relevant date(s) you wish to approve, then click “Approve”. Once a date is approved, a green tick will be shown in the Edit column. You can also repeat the steps to unapprove attendance for any date.
i) “Approve” button will be shown when all attendance is unapproved
ii) “Unapprove” button will be shown when all attendance is approved
iii) Both buttons will be shown when attendance is a mix of approved and unapproved
4. After you have approved any date, a success message pops up. There will be an option to notify the affected user. The same notification option also appears if you subsequently choose to unapprove attendance.
5. Once done, a message will appear on the screen stating that the attendances can now be exported to payroll.

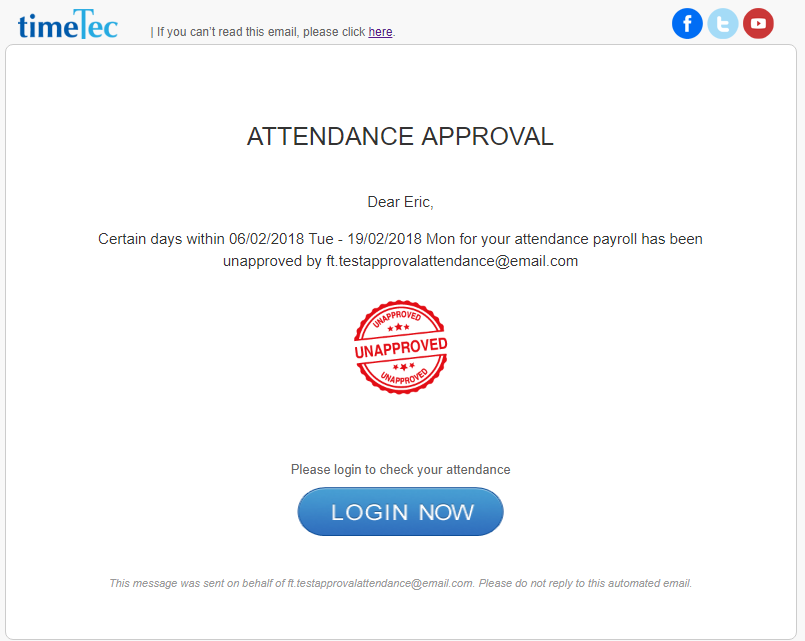
6. If you choose to notify user, system sends an Attendance Approval Email to the user.
i) Approved
ii) Unapproved
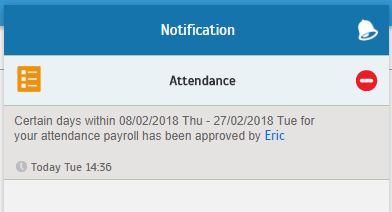
7. Additionally, if you choose to notify user, system also sends an Attendance Approval Notification to the user.
i) Approved
ii) Unapproved

8. When user login, they will also be able to see if their attendance has been approved.
 C) How to Approve (Mobile app)
1. Login to Admin account > Menu > Attendance > select the Approval icon (Clock) on the left of User Listing.
2. Next, at the chosen user’s Attendance Approval screen > filter for your appropriate Date Range > select “Approve” icon at upper-right corner. This will approve the whole date range (use the filter if choosing individual date).
Once the dates are approved, a green vertical panel will be shown on the left. You can also repeat the steps to unapprove attendance for any date.
i. Approve Icon
ii. Approved Attendance Details > May also choose to “Unapprove”
3. After you have approved any date, a success message pops up. There will be an option to notify the affected user. The same notification option also appears if you subsequently choose to unapprove attendance.
i. Approve- Option to notify user
ii. Unapprove- Confirmation message & Notification option
4. If you choose to notify user, system sends email & mobile notification to the user.
D) Reports & Export Attendance Data after approval
To recap what is mentioned above:
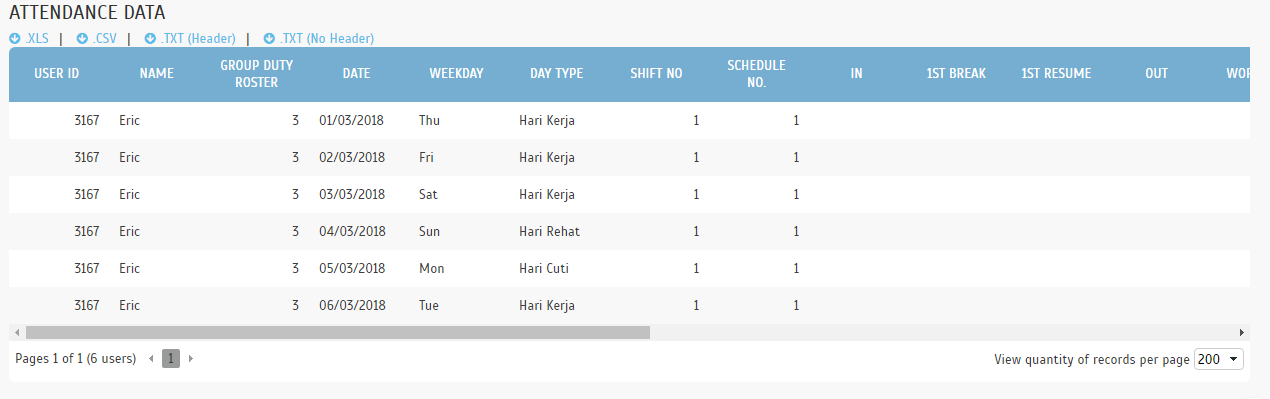
1) Only approved attendance can be exported through Export Attendance, Export Attendance to Payroll and Export Attendance Scheduler features.
2) Once approved, the data is not allowed to be updated by edit attendance, download data from terminal, update user’s group roster, update schedule setting, generate attendance manually and etc.
3) To update approved attendance, users must first proceed to unapprove the attendance.
4) Electronic Time Card shows Approved/ Pending status.
Only approved attendance will be able to be exported
i. Export Attendance
ii) Export Detail
iii) Export Summary

iv) Export Attendance Scheduler
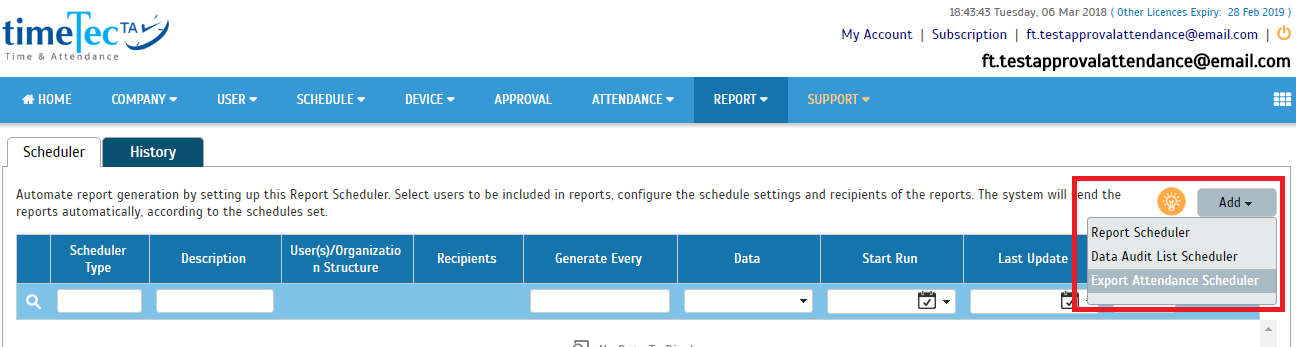
v) Export Attendance to Payroll
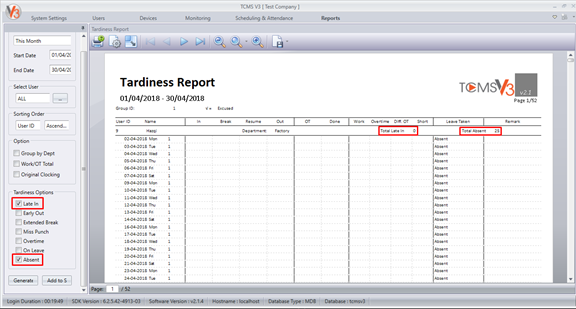
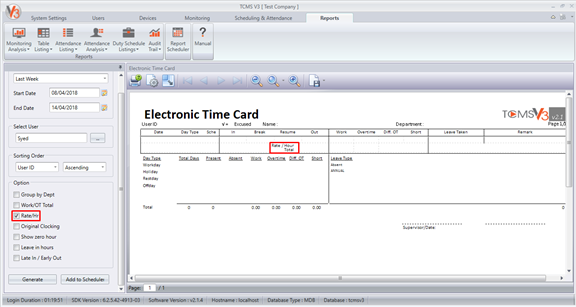
 Report - Electronic Time Card
i) Approved
When generating the Electronic Time Card report for users on the date that the attendance has been approved, there will be an Approved stamp on the report to prove that the attendance report has been checked and approved.

ii) Pending Approval


0 comments:
Have any questions or inquiries about FingerTec? Drop your input here.