Introduction
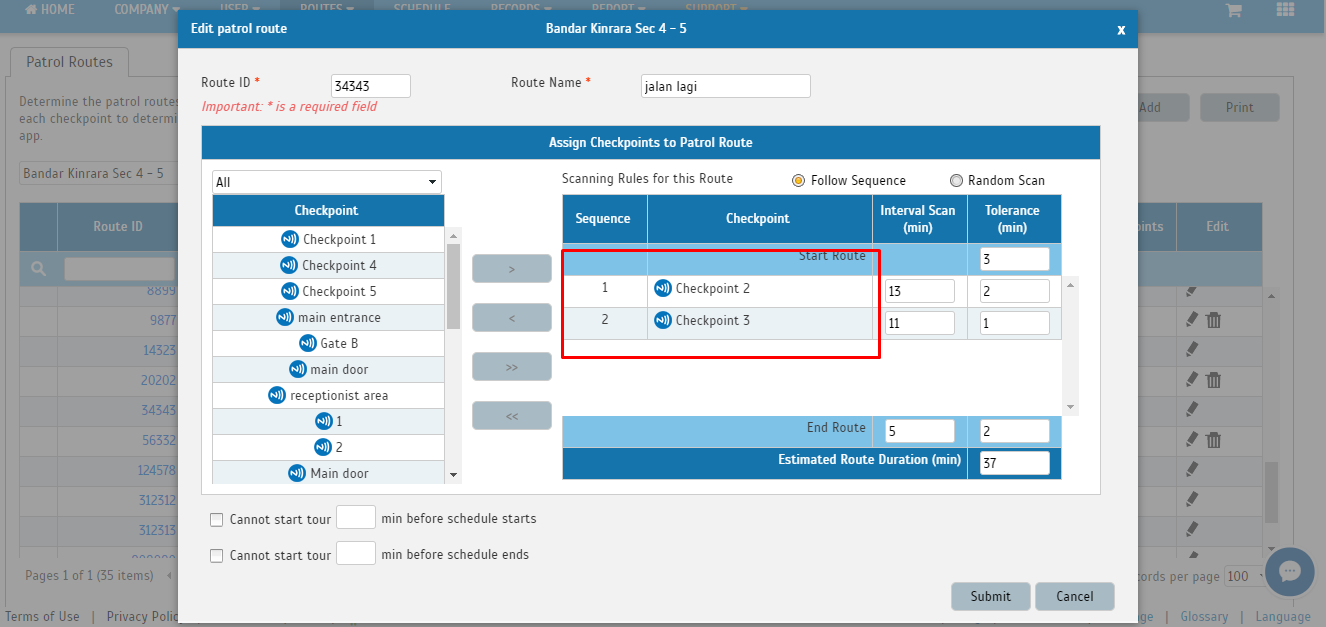
TimeTec Patrol offers two modes of scanning rules for patrol routes, by following a sequence or by random scanning.
1) Follow Sequence mode; the patrol session has to follow the exact sequence of each checkpoint as being set up in the Patrol Route.
2) Random Scan mode, guards can scan at any checkpoints without having to follow any specific sequence.
Having a faulty checkpoint tag in the middle of the patrol route will unable the guard to proceed to the next checkpoint, and the patrol session will get stuck at the faulty checkpoint tag. What do you do in this case?
Process
1. The faulty checkpoint cannot be removed from the Patrol Route setting if the Patrol Route has been used in the Schedule.
2. Since the checkpoint cannot be removed from Patrol Route Settings, go to Routes > Locations & Checkpoints to disable the checkpoint from there.3. Click on the Checkpoint to be removed. In the right pane, click on Edit.
4. Change the checkpoint status to inactive and Save.5. Go to Routes > Patrol Routes to check on the route settings. You will notice that the checkpoint that is set as inactive in the above step will no longer appear in the Patrol Route setting.
6. In the TimeTec Patrol mobile app, guards can tap on Start Button to proceed.
7. Tap on the Time Range.
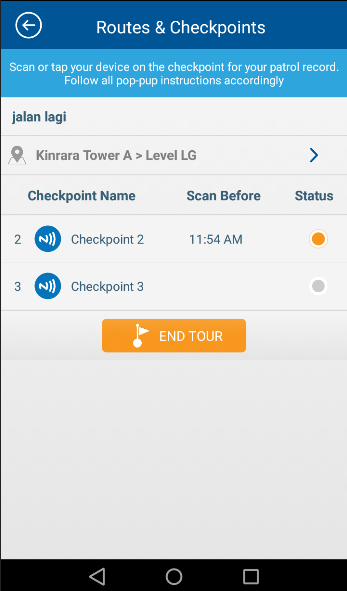
8. When viewing a list of checkpoints, you will see that the disabled checkpoint will no longer be shown in the list and therefore, the guard can scan at all available checkpoints even if in the follow sequence scanning mode.
Note: If some of the screenshots or steps viewed here are different from the ones in the current system, this is due to our continuous effort to improve our system from time to time. Please notify us at info@fingertec.com, we will update it as soon as possible.
Introduction
When guards are repeatedly tardy in scanning the checkpoints, the routines are disrupted. To help Admins assess whether there is a problem that needs resolving, guards need to provide reasons for their tardiness whenever they scan the checkpoint. Following that, Admins can then refer to the Monitoring page to see the tardiness reasons that have been provided.
Process
A. TimeTec Patrol Website
1. Go to Routes > Click Tardiness Reason.
2. By default, the Tardiness Reason settings is disabled (No). Admin may edit the settings by clicking on the Edit button.
3. There are 3 options Admin can set for tardiness reason :
I. No (Default Setting)
- Guards do not need to provide any tardiness reason.
II. Yes (Optional)
- Guards can choose whether they want to provide tardiness reason or not.
III. Yes (Mandatory)
- Compulsory for guards to provide a tardiness reason.
4. There are 3 default reasons provided in all accounts
I. Connection Failed
II. Forgot to Scan
III. Locate to the wrong checkpoint
5. Admin able to Add new tardiness reason by clicking on ‘’ + “ symbol.6. Admin can check Tardiness in the Monitoring Page.
B. TimeTec Patrol App
Guards need to provide reasons for their tardiness whenever they scan the checkpoint using the app.
Note: If some of the screenshots or steps viewed here are different from the ones in the current system, this is due to our continuous effort to improve our system from time to time. Please notify us at info@timeteccloud.com, we will update it as soon as possible.
Introduction
In TimeTec Patrol, the Admin can add additional checking or tasks to be conducted at each checkpoint to ensure the guards pay extra attention when patrolling. These tasks can be controlled and customized by the Admin. For example, if a guard needs to check and verify whether a gate is locked or not, the question for this action can be set to appear after the guard has scanned at the checkpoint.
In this article, we will guide you on how to set and assign the task for each patrol checkpoint in TimeTec Patrol.
Process
Login to TimeTec Patrol, click Routes > choose Location & Checkpoints
Click on one of the checkpoint > click Edit (pencil icon)
You may choose the type of action you wish to set for that checkpoint.
Display message –You may key in an important message as a remark or add a note for the guard. The message will be displayed after the checkpoint has been scanned. After configuration is completed, you may click save to proceed.
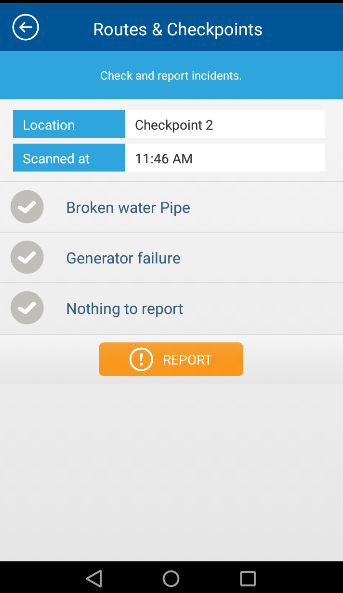
When the guard scans at the checkpoint, the message will be displayed as below.After the guard has scanned the checkpoint, the incident lists will be displayed for the guards to select and report.
Report the correct value – Here you may set up a question for the guards to answer. Click Save to confirm the setting.
When the guard scans at the checkpoint, he will then have to insert the value as what is being asked in the question.
Answer Yes or No – A Close-ended question can be set up as well. Click Save to confirm the setting.
When the guard scans at the checkpoint, there will be a Yes or No question following the scanning.
Prompt guard for remarks – When the guard arrives at the checkpoint for a scan, the guard must place a remark before continuing patrolling.
For a checkpoint that has been set to prompt guards for remarks, the guard will be required to insert remarks after scanning at the checkpoint.
As above, an action can be established for each checkpoint. The guard must complete this action in order to fulfill the patrolling requirement. Changes of action can be adjusted or amended.
Note: If some of the screenshots or steps viewed here are different from the ones in the current system, this is due to our continuous effort to improve our system from time to time. Please notify us at info@timeteccloud.com, we will update it as soon as possible.
Introduction
Patrol checkpoints are of the utmost importance when it comes to executing security. You will need to identify the checkpoints needed for the guards to conduct scheduled patrolling on a daily basis to ensure the premises’ protection is well-maintained. This is also to guarantee the patrolling route is organized and guards will give extra focus on the areas that are marked significant.
Process
1. Login to TimeTec Patrol > Click Routes > Choose Location & Checkpoints
2. Right-click on the patrol location > Click Add New Building
3. A new column will appear. Fill up the building name > Click Save
4. You can include the address by clicking the edit ‘pencil icon’
5. Now, add a patrol checkpoint. Right-click at building > Choose Add New Floor
6. A new column will appear. Fill up and click Save.
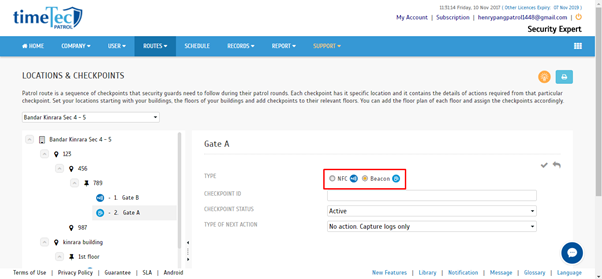
7. If there are only several checkpoints within the building, right click and select add NFC Checkpoint or add Beacon checkpoint. This shall be added according to which gadget you chose (e.g. NFC or Beacon)
8. If there are more than one checkpoint which you would like to add for patrolling, click on the add checkpoint button.
9. At the new pop up page, you can select NFC or Beacon depending on the method you have chosen. You will need to fill up the checkpoint names at each of the columns.
10. After the configuration is completed, click on the submit button to proceed.
11. The checkpoint which you have just added will be inserted automatically and will be ready to enroll as checkpoint(s).
Note: If some of the screenshots or steps viewed here are different from the ones in the current system, this is due to our continuous effort to improve our system from time to time. Please notify us at
info@timeteccloud.com, we will update it as soon as possible.