Find the latest technical tips at our new technical portal site
Introduction
Under some circumstances, you might bump into several issues with your computer till you need to reinstall the software into another PC, and require restoring the old backup database. At times, some users experience a blank device or user after the restoration. In this article we will guide you on how resolve blank user or device tab after restoring an old Ingress MySQL database in a new PC
1) Install the latest Ingress software and restore the Ingress MySQL database by using SQLYog
2) After software login, you might find the user and device tab is blank.
Thus, you may follow the steps given below to resolve the issue
A) Please close all application
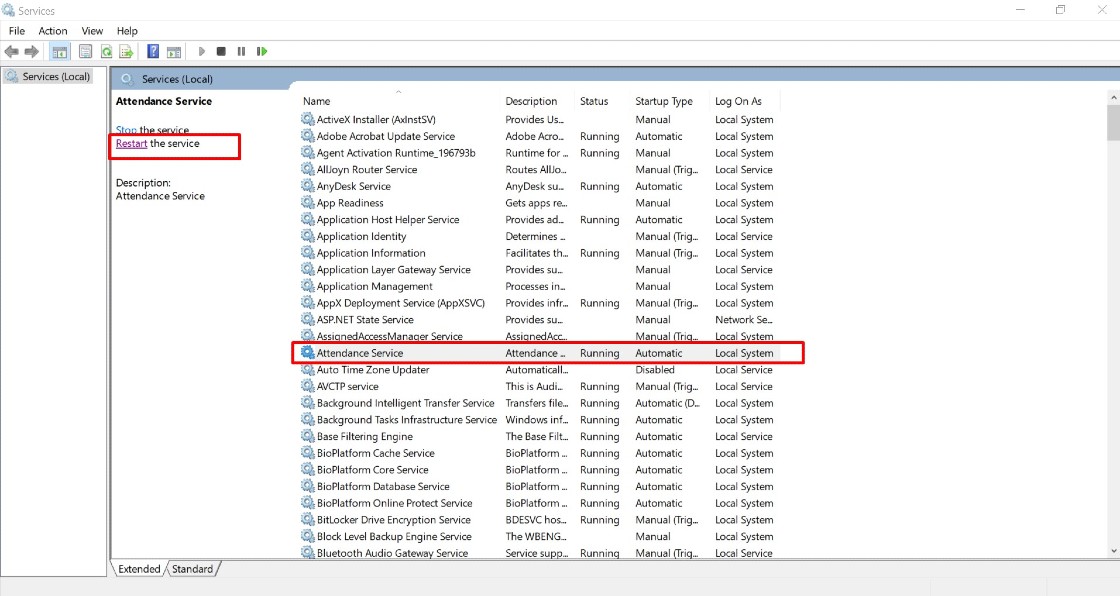
B) Restart MySQL, Ingress Service, Ingress WDMS Service and Attendance Service (Task Manager > Services > restart all the respective services )
 C) Run Ingress DB Installer
 FingerTec Ingress folder (Ingress server folder in C drive ) > Ingress DB Installer > Key In MySQL > Test Connection > Update Connection > Reset Upgrade > DB Diagnostic > DB Maintenance > Upgrade Database
4) Open Ingress > login. You should be able to view the users and devices in the Ingress software.Note: If some of the screenshots or steps viewed here are different from the ones in the current system, this is due to our continuous effort to improve our system from time to time. Please notify us at info@timeteccloud.com, we will update it as soon as possible.
Introduction
FingerTec offers two types of electric door strike: 210MF or 210M Door Strike that can be used with our access control devices. Electric door strike replaces the fixed strike face-plate which is often used with a latch-bar (also known as a keeper). Like a fixed strike, it normally presents a ramp surface to the locking latch allowing the door to close and latch just like a fixed strike would. However, an electric strike's ramp surface can, upon command, pivot out of the way of the latch allowing the door to be pushed open (from the outside) without the latch being retracted (that is, without any operation of the knob) or while activated the knob or lever can be turned to allow access from the secured area.
210MF (Fail-safe): Also known as the fail-open. When the electric current is applied to the strike, it will lock up the door. It operates just like the EM lock mechanism and if there is a power failure, the strike will release the door. The fail-safe unit operates on direct current (DC) with the same function with EM lock, the connection with the FingerTec device is almost the same with EM lock connection.
210 M (Fail-secure): Also known as the fail-lock or non-fail safe. When the electric current is applied to the strike, it will release the door. In this configuration, the strike would remain locked in a power failure. However the knob can still be used to open the door from the inside to allow access from the secure side. These units can be powered by alternating current, which will cause the unit to buzz, or DC power, which offers silent operation, except for a "click" while the unit releases. The device connections are different with the EM Lock where it only unlock when current is applied.
 The 210MF or 210M Door Strike
 The strike and monitoring contact (where it can be used as indicator for door open or close)
 12VDC Power Supply Input terminal
 Monitoring contact terminal
 210 MF strike condition where no power supply applied
 210 M strike condition where no power supply applied
 210 M (Fail-secure) Connection with FingerTec device
Note: If some of the screenshots or steps viewed here are different from the ones in the current system, this is due to our continuous effort to improve our system from time to time. Please notify us at info@timeteccloud.com, we will update it as soon as possible.
Introduction
TimeTec offers a geofence feature which limits the GPS clocking within a preset location range. Due to the restriction, some staff might not be able to clock their attendance when they are outside of the permitted area. In TimeTec, the Admin can set a setting which can allow the staff to request for clocking outside of the permitted area, which then will need approval from the superior. Here we will guide you on how to request and approve out of area via TimeTec HR app.
Process
1. When a user wants to clock outside of the allowed Geofence area, a pop up notification will appear on the user phone app after the user clicks on the GPS icon.
2. You may check the View Map setting, to check for your current location and allowed location for clocking.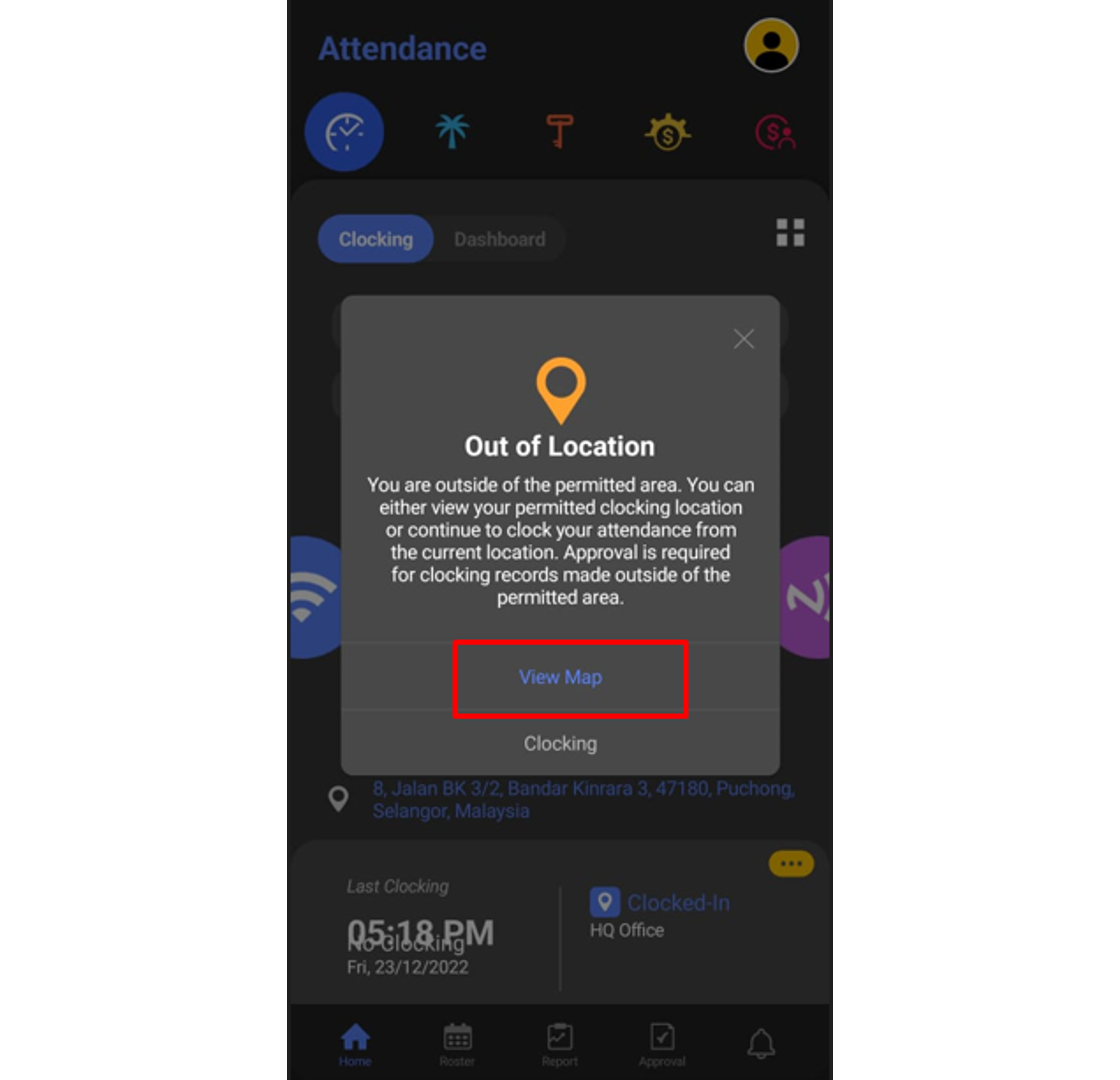
Location A - User current location
Location B - User’s allowed clocking location based on Geofence group in the system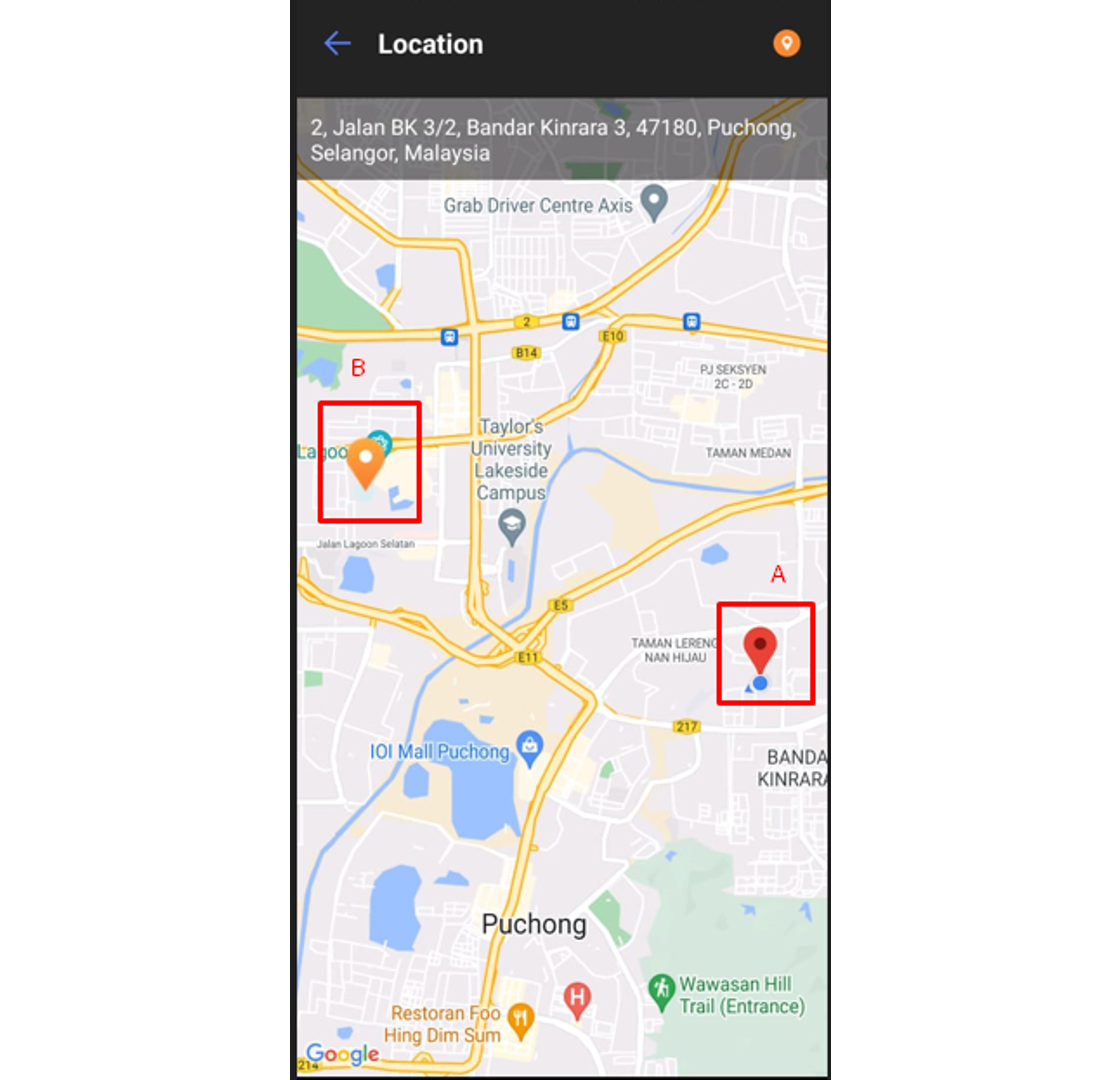
3. To apply for Out of Area Clocking, click on the Clocking button.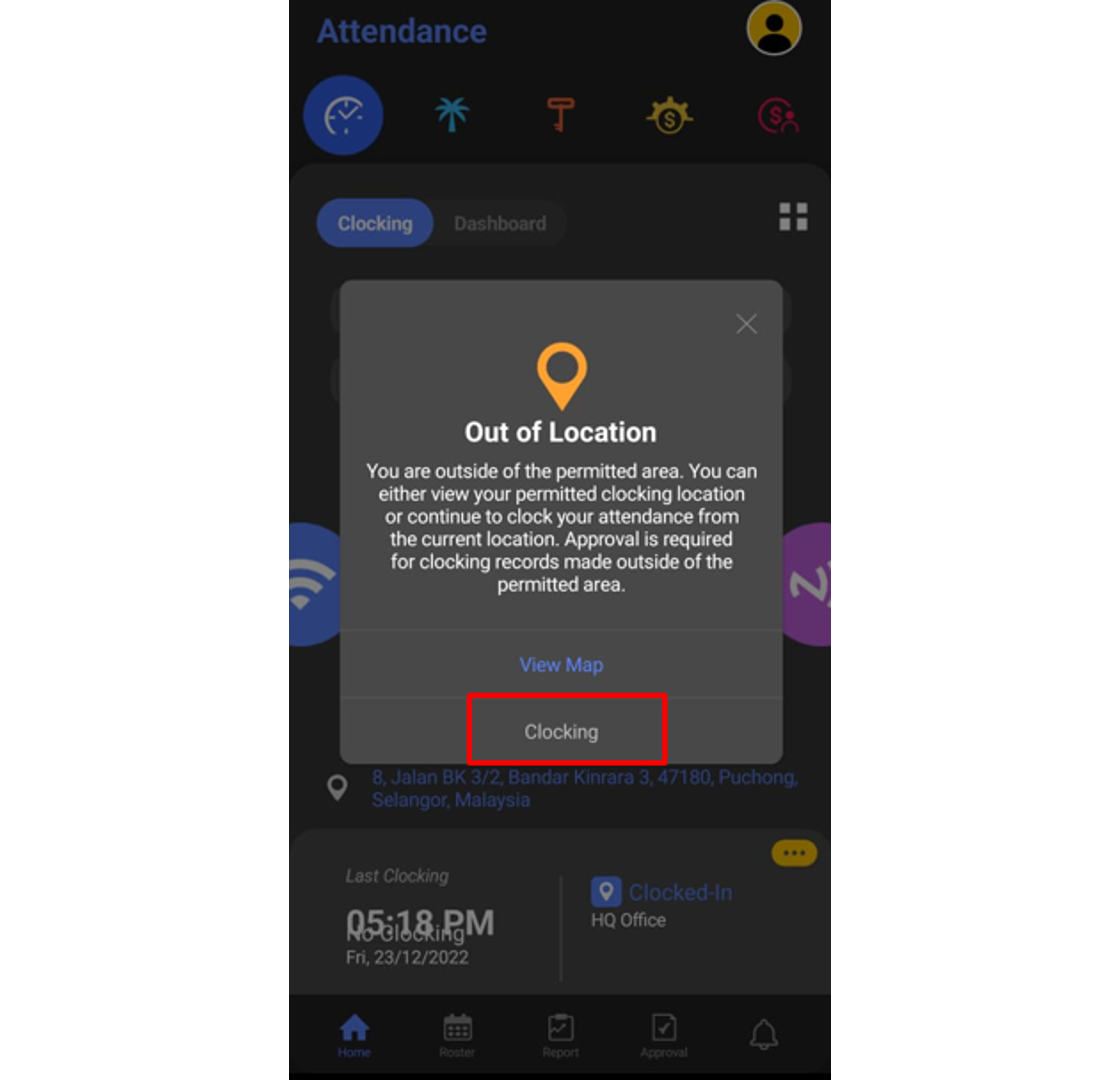
4. Fill up all the necessary information for each box and click Submit.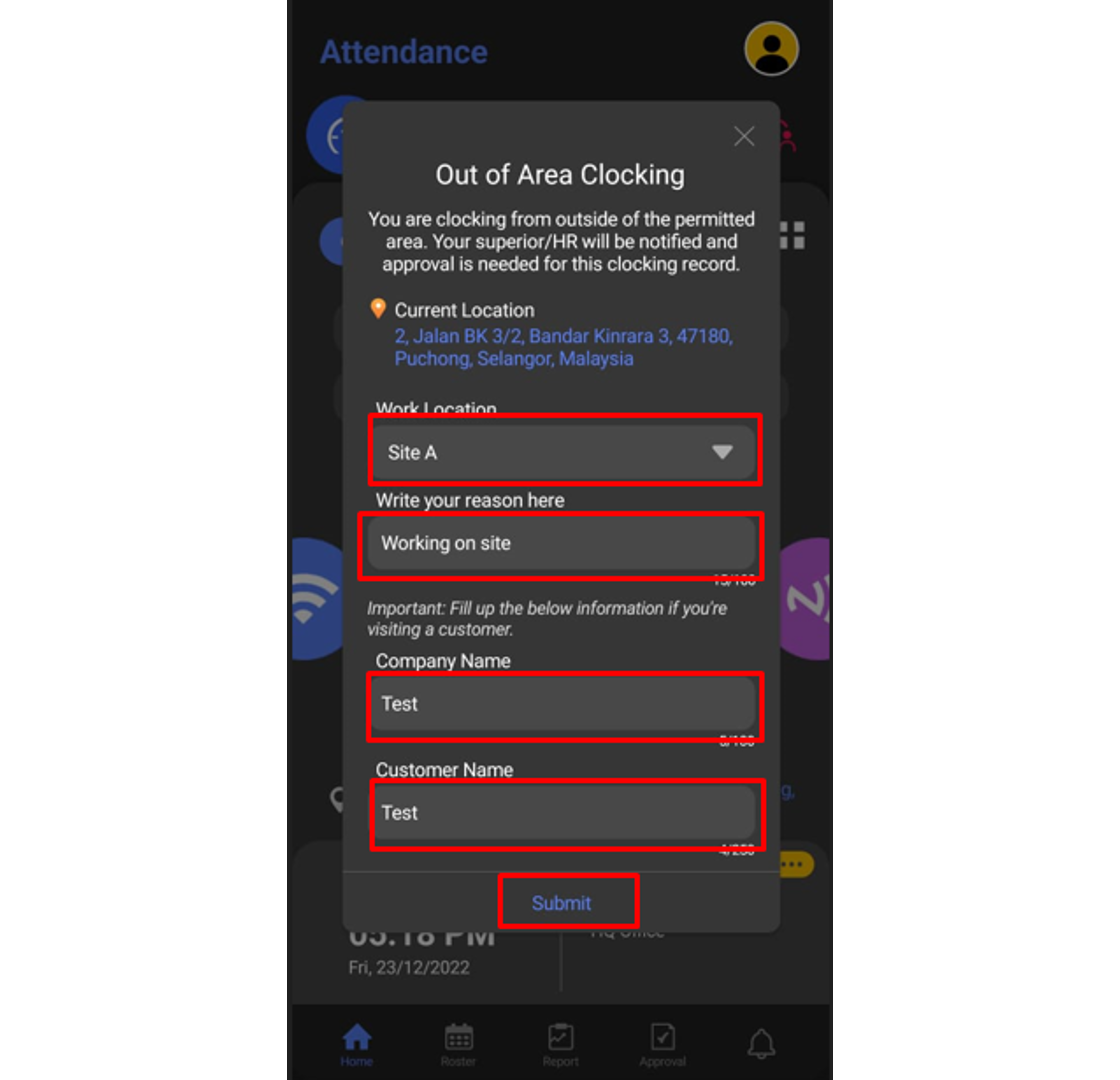
5. To check on your request status, click on the Features button.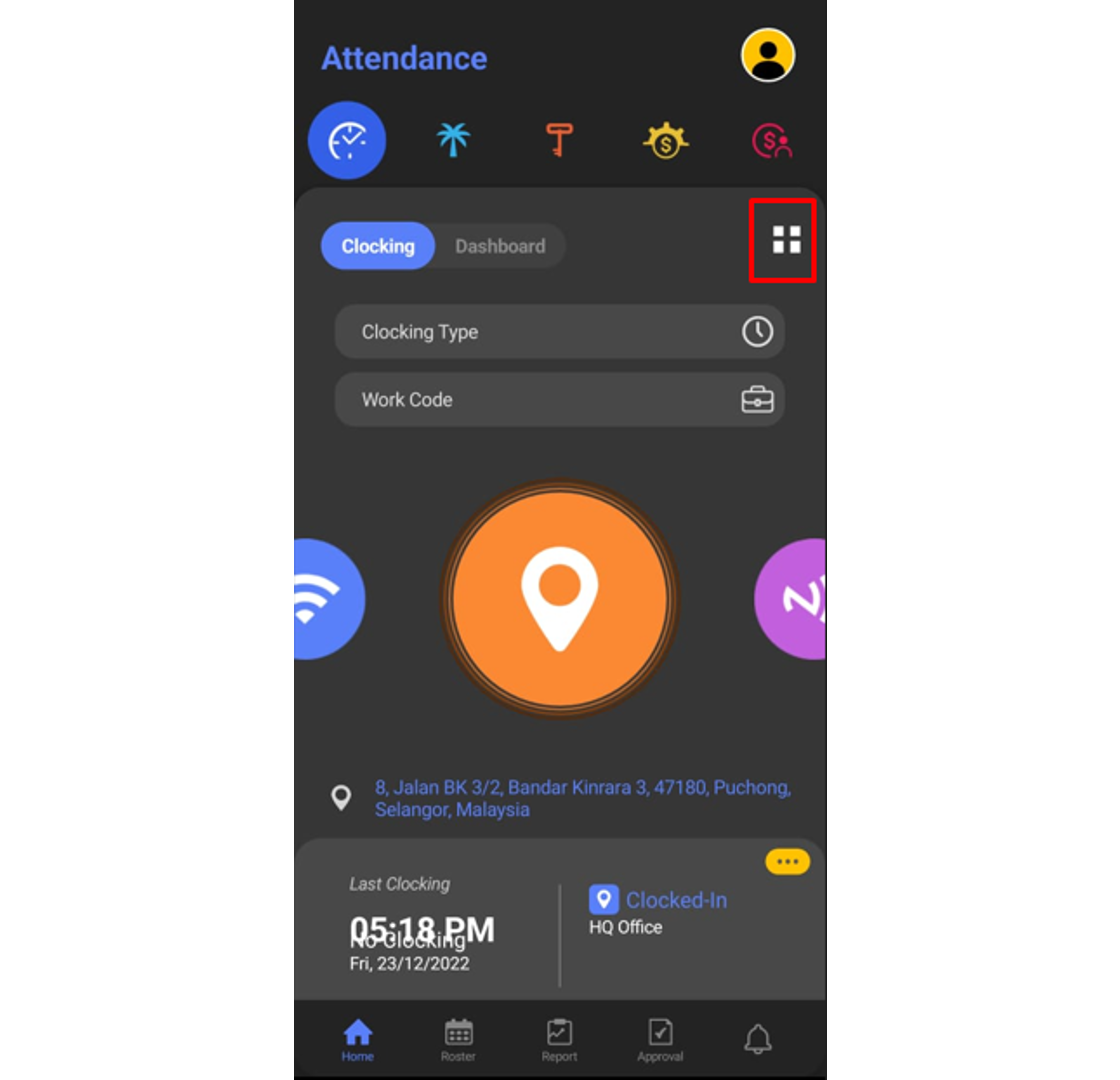
6. At the pop-up window, choose Out of Area Clocking.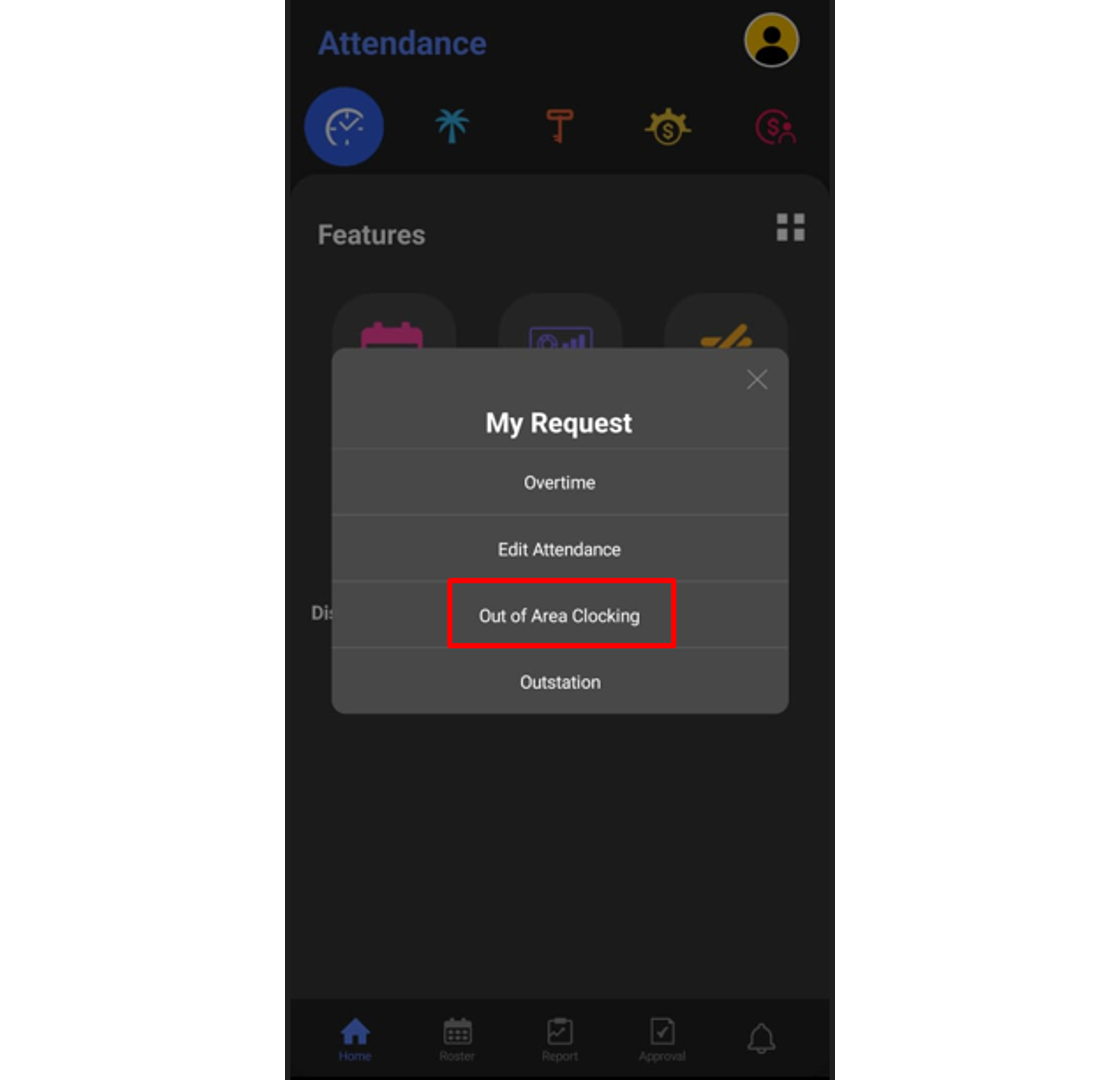
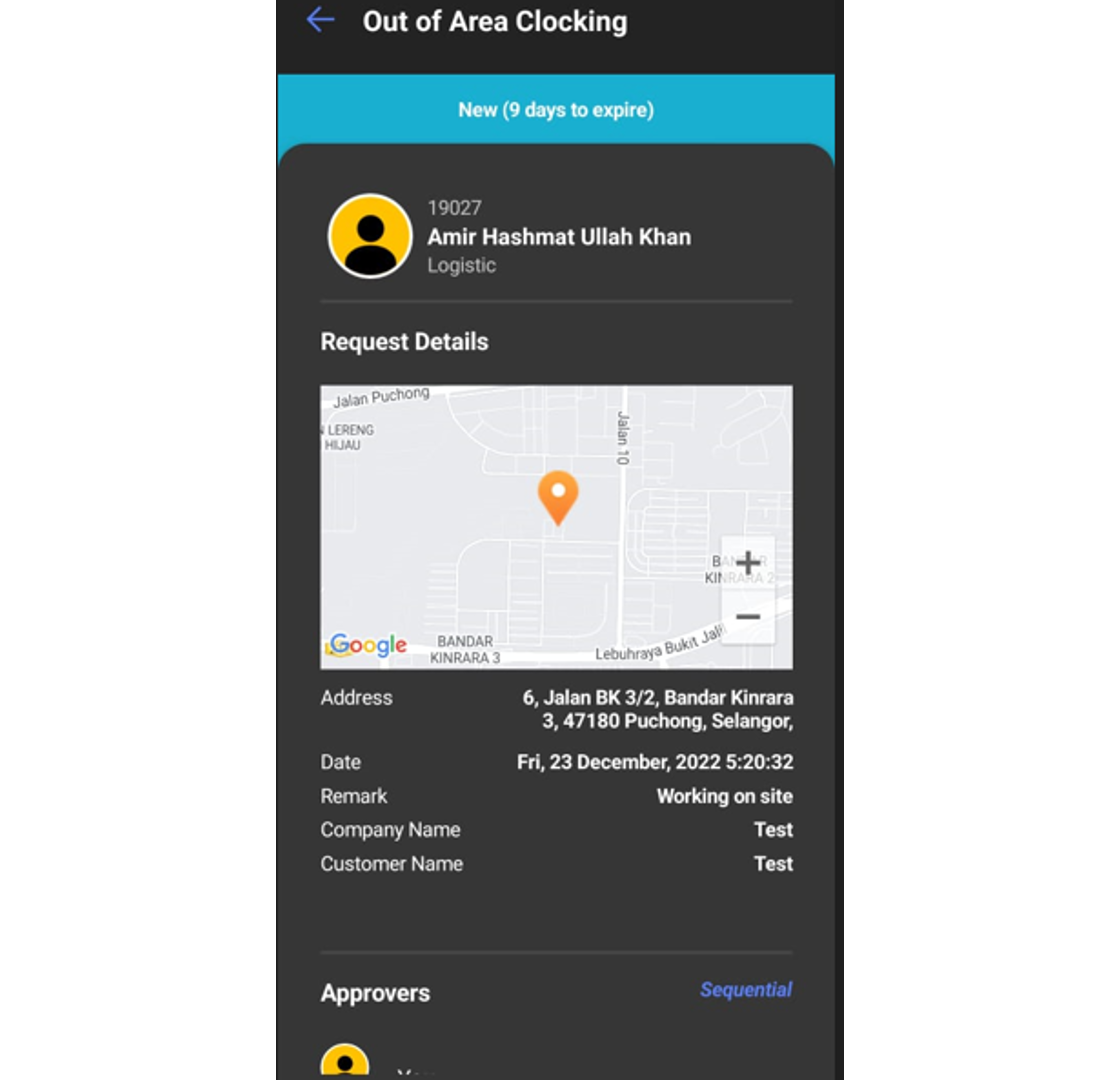
7. You can view the pending requests in this section.
 B. Approval for Out of Area Clocking request
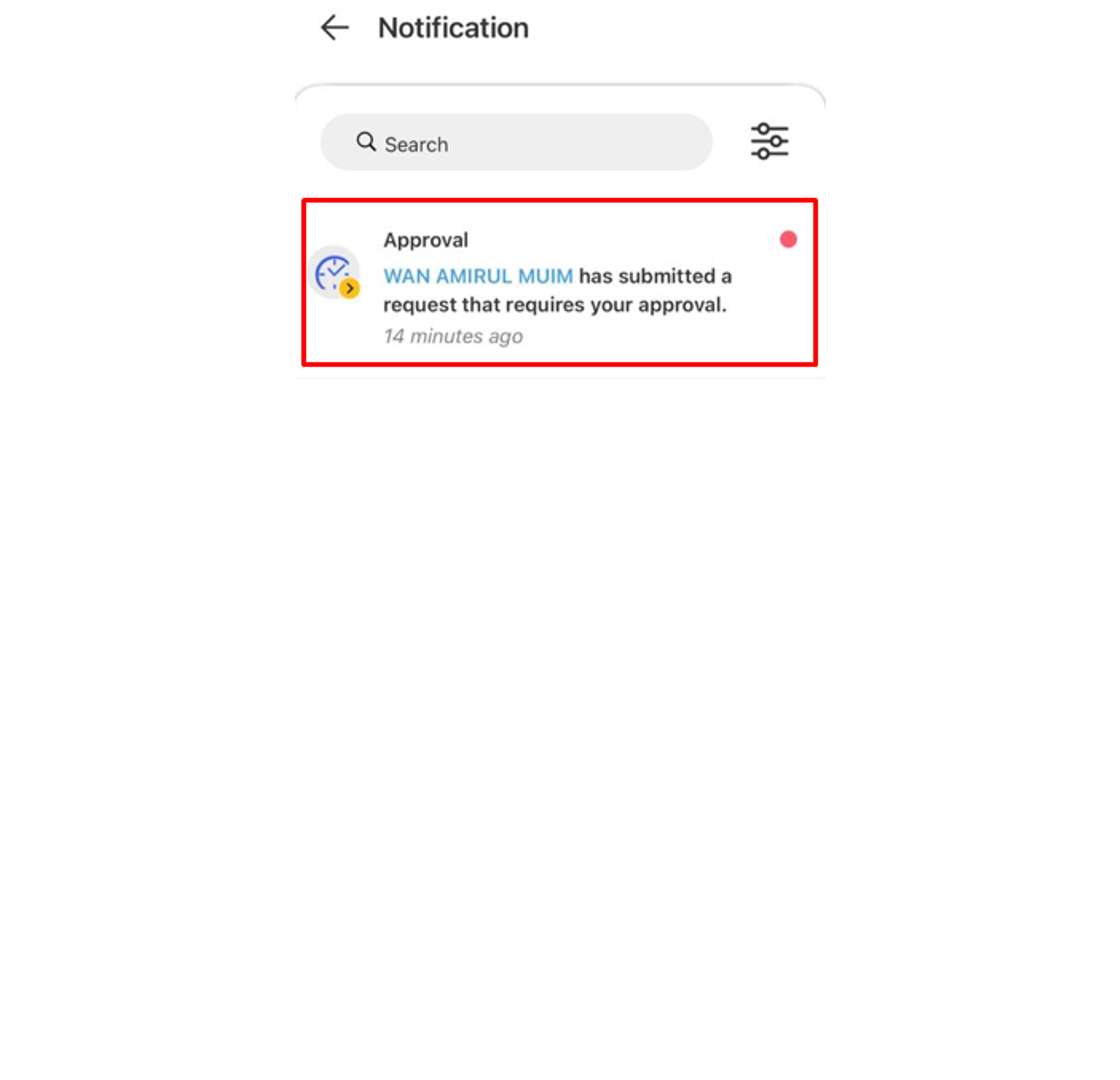
1. Approver can check any request submitted by their staff under the notification tab.
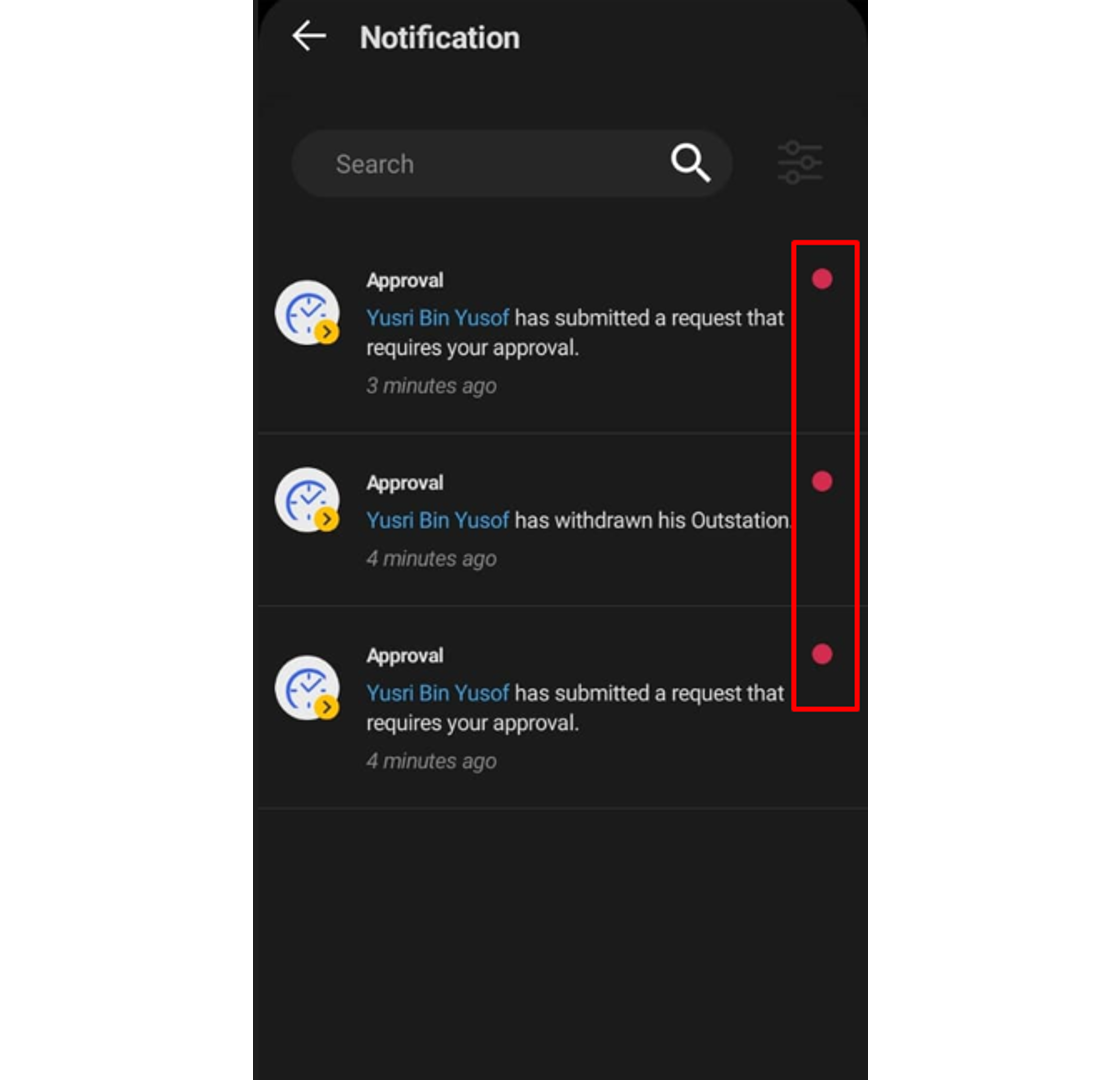 2. The approver can click at the Approval tab to view all staff requests and the status of each request. Click on the pending request (blue tab) to view the request that needs an approver to response.
3. The approver can fill up the comment section and response to the request (Approve or Reject).
4. Once Approve button is clicked, the request tab will change to green color.
Note: If some of the screenshots or steps viewed here are different from the ones in the current system, this is due to our continuous effort to improve our system from time to time. Please notify us at info@timeteccloud.com, we will update it as soon as possible.
Introduction
If you are a TimeTec HR mobile user and you need to request Admin to edit your attendance, what should you do? You can do this directly via the TimeTec HR App through an Approval for Edit Attendance function. This option will allow users to edit their attendance data and this step would require superiors’ approval.
There are two ways to request attendance edits, one is through a web browser and another is through TimeTec HR App. Let’s look at the steps to do it in TimeTec HR App.
Process
A. Request Edit Attendance
1. Login to Timetec HR App > Click on the feature button
2. Then click on the My Request icon
3. On the Pop-up notification, you may select Edit Attendance
4. Click on the + symbol to add a new Edit Attendance Request
5. Select the date to edit, fill in the correct clocking details and provide a remark. Click on the Send button once the information is complete.
6. Once the request is successfully submitted, a new pending request will appear under the Edit Attendance request.
7. Users can check the status of their request under the Approval tab whether it is Approved or Rejected.
 B. Approve Edit Attendance
1. As an Approver you will receive a notification for every request made by staff. Go to the Notification tab to view any of the new requests and select it to view its details. 2. Click the Approval tab to view all staff requests and the status of each request done by the staff. Click on the pending request (blue tab) which needs an approver response.
3. The Approver also will be able to fill up the comment section and response to the request whether to tap the Approve or Reject button. Select ‘Only disclose to approvers’ to limit the comment view to approvers only
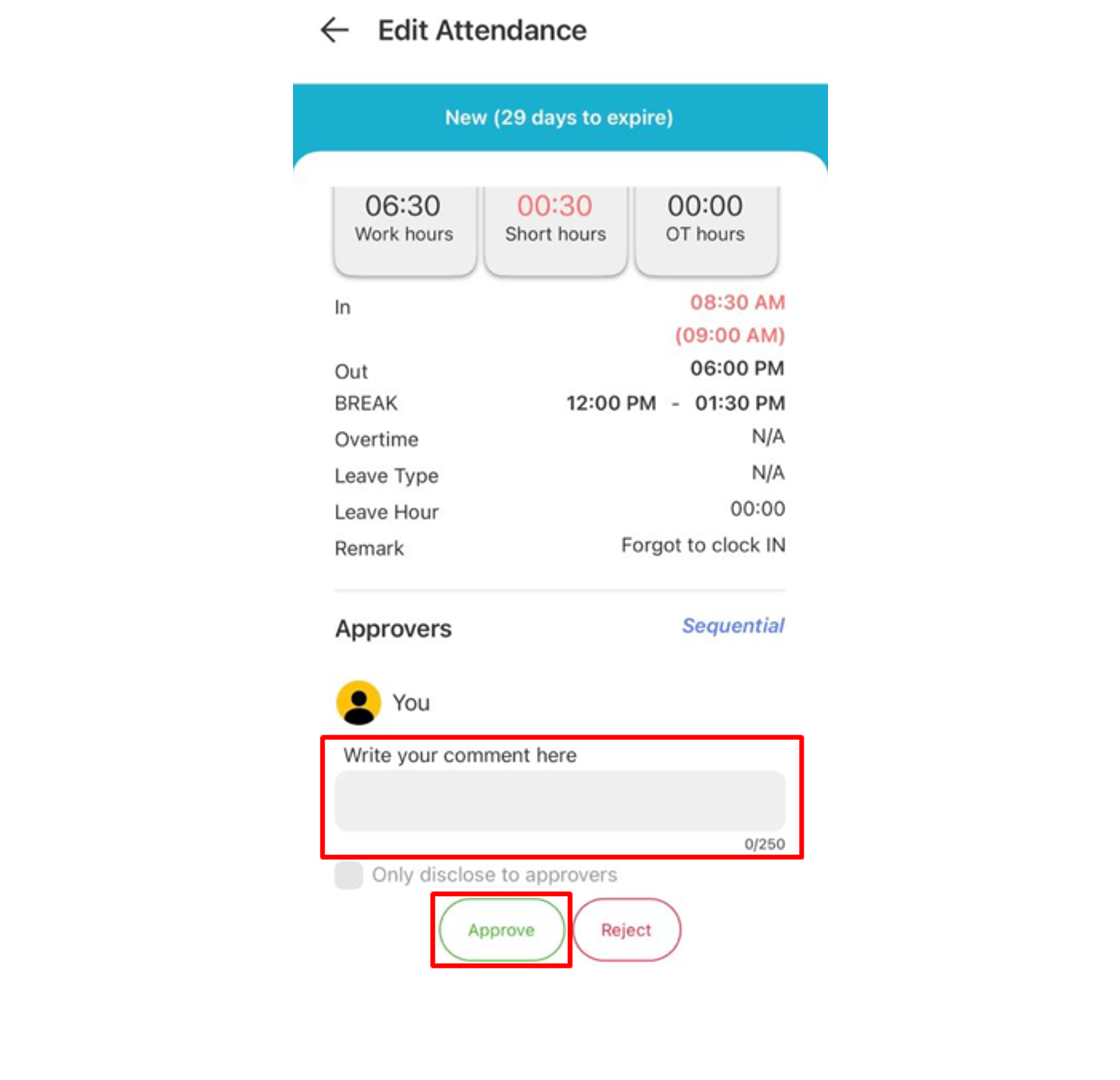
4. Any Approved request will change the Tab colour to Green.

Note: If some of the screenshots or steps viewed here are different from the ones in the current system, this is due to our continuous effort to improve our system from time to time. Please notify us at info@timeteccloud.com, we will update it as soon as possible.


 C) Run Ingress DB Installer


 The 210MF or 210M Door Strike
 The strike and monitoring contact (where it can be used as indicator for door open or close)
 12VDC Power Supply Input terminal
 Monitoring contact terminal
 210 MF strike condition where no power supply applied
 210 M strike condition where no power supply applied
 210 M (Fail-secure) Connection with FingerTec device


 Import User and Attendance Record with USB (.dat File) from the Folder Path
 Understand How To Troubleshoot Connection Error When Using TCP/IP
 Steps To Setup Ingress Server And Ingress Client
 5 Common Errors in TCMS V3/ Ingress Software and How to Fix It
 TimeTec TA Mobile App - Personal Clocking
 Invalid Time Period Error in Face ID5 for New Registered User
 15 TCMS V3 Most Common Technical Questions Answered
 How to Troubleshoot Approval Request Submission Problems for TimeTec TA
 Unable to Download Transaction Log/User Data from FMM Terminals Via USB
 Password Settings Login And Administrator for TCMS V2

