TimeTec TA is a cloud-based solution introduced by TimeTec to handle workforce management and time attendance of an organization. Other than mobile and web clocking, FingerTec terminal is one of the other clocking option as well and as such, includes face terminals like Face ID 4.
However, as of the moment, users are not allowed to directly transfer face templates from one device to another via TimeTec TA. In other words, users will need to go through FingerTec Windows-based software such as Ingress to act as a medium for transferring face templates from Face ID terminal to another platform.
Learn how to manage face templates using FingerTec Ingress or TCMS V3 software & USB drive from this article. Below are the steps on how to transfer user’s face template from Terminal A to Terminal B:
1. Install FingerTec Ingress Microsoft Access or TCMS V3. Skip this step if you already have Ingress/TCMS V3 software installed. Download link can be found under this page : http://www.fingertec.com/software/
2. From Terminal A, insert a USB drive to the USB port. Go to the Menu > USB > Download User, and wait for the message download successful.
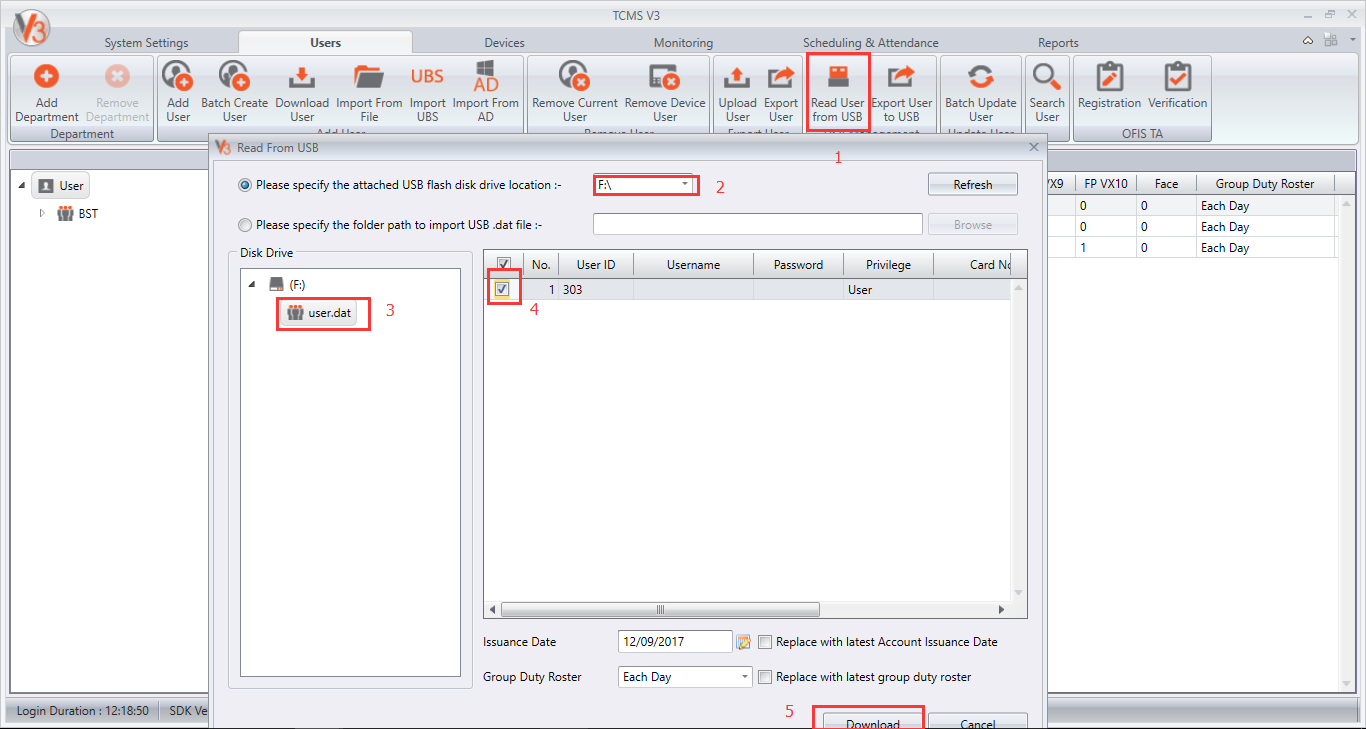
3. Insert the USB drive to your PC, and launch TCMS V3 or Ingress. Go to USER tab and from there go to Read User from USB. Choose the users that you want to transfer to Terminal B, and click download to the software. Refer to screenshot shown below for further guidance.
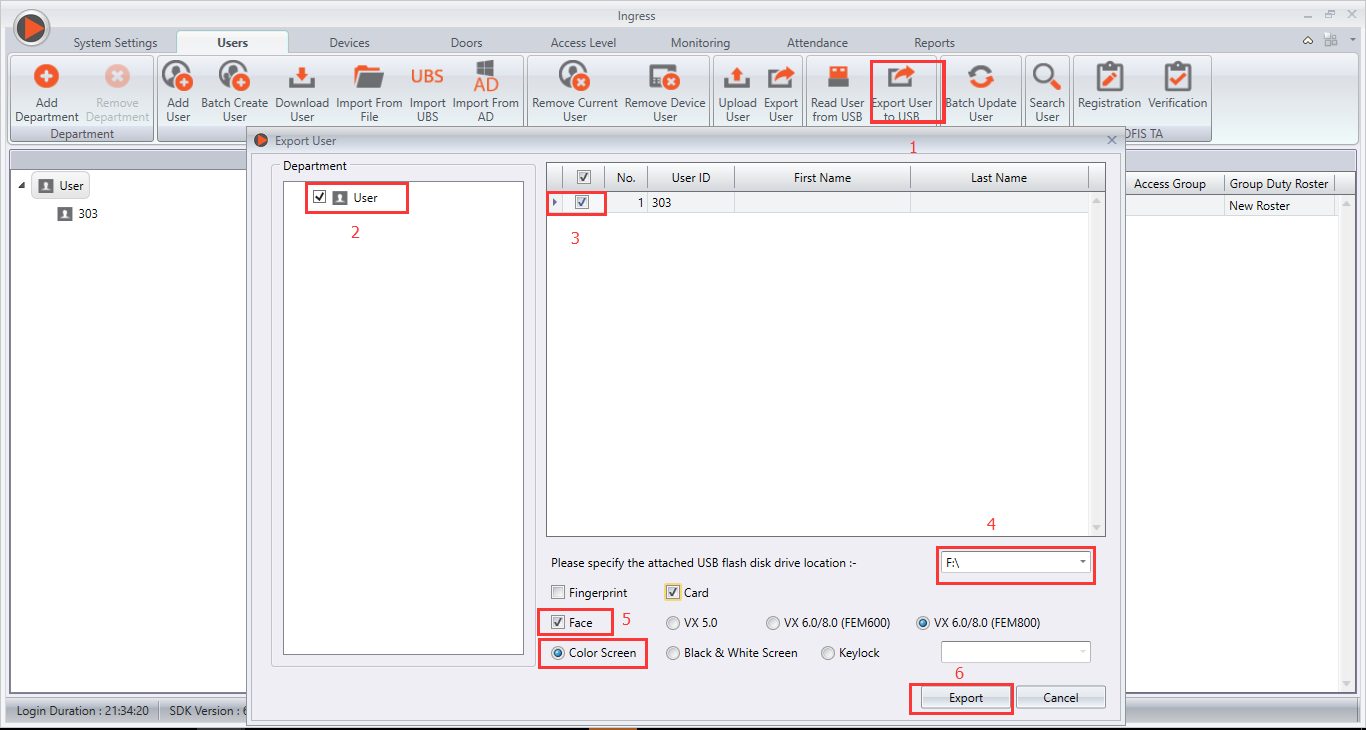
4. Next, go to Export User to USB and select users that you want to upload into the terminal, and click export to the USB drive.
5. Insert the USB to Terminal B. Go to Menu > USB > Upload User. Wait for the upload successful message to appear.
Remark : However, please note that you may skip step 1, 3 & 4 if you are willing to upload all user’s information from Terminal A to Terminal B and directly continue to step 5.
All in all, the process is rather simple. However, do take note that if you are currently using TCMS V3 / Ingress, and want to transfer the user’s face templates from TCMS V3 / Ingress to FingerTec terminals, please ensure that the User ID within the software matches the User ID within TimeTec TA.
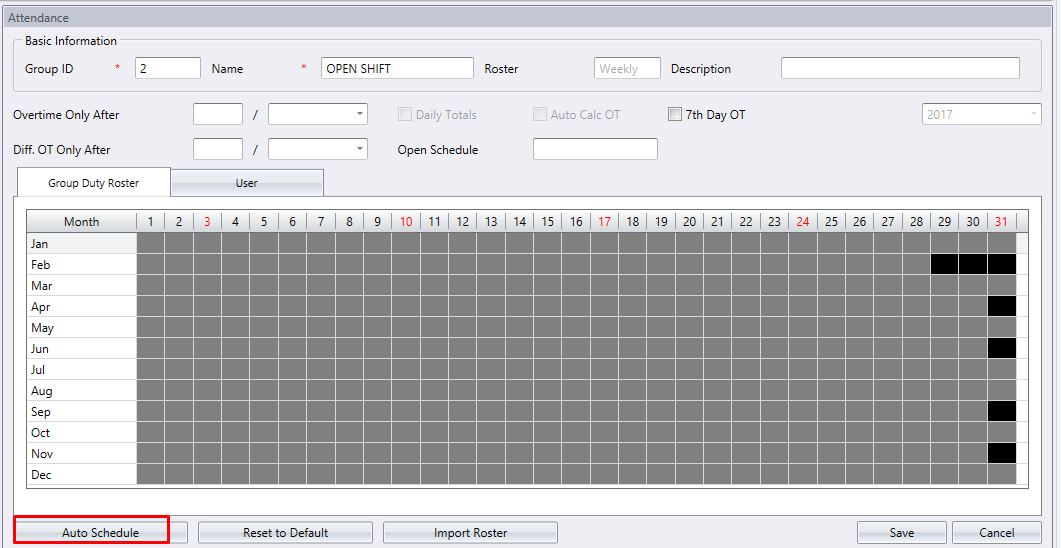
Introducing our latest feature in TimeTec TA: Terminal Automation. This feature is designed to ease user transfer between FingerTec terminals and TimeTec TA as well as ensuring that no user is left out from the system. Below are 2 functions that you can set in Terminal Automation feature:
A) Auto-create FingerTec Terminal User in TimeTec TA
Admins no longer have to download users from the terminal manually every time new users enroll into FingerTec terminal. Now according to the time set, the system will automatically create user profiles everyday if there are any new users detected in the terminal(s). As such, this function saves time and eases the company in monitoring and keeping the system updated.
The Process
1. Select the terminals that you want to enable for Terminal Automation
Go to Device > FingerTec Terminal. Click on the second tab - Terminal Automation. Enable the “List of terminals to auto sync or auto create users from” and click Select Terminal.
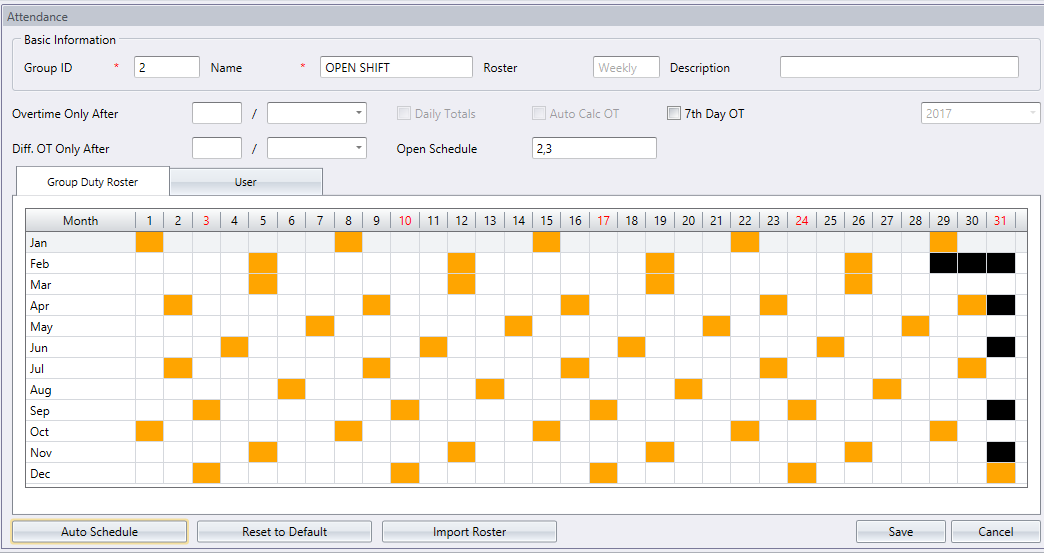
2. Set the timer for auto-download and create users into TimeTec TA
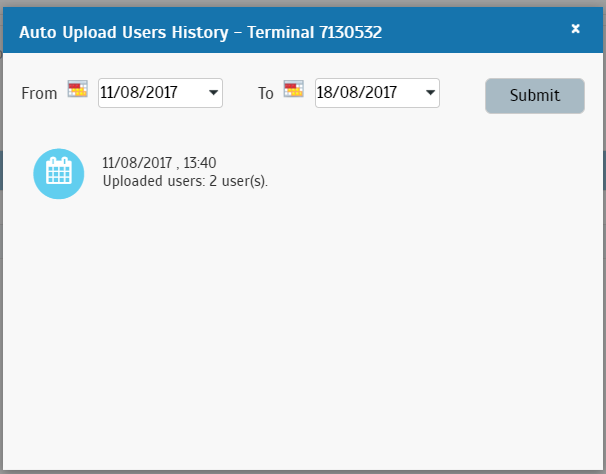
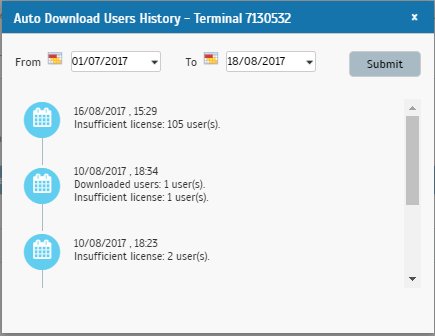
By default, the Auto-Create User is enabled so that newly enrolled users in the terminal will be automatically created in the system. On the other hand, you can also set up to 2 timers for the automation process and the system will do the automation process everyday according to the time set. Additionally, you can check the past events in the History column for monitoring purpose.
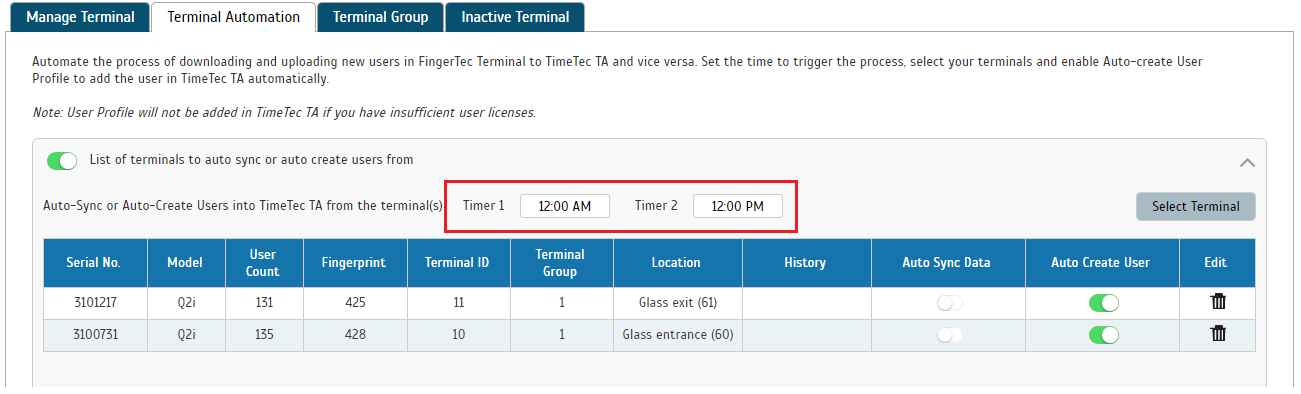
Note: System will not add users in TimeTec TA if you have insufficient user license.
B) Upload Users in TimeTec TA to FingerTec Terminal
Whenever users are created in TimeTec TA, the system will automatically upload newly created users to your FingerTec terminal(s).
The Process
Go to Device > FingerTec Terminal > Terminal Automation tab. Scroll down to the second section.
Enable “List of terminals to auto upload users to after create user in step above” and click Select Terminal.
Note: Automation process for uploading users can only be enabled when you have enabled the auto-sync option and set the sync timer at the first section.

There will be a pop up displaying all of your added FingerTec Terminals in TimeTec TA. Select the terminals and click Submit.
View all uploading activities at the History column.
You can delete the terminal(s) if you no longer require this automation process.
Introduction
Within many organization, a server PC is normally restricted to data storage while accessibility is only allowed for just a few personnels. For situations such as these, you can alleviate the problem by connecting Ingress software from another PC to the server PC and store all of your supposed attendance and access data into MySQL database. Please note that both PCs must be in the same network as the connection will be based on the network IP address.
Steps/ Procedure
First of all, to complete the setup, you will need to have:
1) Two different PC with the same network
2) MySQL version 5.5 (database)
3) SQLyog (to access the MySQL)
4) Ingress software
After obtaining the above requirement, you need to install the MySQL to the PC that you want to host the database. After installing MySQL, you need to install SQLyog because there are still few settings which needs to be carried out in order for the database to be accessible from other PC.
You can refer to this picture:
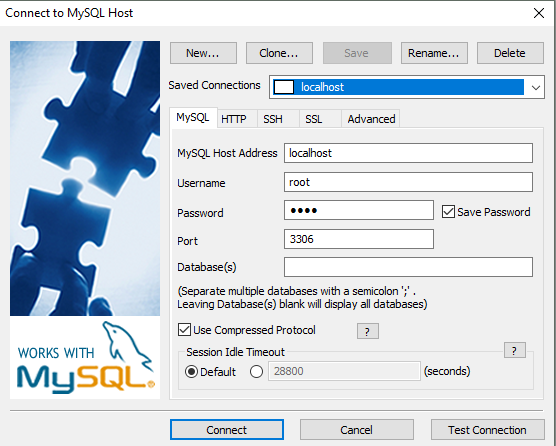
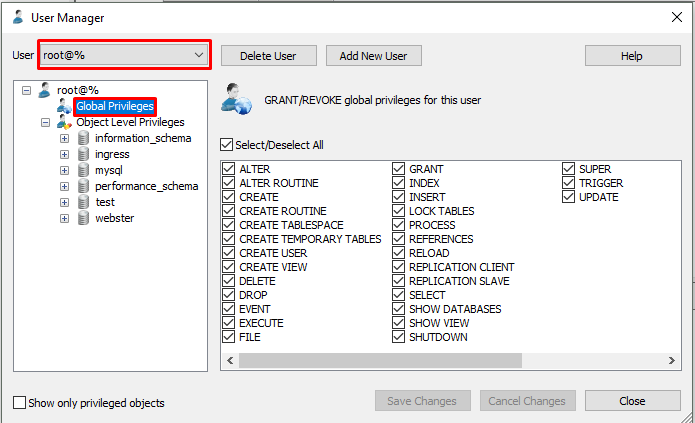
First, open the SQLyog and connect to the database.
Then go to User Manager.
From User Manager, select root@localhost and go to Global Privileges, then tick all the box from this page
Lastly for the PC that doesn’t contain Ingress software, you’ll need to create new user and assign the name as Ingress in order for the Ingress software to recognize this user.

Click Add New User
Username: ingress
Password: ingress
Host: %
Then click save
After that, just follow the previous procedure, select ingress@% and grant all the access for this user.
Click save.
Note: All of these steps need to be done at the server side.
The next steps are on How to connect Ingress software to the database that you have setup previously:
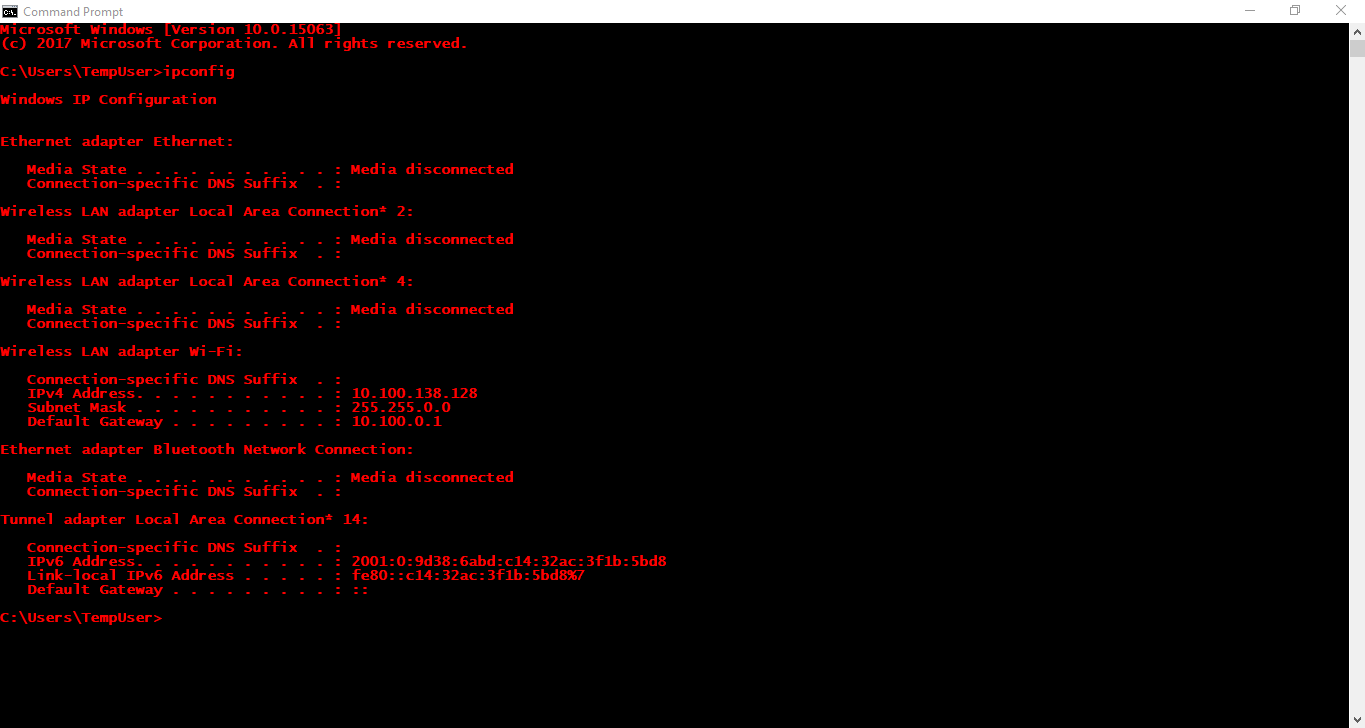
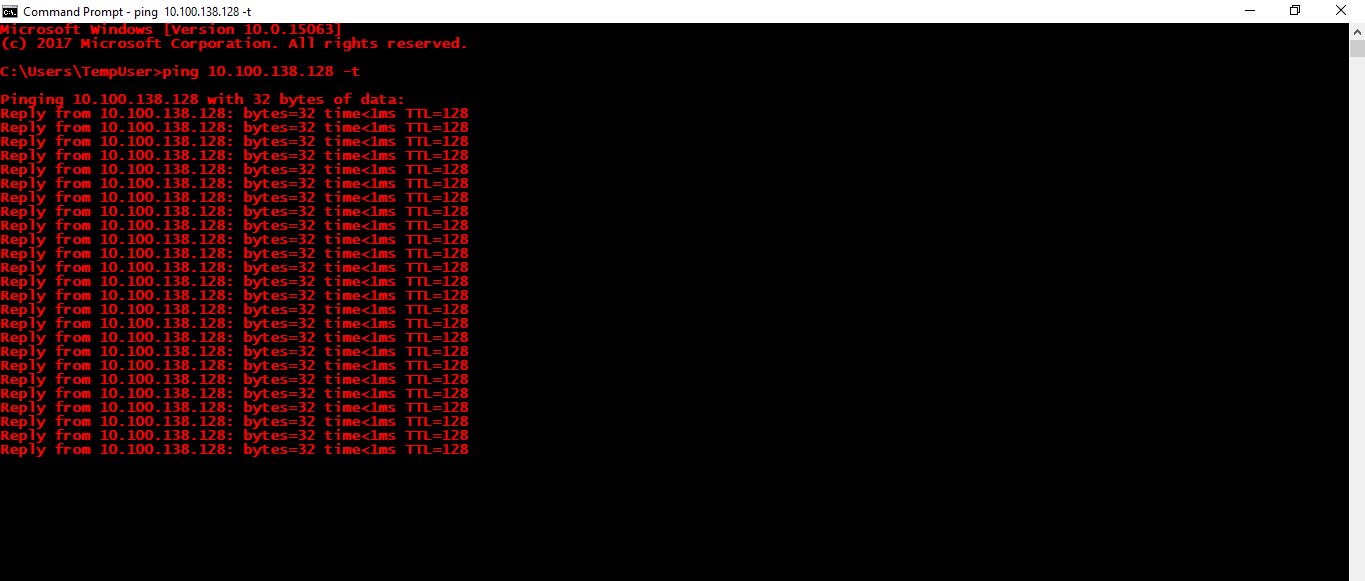
Firstly, you need to ensure that you can ping the IP address of the server (MySQL database location).
You can check the IP config of that PC before trying to ping that IP.
By receiving the reply from the other PC means that both PC can be accessed over the network.
For example, you can refer here:
After you’ve already confirm that the IP can be ping, you can now proceed to the next steps.
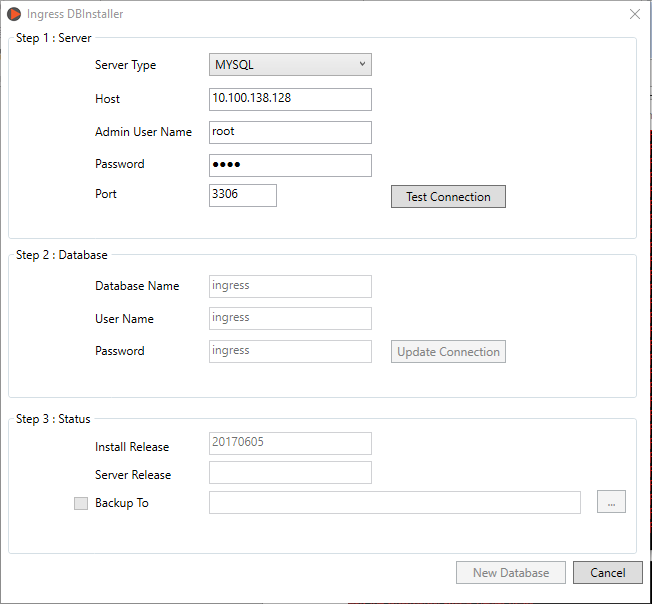
Install the Ingress software from this PC and after Installation, open the DB installer. This is the important part.
From Step 1, please insert the IP address of that server (the previous IP that you ping previously).
Admin user name: root
Password: root
The username and password should be based on what you have set from your MySQL installation, but for demonstration purpose, we only use ‘root’ during installation.
Then, proceed to Step 2 and 3.
Once you’ve already finished all the steps above, you can now open the Ingress software and login to it.
The default username: admin and default password: 123
After you entered the software, you can see the Database address showing the IP address of the server PC that you’ve setup previously.
If the IP address is still showing your PC’s IP address, this means that there are some incomplete steps carried out during the installation process. Please refer to the previous steps in order to troubleshoot the problem and ensure that you follow all the steps given.
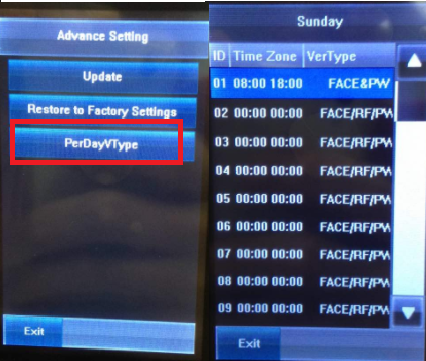
FingerTec have updated Face ID 3 firmware to include the much anticipated feature: Per Day Verification Type as well as an additional Verification type - Face or Password & Card.
Feature Description
With Per Day Verification, user can now set a specific verification style for a particular day and time. For example, the usual Monday to Friday can be customized to “Face Only” during office hours (8am – 5pm), and “Face & Card” for out of office hours (5pm – 8am) while Saturday and Sunday can be arranged to “Face & Card” for the whole day.
This feature is suitable for company who wishes to strengthen their security after working hours and during rest days.
Feature Settings
To enable this feature in Face ID 3, first you need to update the firmware to version 4835-01 or later. Then download a tool from the link below in order to enable this function.
The settings of this feature can be manually set in the device [System > Advance Setting > PerDayVType] as shown in the picture below.
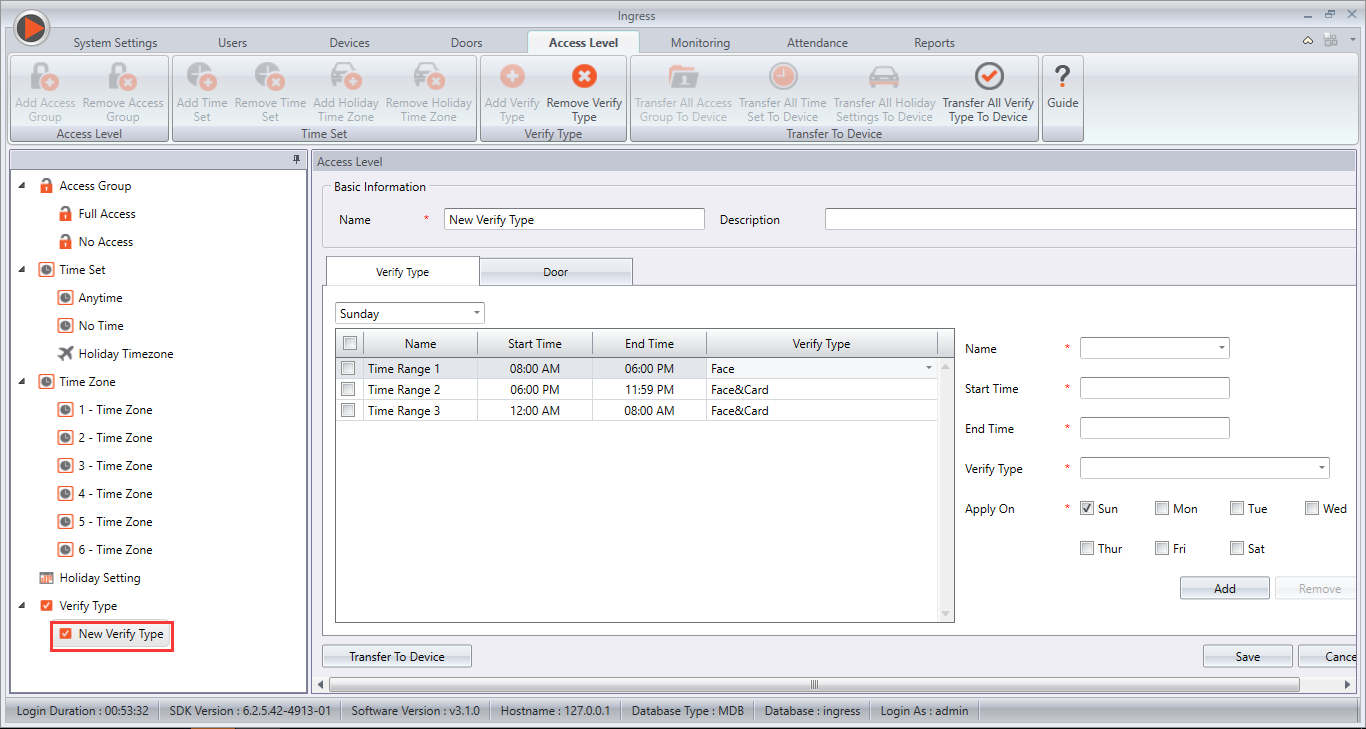
Alternatively, if the Face ID 3 is connected to Ingress Software, the settings can then be done under Access Level > Verify Type. After setting up the verify types and time zone, please make sure to Add Door and synchronize the device in order for it to take effect.
Remark: If PerDay Verification Type is turned ON, group and individual verification type will not be active. If timezone is not set in PerDay Verification Type, default type will be selected instead, which is Face, Password or Card.