Introduction
In the Banking and General Ledger module, there is a refundable deposit function to record and track refundable deposits in the system. After a certain period, the Management needs to issue a payment voucher to refund the deposits received from the owner.
However, the Management can opt to deduct partial or full amount from the refundable deposit if the owner did not fulfill the criteria when claiming their refund or if the owner requests to contra the deposit amount with their monthly charge invoices (e.g. Maintenance Fee & Sinking Fund). The steps to create deduction for the refundable deposit are as below:
Process
Step 1
Go to Banking and General Ledger > Transaction > Deposit Refunds and select the Owner name.
Step 2
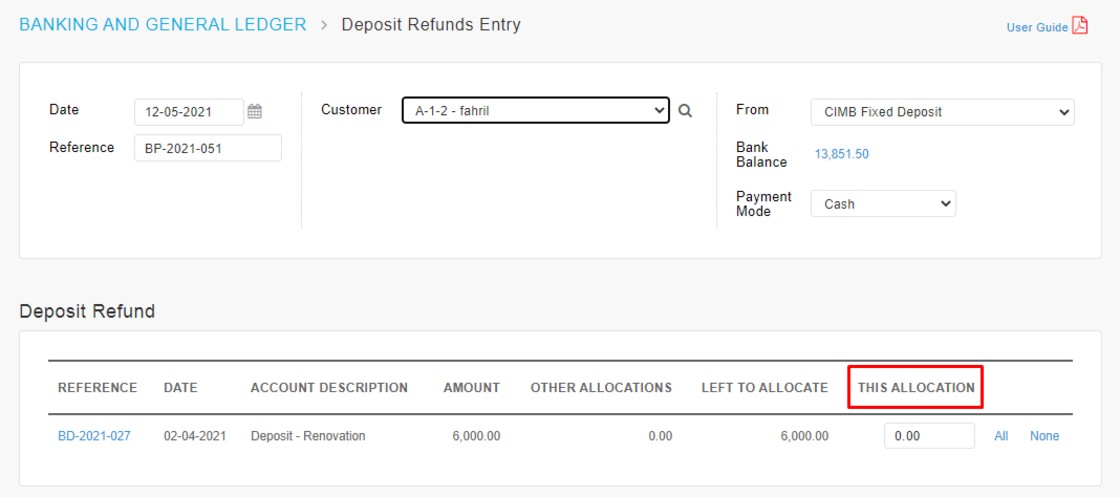
If the owner has an outstanding/unrefunded deposit balance, it will be shown in the Deposit Refund listing. Allocate the Refundable Deposit accordingly at the This Allocation column.
Step 3
The following example is to further illustrate how to enter the refund:Refundable amount for a Renovation Deposit is supposed to be RM 6,000 but the owner will be charged for additional Cleaning Fees as the workers failed to dispose of construction waste materials properly. Management has to deduct RM1,000 from the total refundable deposit and raise a Cleaning Fees invoice later for the same amount. Thus, the “Payment Amount” which represents the exact amount refund to the owner is RM 5,000 only. Follow the example as below to record the transactions:
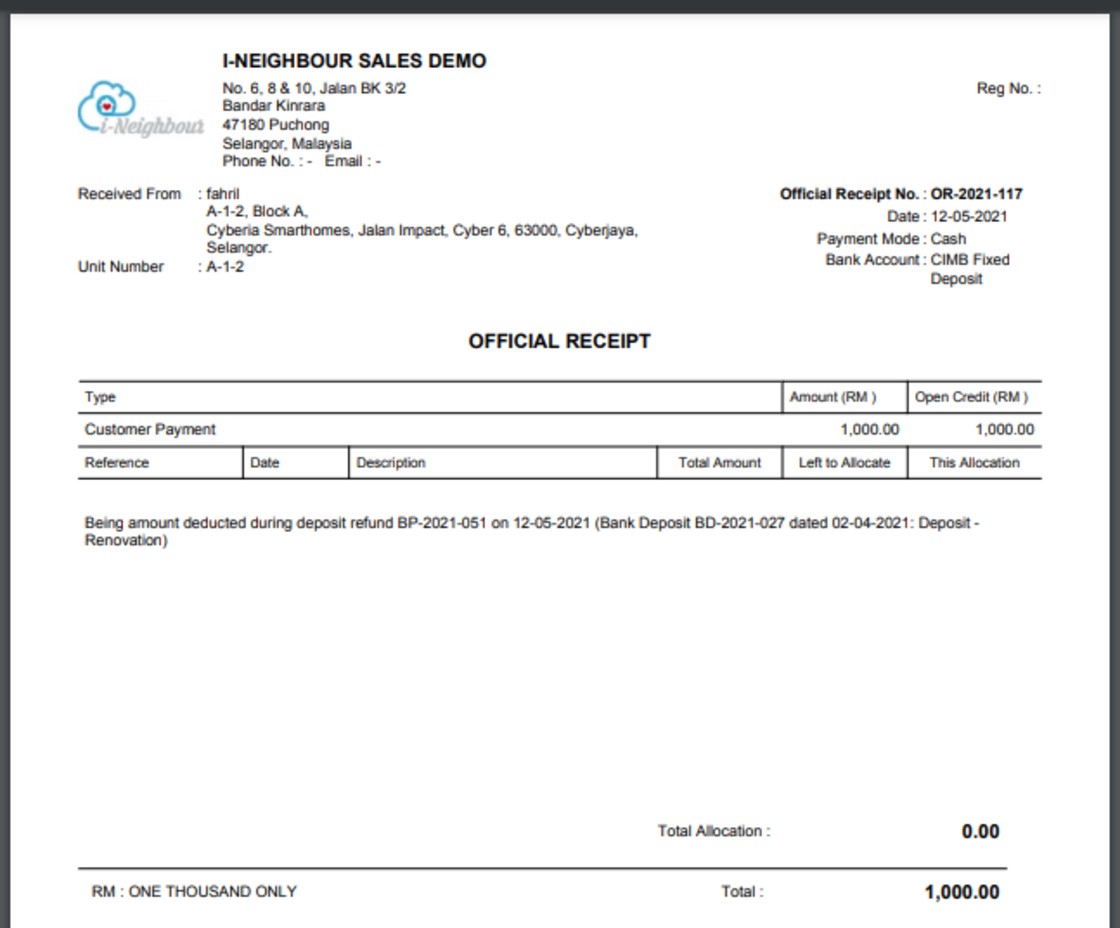
Additional Note: System will automatically create the Receipt for the deduction amount.
Step 4
In order to process the refund, Admin needs to click the “Process Refund” icon at the bottom of the page. This message will automatically pop out once the admin successfully processes the refundable deposit.
Admin has the option to email/print the payment voucher to the owner or print the receipt for the deduction.

Sample of Payment Voucher for Refundable Deposit:
Sample of Official Receipt for Deduction amount:
Note: If some of the screenshots or steps viewed here are different from the ones in the current system, this is due to our continuous effort to improve our system from time to time. Please notify us at info@timeteccloud.com, we will update it as soon as possible.
Introduction
Earlier this year, we have enhanced the Leave Restriction features. Previously, the feature only limits the number of users who can request to be on leave on the same day. We have enhanced the feature by adding a new setting which will restrict employees from applying a certain leave type before they have fully utilized another leave type, e.g: the employee must use his Replacement Leave before he can apply for Annual Leave. The 2 restriction types are:
1. On Leave Restriction - limits the number of leave applications for a specific leave type, department, date range.
2. Leave Type Restriction - restrict which leave type must be utilized before a certain leave type can be applied.
Process
Details of this new and improved feature is detailed out below:
On Leave Restriction
1. Go to LEAVE SETTINGS > Leave Restriction
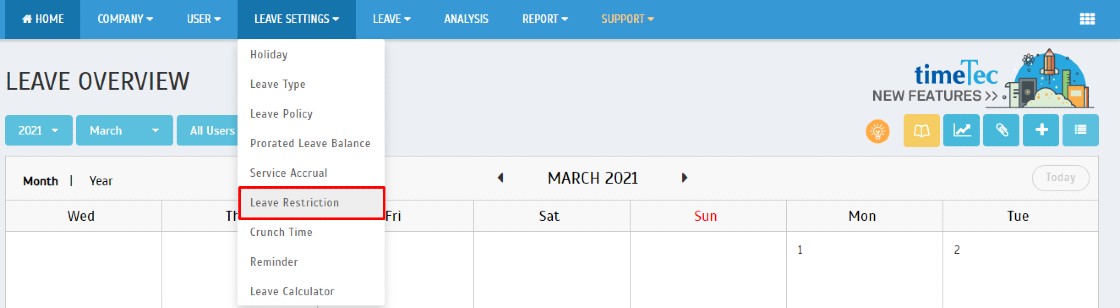
2. Along with the introduction of the new restriction type, we have updated the Leave Restriction interface which now has two separate tabs. Existing settings are located on the first tab ‘On Leave’, where we have also added an ‘Enable’ column. Admins can now enable/disable the restriction settings as and when necessary. Click the ‘Pencil’ icon to edit the leave type and click ‘+’ icon to add a new leave type.
3. To add a new ‘On Leave Restriction’, click on the “+’ button, select the Leave type, Organization Structure, Max Daily Request, Date Range, and click the ‘Tick’ icon to save

Leave Type Restriction
1. Restrict employees from applying a certain leave type before they fully utilize another leave type, e.g: Employee must use up all Replacement Leave before he can apply for Annual Leave.
2. Go to ‘Leave Type’. Click the ‘+’ icon to add a new leave type.
3. Select the Leave Type to be restricted and the leave type that must be utilized fully. Click the ‘Tick’ icon to save.
Leave Application – Error Message (Leave Type Restriction Applied)
Below is an example of the error message appear once the Leave Type Restriction Applied
Note: If some of the screenshots or steps viewed here are different from the ones in the current system, this is due to our continuous effort to improve our system from time to time. Please notify us at info@timeteccloud.com, we will update it as soon as possible.
Introduction
Forgot your password? It happens to all of us. In this article we will guide both Admin and User on how to reset the TimeTec account password.
Process
USER
A. Go to any TimeTec Solution account > click Login
B. Click on the “Forgot your Password?”
C. Insert the registered email address in the column > approve the captcha verification > and click on “Reset Password”

D. Check your email > Click on the icon to change the user password. 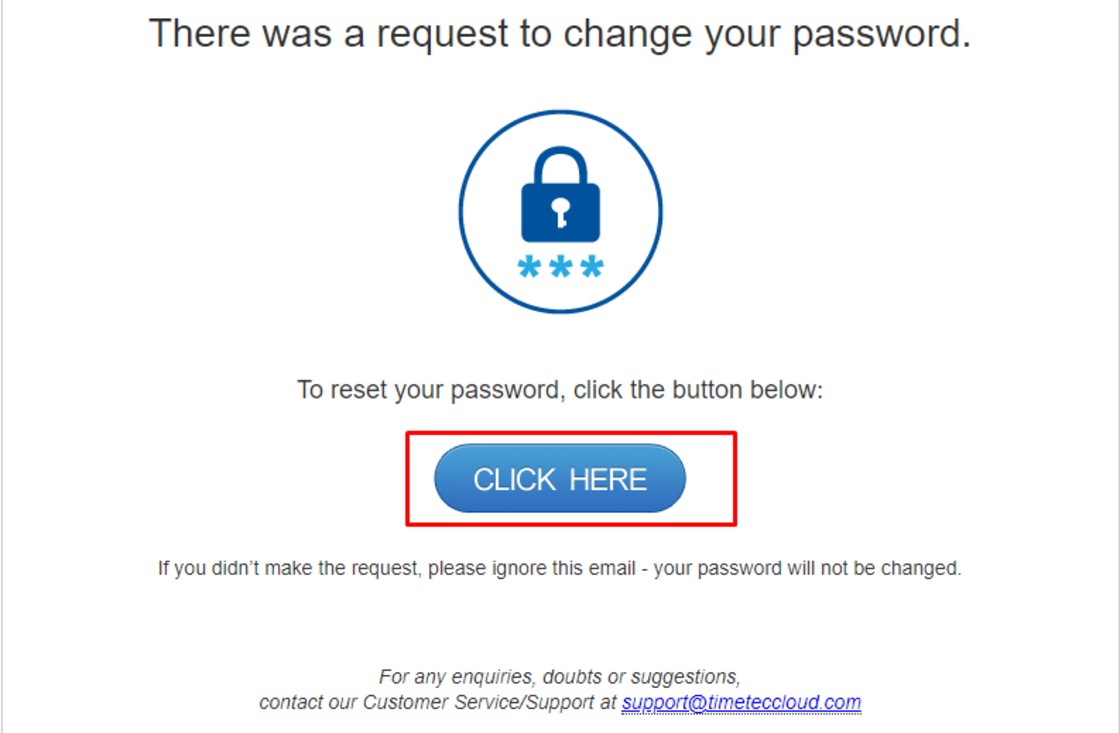
E. Setup the new password > click on “Reset Password” to complete the process. User will be able to access using the new password.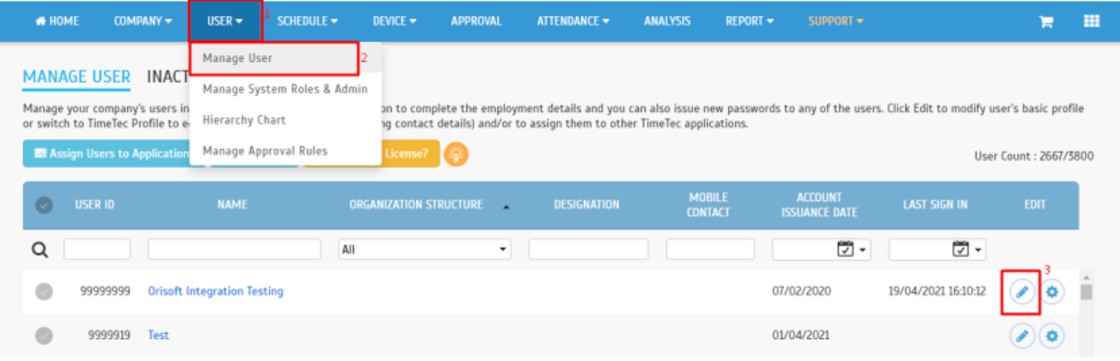
D. Go to the “Account Information” > click on the edit user (pencil icon)
E. Set a new password (the new password set by the admin will be a temporary password)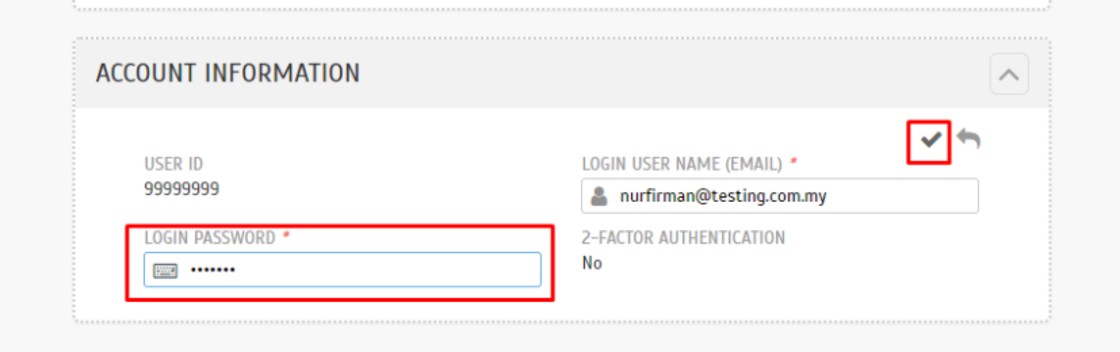
F. After the password is set, the user can log into his TimeTec account using the new password.
*The system will prompt the user to set a new password when the user logs in with the temporary password.
C. Click on Manage > Reset User Password
D. Confirm Reset Password for the selected users.
E. A reset password email will be sent to the selected users. The user needs to click on the reset password link and change password accordingly.
Note: If some of the screenshots or steps viewed here are different from the ones in the current system, this is due to our continuous effort to improve our system from time to time. Please notify us at info@fingertec.com, we will update it as soon as possible.
Introduction
When guards are patrolling, there could be times when they scan the checkpoint later than the scheduled time. The guards might have a valid reason for the lateness, thus the TimeTec Patrol app has been enhanced to allow the guards to add in their tardiness reasons whenever they scan the checkpoint. The tardiness reasons will be displayed at the monitoring page for Admin’s reference.
Note: Admin needs to set a tardiness reasons list in the Web account before the guards can use this feature in the App.
Steps
1. Go to Routes > Tardiness Reason.
2. By default, the Tardiness Reason settings is disabled (No).
3. Admin can opt to enable the Tardiness Reason feature and choose whether it is compulsory for guards to provide a reason.
4. The system has 3 standard reasons in all accounts: “Connection failed”, “Forgot to scan” and “Locate to the wrong checkpoint”.
5. Click on the “+” to add more reasons and guards will be able to select from this list during their checkpoint scan.
Refer to the sample screenshots below for further details:
a. Routes > Tardiness Reason
b. Tardiness Reason settings page
c. Tardiness Reason Enabled (Yes: Optional)
d. View Tardiness in Monitoring Page
TimeTec Patrol App Update
Guards can now provide reasons for their tardiness whenever they scan the checkpoint.
Note: If some of the screenshots or steps viewed here are different from the ones in the current system, this is due to our continuous effort to improve our system from time to time. Please notify us at info@fingertec.com, we will update it as soon as possible.
Introduction
Anti-passback is a security system feature that is primarily used to prevent users from passing their credentials (such as access cards) back for another user to borrow and to stop users from entering an area by simply following or tailgating another user.
For this article, we will guide you on the anti-passback setup for model m-Kadex and k-Kadex.
Requirement
- M-Kadex (Master)
- K-Kadex (Slave)
- Power Supply 12VDC
- Electromagnetic lock (EM Lock)
- Ingress/TCMS V3 software
Wiring Diagram
Steps
-Please refer to the diagram above for the Master-Slave connection.
-Connect the master reader to the server or PC using TCP/IP port.
-Connect with Ingress/TCMS V3 software.
-At the software, select DEVICE -> select device -> Access Control -> Edit -> Select Anti- Passback Option.
- Save and synchronize.
How does it work?
-When a user accessed the Master device (IN door), you can see ‘Access Denied’ sign appeared when the user tries to enter at the same door again.
-You can only access the Master device again when you leave the area or access the Slave device (OUT/exit door)
Note: If some of the screenshots or steps viewed here are different from the ones in the current system, this is due to our continuous effort to improve our system from time to time. Please notify us at info@fingertec.com, we will update it as soon as possible.


