Adding 3G/GPRS Device into Ingress/TCMS V3


Introduction
Please note that 3G and GPRS devices cannot be added directly into the software. It requires a medium to connect these devices into the software.

Benefit
FingerTec Webster is the best choice as the medium because it retrieves the data automatically once a device is connected to it.

Process
Download the Webster SDK link:
FingerTec Webster is installed in the localhost. To run Webster, you may use the default username and password as admin for both required fields. To connect the device with the FingerTec Webster, please make sure that in the device settings, webserver IP address is already set. To retrieve the webserver IP address, run “ipconfig” command on cmd.
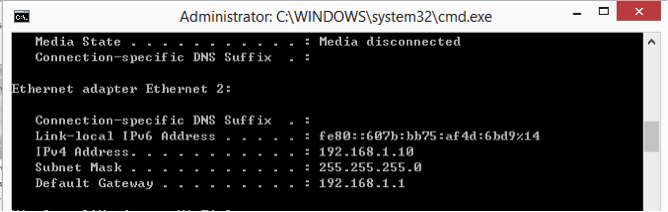
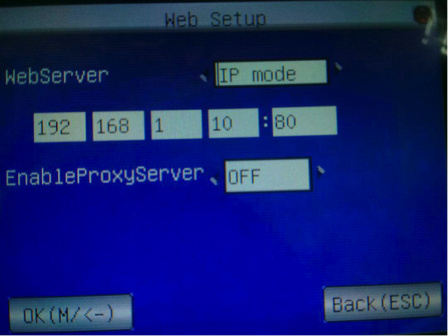
To know whether the device has already been connected, check at the device main interface and look for the letter “I” inside the box. Another way is to check the device’s activity inside the Webster’s Terminal List. Insert Serial Number/Device Name/Device’s IP Address to search for the device. It will show the last activity of the device.
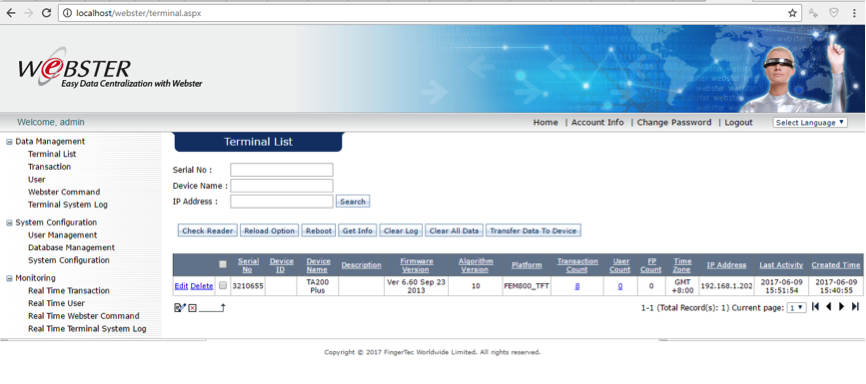

Once the device is connected, this Webster can read all the information inside the device such as Enrolled User and Transaction Data.
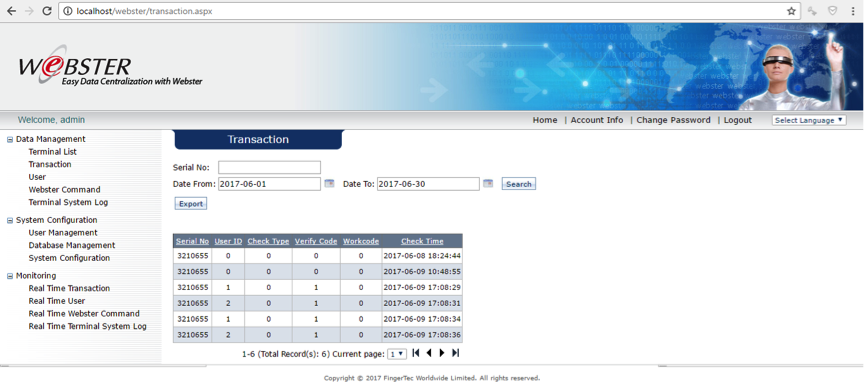
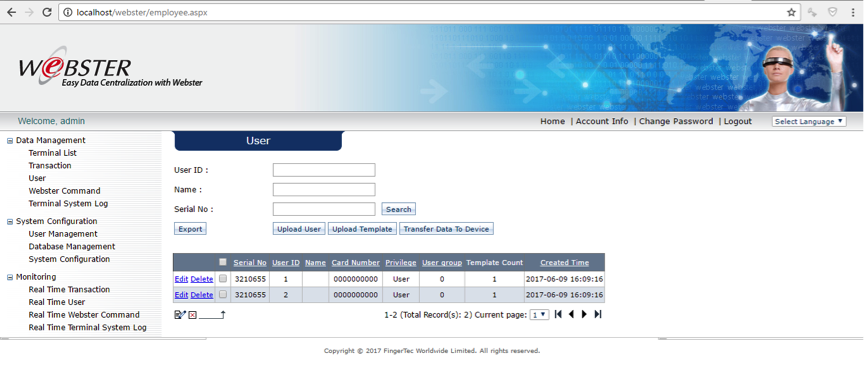


Since all the raw data is here, migration process can be done into the software where the data will be processed to become useful data. This feature is available inside the Migration Wizard > FingerTec Webster.
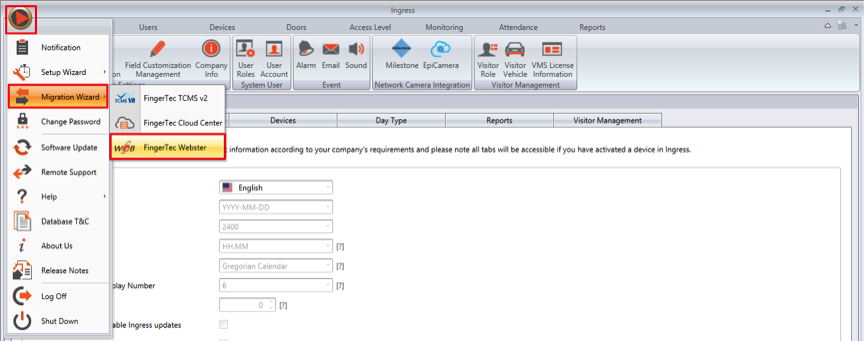
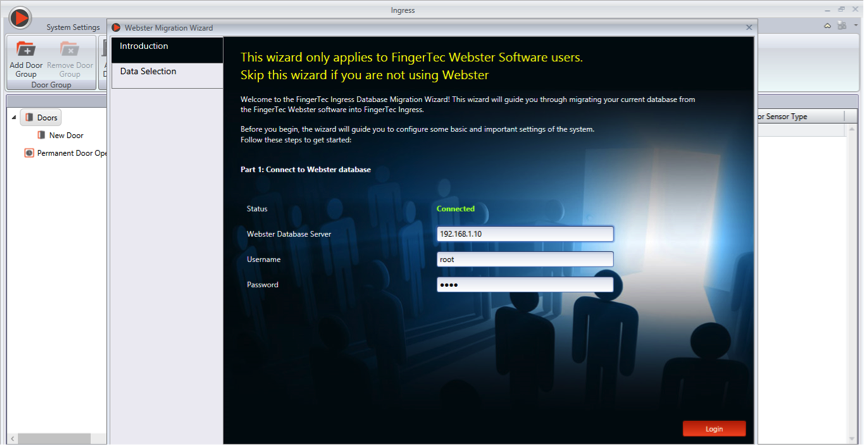
The Migration wizard interface require you to log in. Insert the Webster Database Server as set in the device. The details depend on whether Webster application and TCMS V3/ Ingress software was installed on the same PC or in the same network range.

For local PC, use below details: Webster database server : localhost Username : webster Password : webster

You may refer image below on where to configure this setting :


Then for downloading Webster database into TCMS V3/ Ingress, where TCMS V3 is installed in another PC (Same network range) :
The username and password by default is a root for both. Username : root Password : root For Webster database server IP, this refers to the main PC IP address. (Run CMD > type "ipconfig") Then for login username and password, this is refer to MYSQL login password installed in main PC.

From here, you can select all the devices and users along with the transactions in the device. All you need to do is to select the required data and import it into the software.
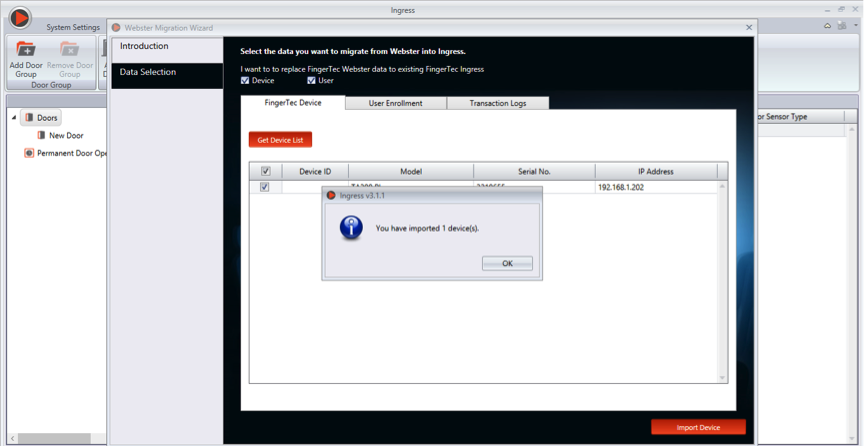
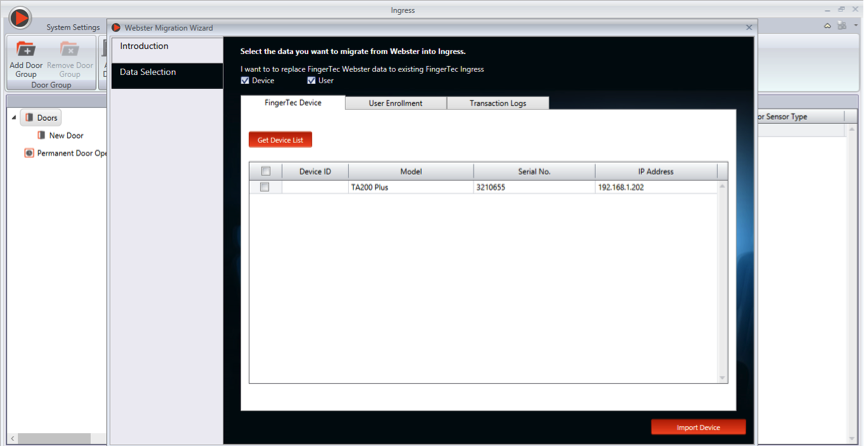
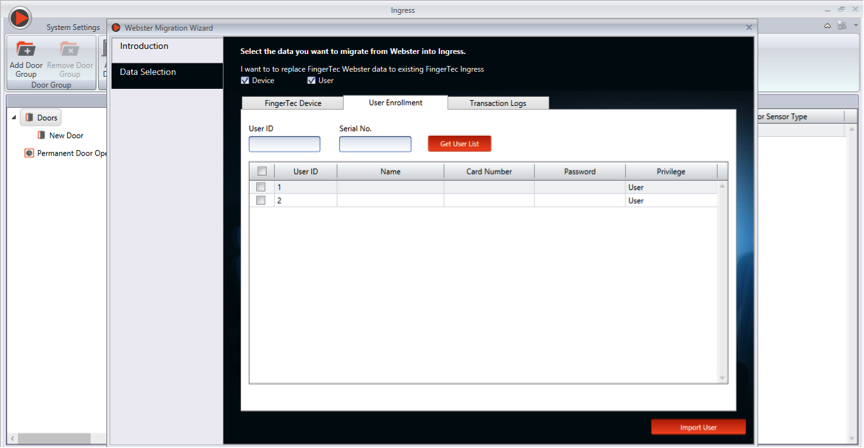
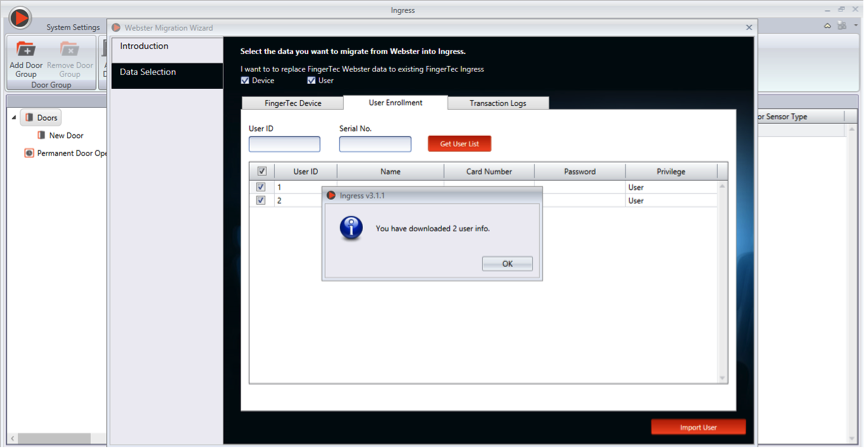
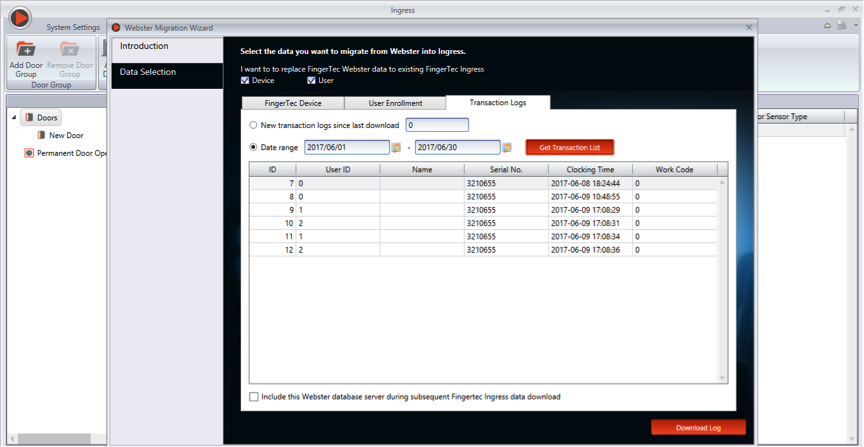
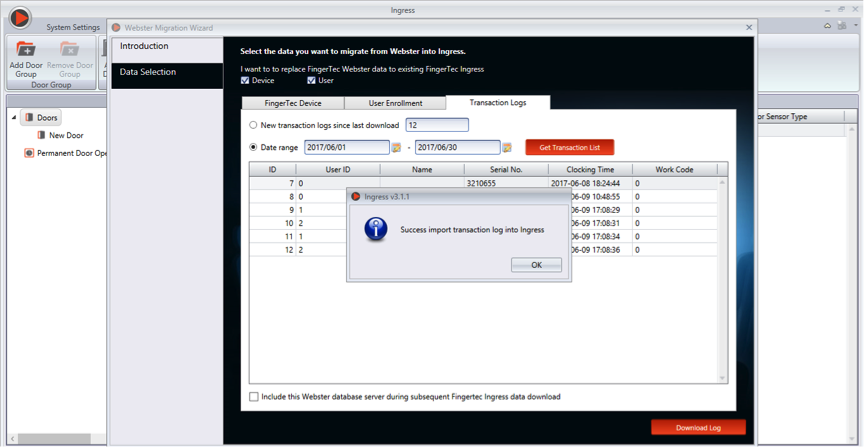


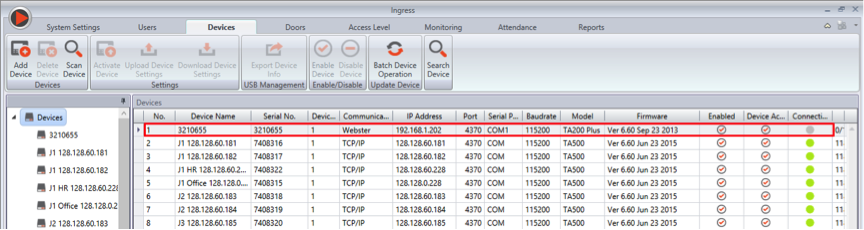
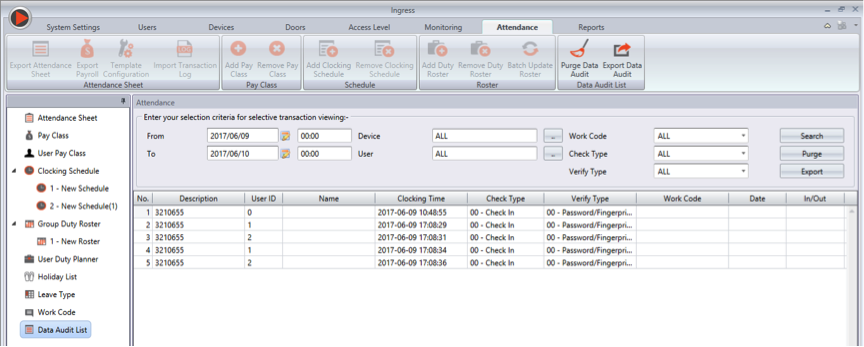
After importing data, the device will be successfully connected into the software. Now, you can manage all attendance, you can generate report and complete the payroll settings using the software.

Weekly Accumulative Overtime Configurations (Overtime only after)


Banner02.jpg

Introduction 
FingerTec’s Ingress & TCMS V3 software is able to calculate overtime under different settings and circumstances customized by the user. Generally, Ingress & TCMS V3 will treat extra working time as overtime or OT when it exceeds a predefined value that is set by the user. Users can choose to accumulate the extra time either by week or by month.

Benefit
Some countries may have a special overtime that need to be taken into consideration where the company will only calculate overtime when it exceeds a predefined value and will pay employees biweekly, semimonthly or monthly. You can have a look at the overtime only after configuration offered by our Fingertec software and configure it based on your company pre-requisite setting.

Process
Read more for a few configuration examples that can be used according to a business organization's requirements.

Available Options: Weekly, Bi-Weekly, Semi-Monthly or Monthly
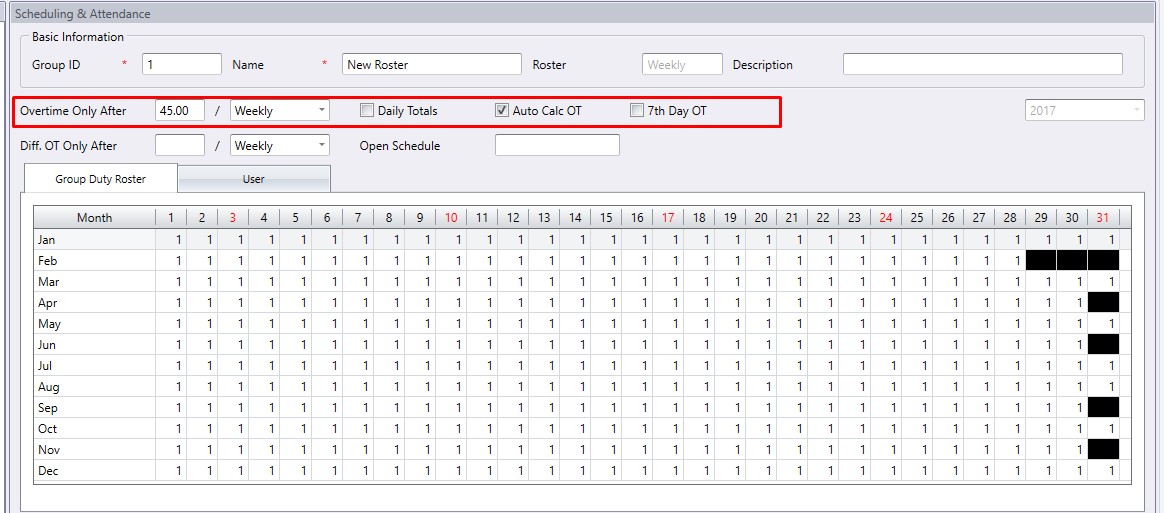
Check on Daily Totals, Auto Calculate OT and 7th Day OT if the rule applies.

For example, if a predefined working hours in a week is set at 40 hours and an employee works a total of 45 hours for that particular week, 5 hours will be considered as OT for the employee. If the total working hours does not exceed 40 hours, however, Ingress & TCMS V3 will treat it as normal working time.


Below are examples of configurations that can be used and its necessary steps needed.

Example 1
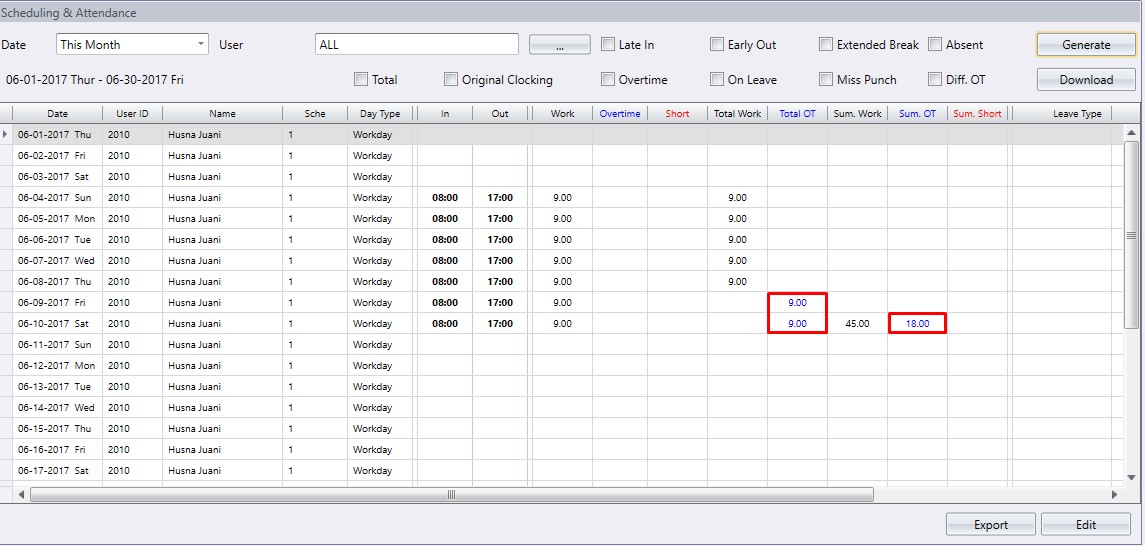
If you enable Daily Totals, you will instead get the below results:

Step 1
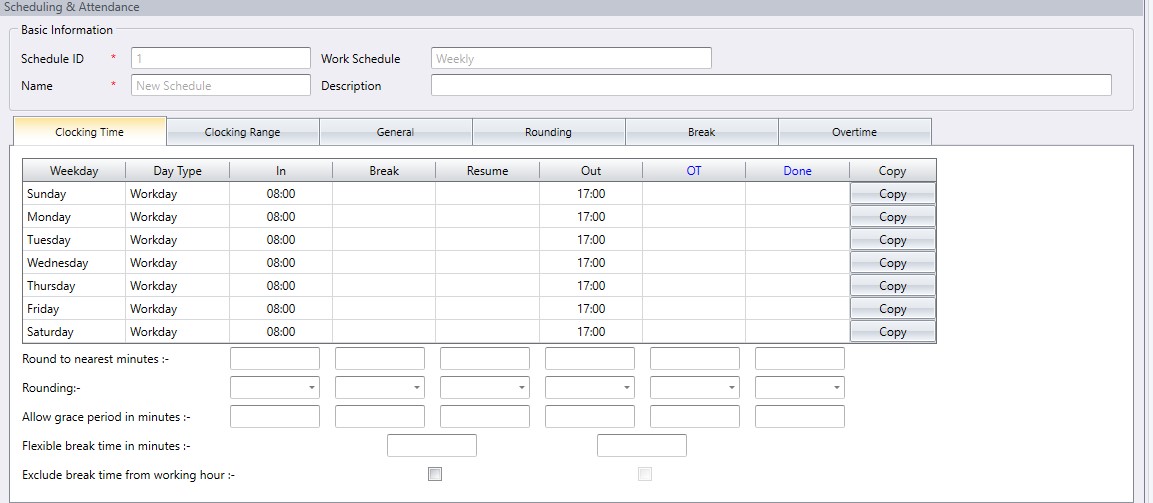
Create the clocking schedule. E.g.: IN - 0800 / OUT - 1700
1.jpg

Step 2
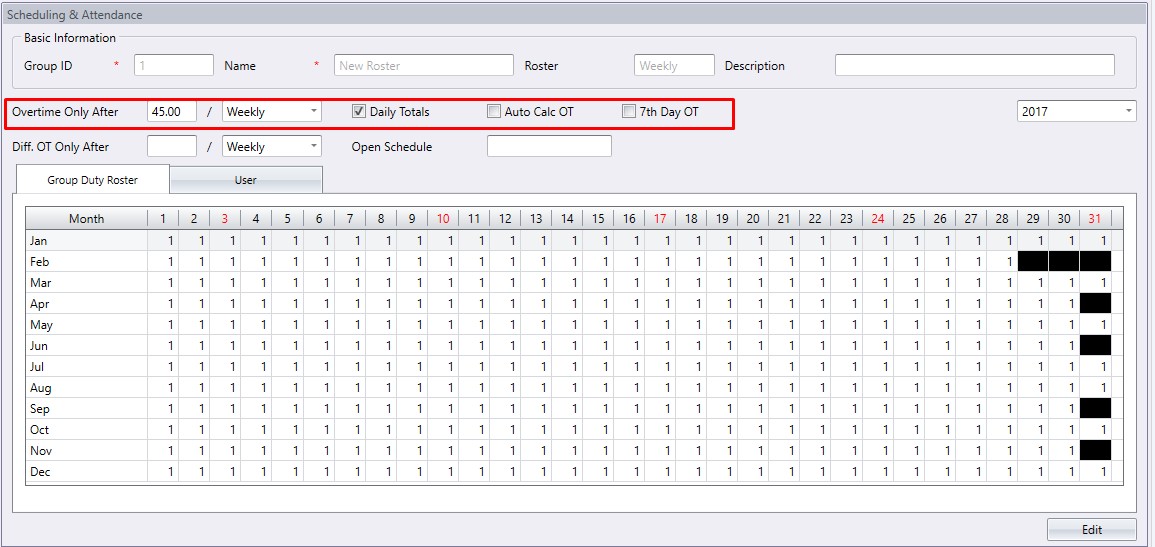
Create the group duty roster and set Overtime Only After to 45.00 hours
per weekly and select the Daily Totals option.
2.jpg

3.jpg

Example 2
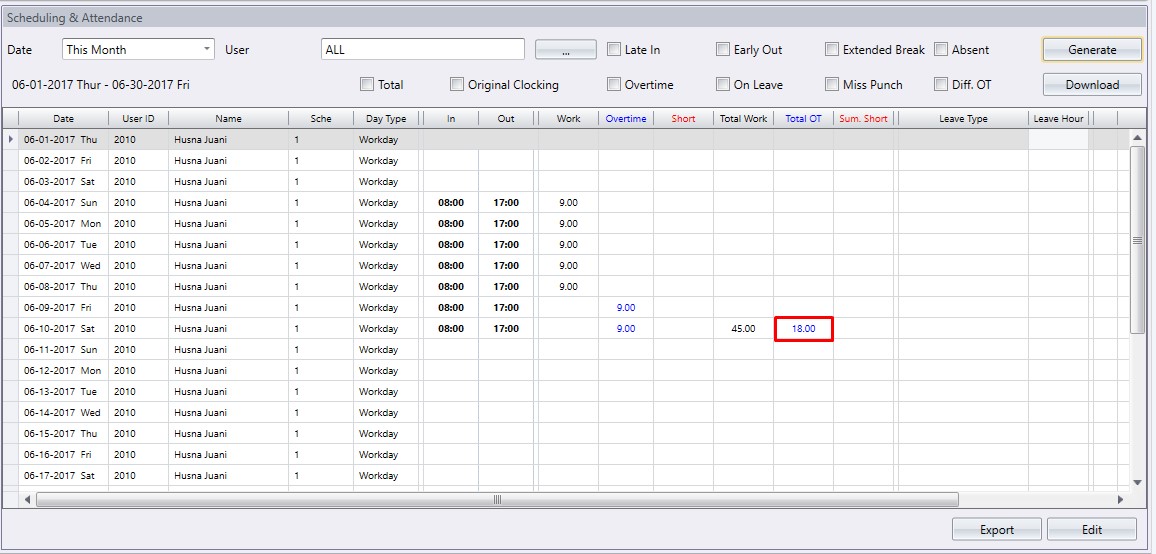
If you enable Auto Calculate OT, you will instead get the below results:
4.jpg
5.jpg


Example 3
Customized for our clients in USA, Ingress & TCMS V3 also have the 7th Day OT option. This is because of a ruling by the Californian State Government, whereby an employee is entitled to overtime whenever the employee has worked more (a) than 8 hours in a day, or (b) 40 hours in a week, or (c) when the employee has worked for 7 consecutive days (in which the whole of the 7th day is considered as overtime).

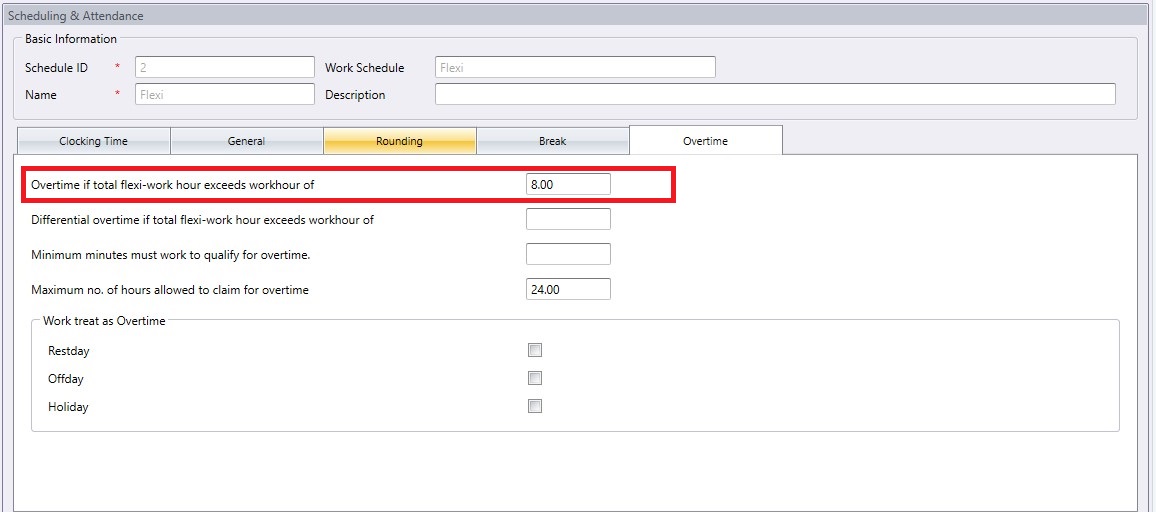
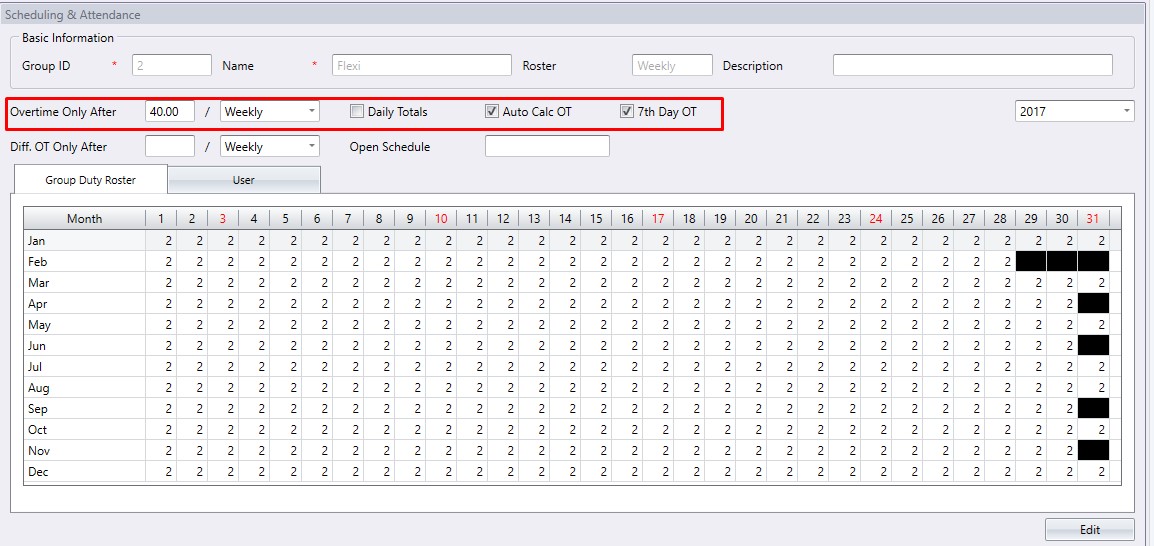
In this case, the user needs to set up overtime after 8 hours in a flexi schedule, and in the roster, overtime after 40 hours per week and 7th Day OT. Thus, the overtime will be calculated if the user works more than 40 hours in a week or has worked 7 consecutive days (even if less than 40 hours total).

Step 1
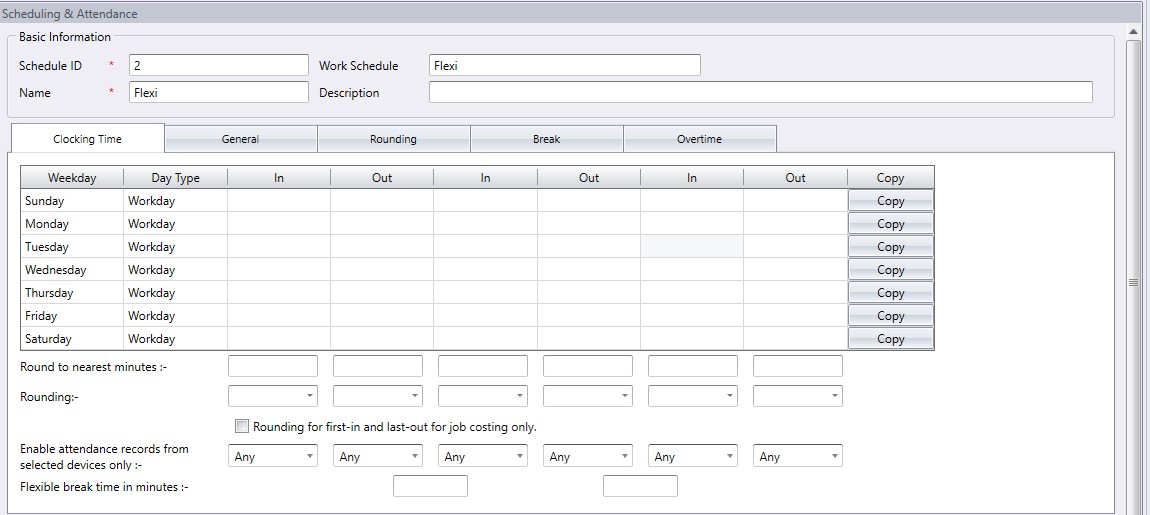
Create the flexi schedule.
6.jpg
  
Step 2
Configure Overtime if total flexi-work hour exceeds workhour of to 8.00.
7.jpg

Step 3
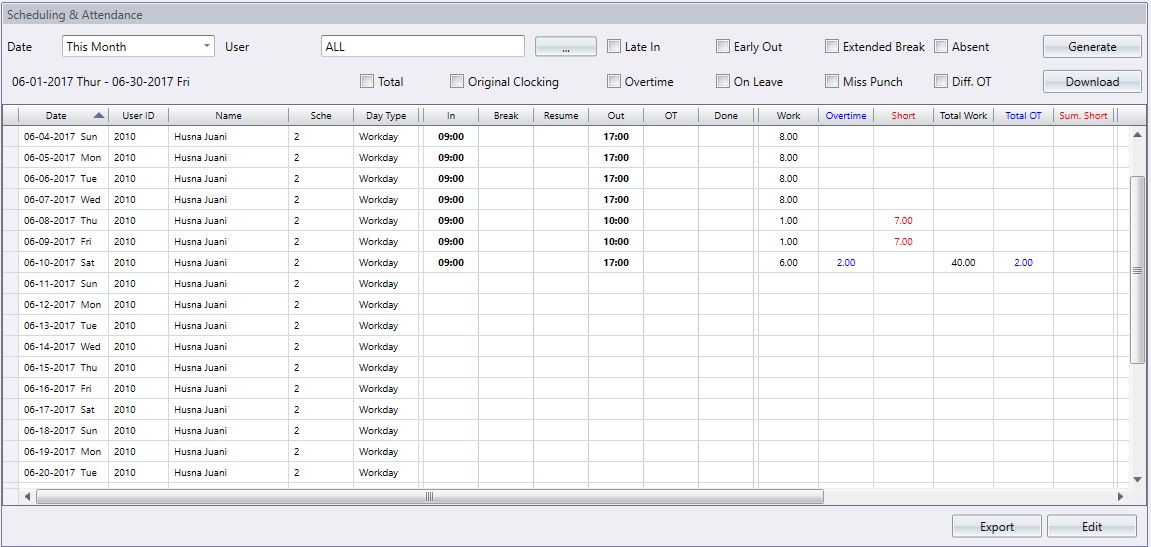
After enabling 7th Day OT with Auto Calculate OT, you will get the below results:
8.jpg

8.jpg

Configuring the Five Lunch Time Scenarios in Ingress & TCMS V3


Lunch.jpg
Introduction
FingerTec Ingress & TCMS V3 allow users to manage their attendance records even better. One such method is being able to set the remaining time of their lunch break to either work time or overtime. This allows employees to resume their job earlier after lunch break and claim whatever remaining time they have.

Benefit
By having this options, it provides flexibility to the organization to manage the employee's attendance as every organization has different lunch configuration. This is because some companies offer a paid-lunch system where the company will pay for the remaining lunch time of each worker.  There are five lunch time scenarios in Ingress & TCMS V3 that can be configured to suit the user’s preference.

This guide will take you through the scenarios and steps that are required to configure them.

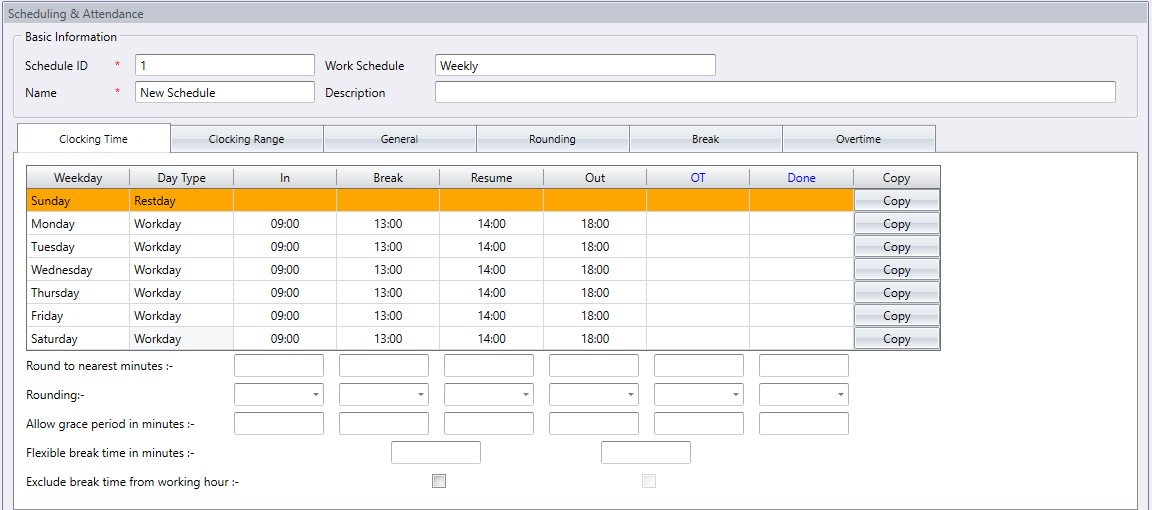
Scenario 1 – Fixed Lunch Time

Step 1
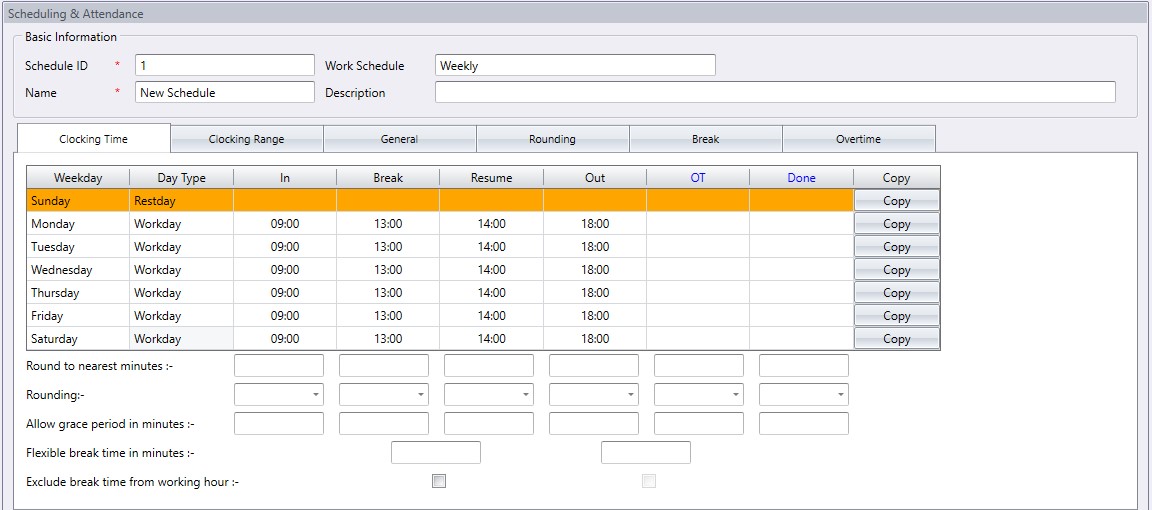
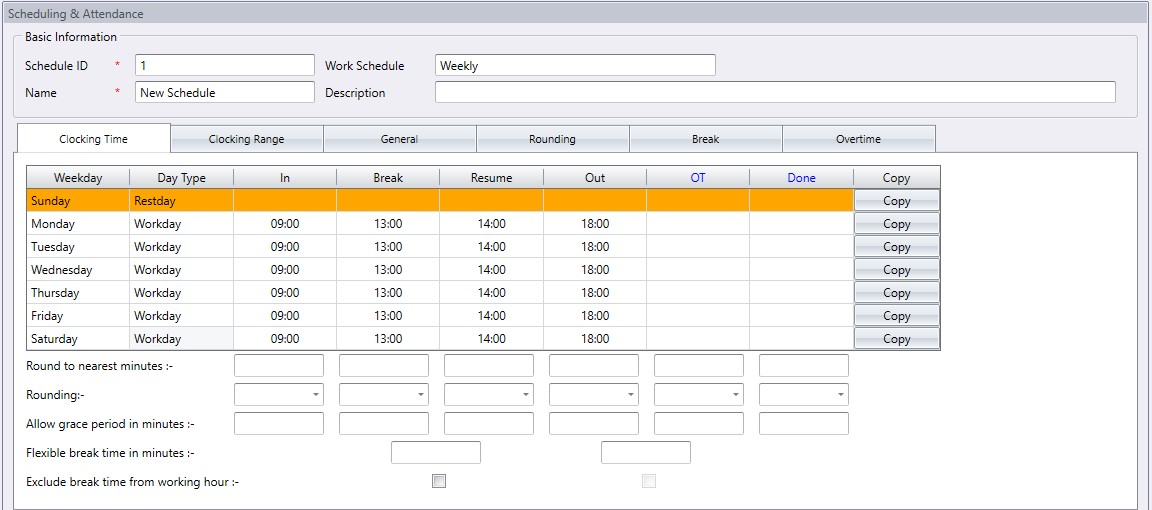
Create the clocking schedule.
Example: IN – 0900 / BREAK – 1300 / RESUME – 1400 / OUT – 1800
1.jpg

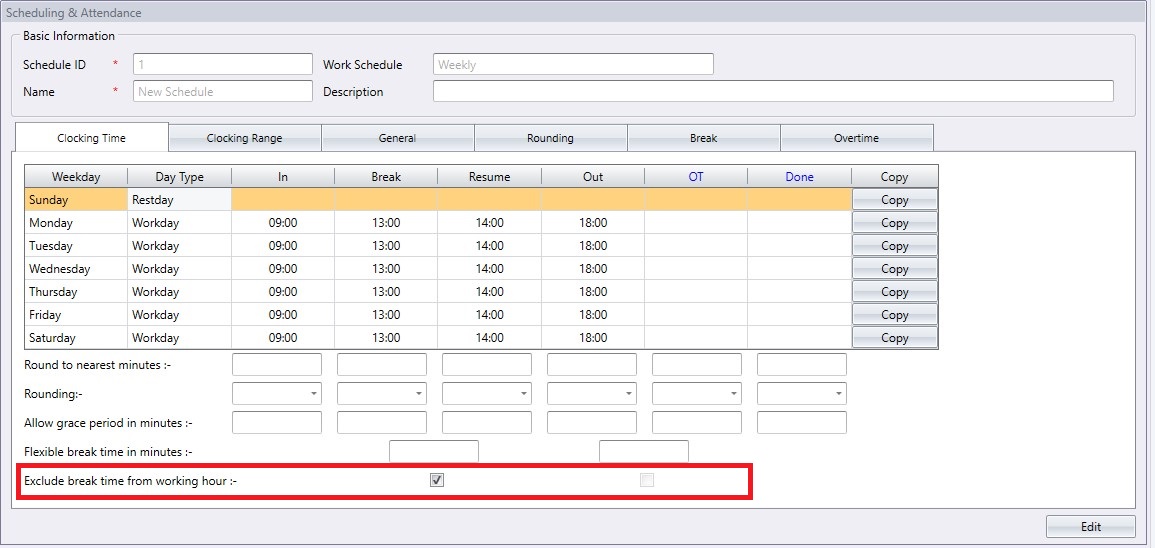
Step 2
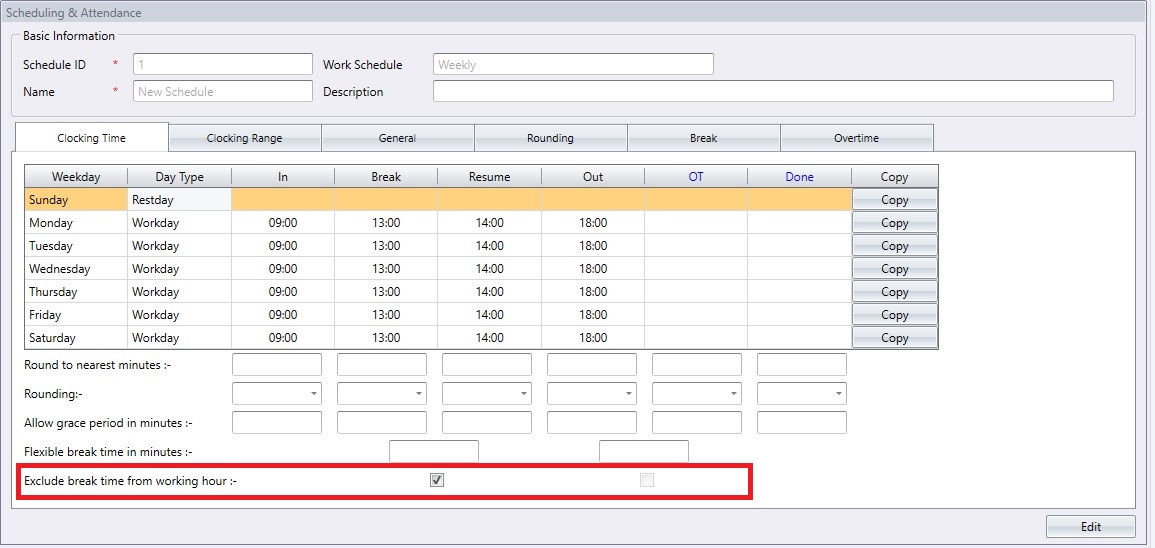
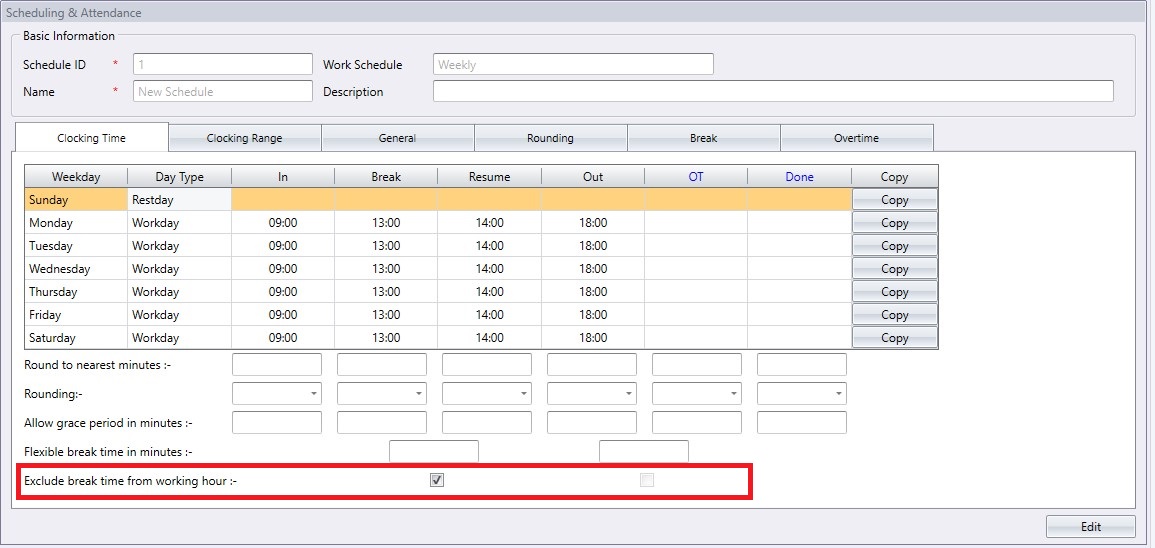
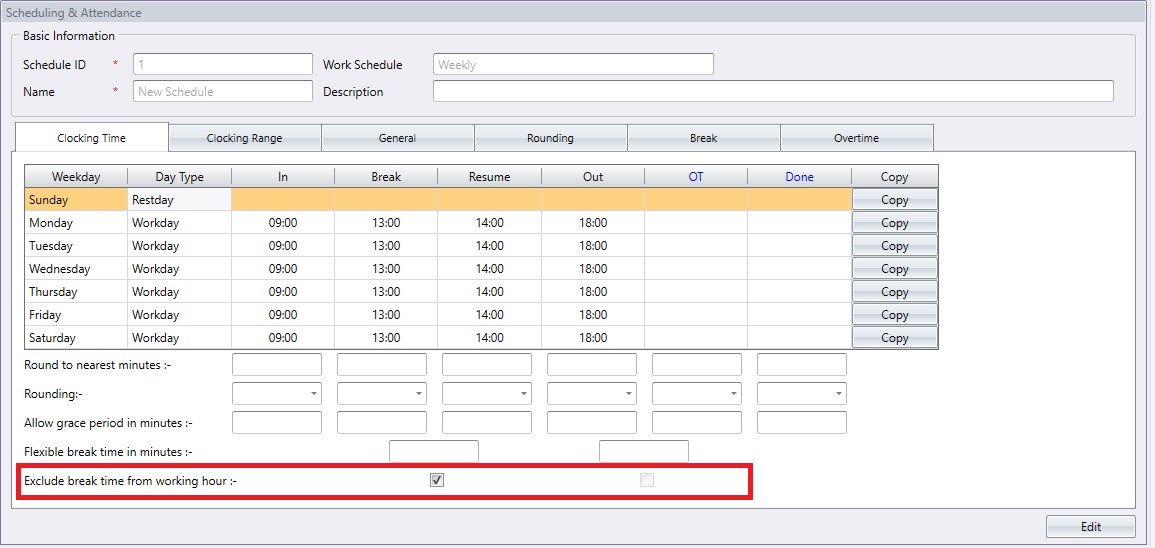
Go to the Clocking Time tab and tick on the option Exclude break time from working hour
2.jpg

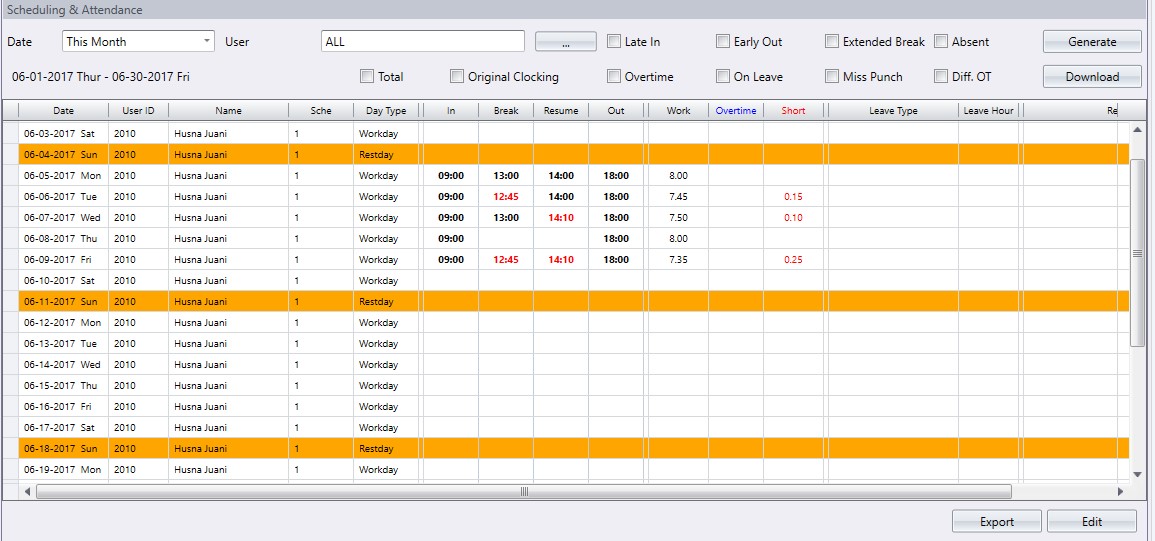
Step 3
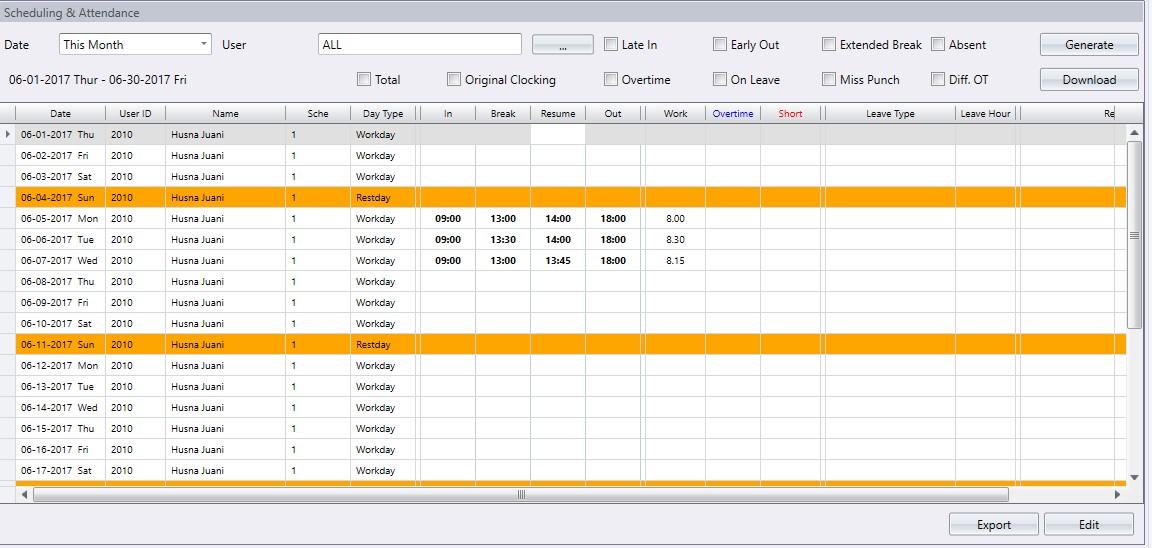
Generate the attendance sheet to apply the new setting.
3.jpg

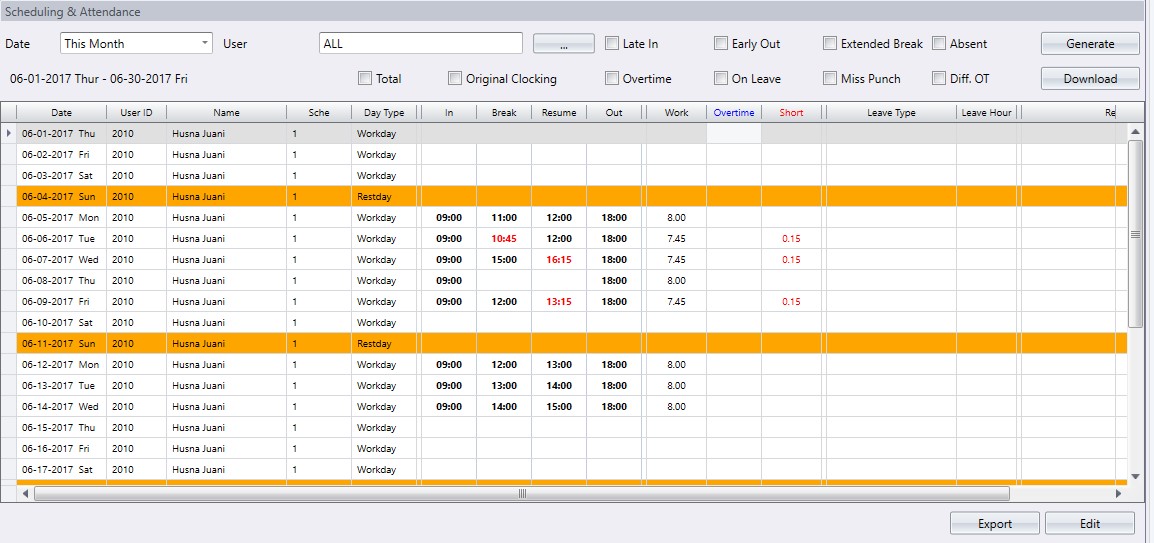
Scenario 2 – Flexible Lunch Time

Step 1
Create the clocking schedule.
Example: IN – 0900 / BREAK – 1100 / RESUME – 1600 / OUT – 1800
4.jpg

Step 2
Go to the Clocking Time tab and configure on the following options:
1. Tick on the option Exclude break time from working hour.
2. Flexible break time in minutes - 60.
5.jpg

Step 3
Generate the attendance sheet to apply the new setting.
6.jpg

Scenario 3 – Remaining Lunch Time to become Work Time

Step 1
Create the clocking schedule.
Example: IN – 0900 / BREAK – 1300 / RESUME – 1400 / OUT – 1800
7.jpg

Step 2
Go to the Clocking Time tab and Break tab and tick on the following options:
1. Exclude break time from working hour.
8.jpg

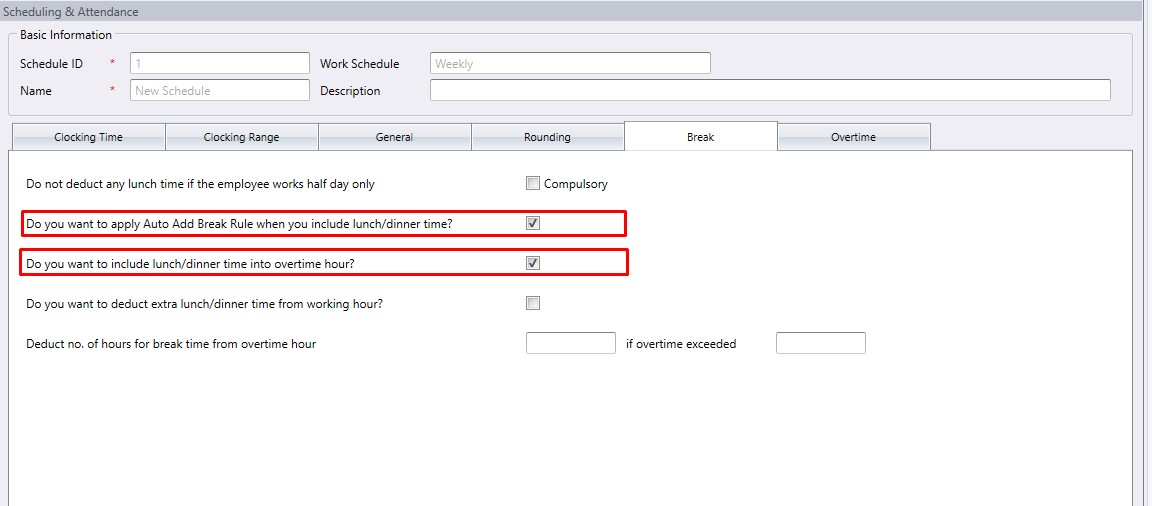
2. Do you want to apply Auto Add Break Rule when you include lunch/dinner time?
9.jpg

Step 3
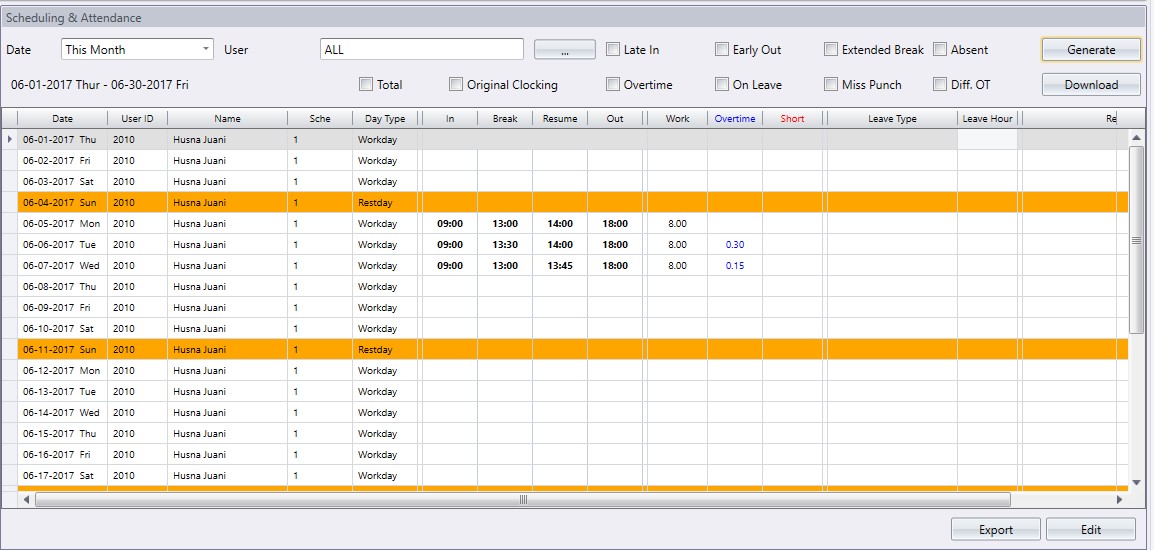
Generate the attendance sheet to apply the new setting.
10.jpg

Scenario 4 – Remaining Lunch Time to become Overtime

Step 1
Create the clocking schedule.
Example: IN – 0900 / BREAK – 1300 / RESUME – 1400 / OUT – 1800
11.jpg

Step 2
Go to the Clocking Time tab and Break tab and tick on the following options:
1. Exclude break time from working hour.
12.jpg

2. Do you want to apply Auto Add Break Rule when you include lunch/dinner break?

3. Do you want to include lunch/dinner time into overtime hour?
13.jpg

Step 3
Generate the attendance sheet to apply the new setting.
14.jpg

Scenario 5 – Deducting extra Lunch Time from your working hour

Step 1
Create the clocking schedule.
Example: IN – 0900 / BREAK – 1300 / RESUME – 1400 / OUT – 1800
15.jpg

Step 2
Go to the Clocking Time tab and Break tab and tick on the following options:
1. Exclude break time from working hour.
16.jpg

2. Do you want to deduct extra lunch/dinner time from working hour?
20.jpg

Step 3
Generate the attendance sheet to apply the new setting.
21.jpg


Attendance Monitoring via TimeTec TA App


Attendance monitoring is a feature that allows you to monitor clocking activities of a certain user. There are 2
types of attendance monitoring; Clocking Monitoring and Tardiness Monitoring.

Clocking Monitoring
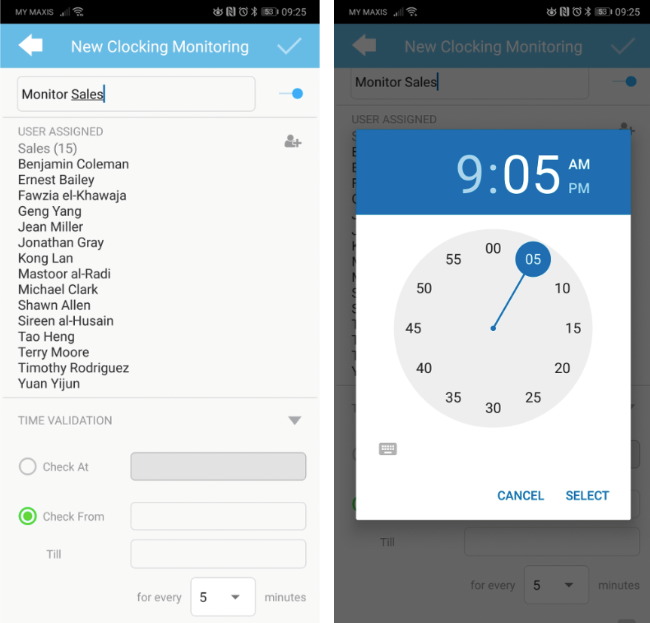
By using Clocking Monitoring, you can set a time to check on certain users clock-in times.

To set Clocking Monitoring, at the side Menu, go to Monitoring > Select Clocking Monitoring and tap at the
plus sign.


Fill in the description and select the users you want to monitor. User listing will be based on your organization
structure. If you don’t have any user placed under you, you can only monitor your own attendance.


Next, select the time validation. You can either select to check at a certain time or a certain period of time, and
determine the frequency.


Enable ‘Notify Upon User Arrival’ if you want to be notified once the user has clocked in. Tap Confirm to set
the monitoring. You can stop this monitoring function by disabling the toggle button, located besides the
description field.


Tardiness Monitoring
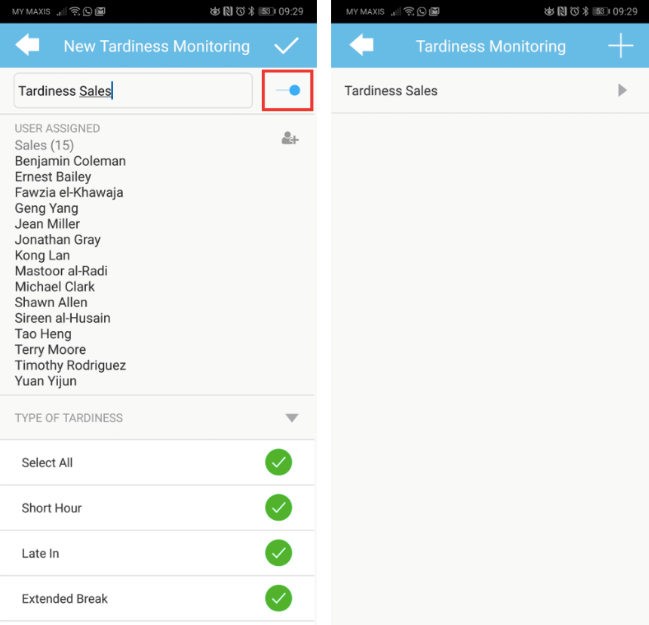
Use Tardiness Monitoring feature to monitor tardiness in a certain user’s attendance and you will receive a
notification when the system spots tardiness on the users you select.

To set Tardiness Monitoring, at the side Menu, go to Monitoring > Select Tardiness Monitoring and tap at the
plus sign.


Fill in the description and select the user(s) who want to monitor. User listing will be based on your
organization structure. If you don’t have any user placed under you, you can only monitor your own
attendance.


Next, select the type of tardiness you want to monitor. Tap Confirm to add this monitoring function.
You can stop this monitoring function by disabling the toggle button located besides the description field.


Note: If some of the screenshots or steps viewed here are different from the ones in the current
system, this is due to our continuous effort to improve our system from time to time. Please notify us
at info@timeteccloud.com, we will update it as soon as possible.