

Manage and View Visitors in the Dashboard of TimeTec VMS Website for Admin

Introduction
TimeTec VMS is a cloud-based Visitor Management System designed to better manage and monitor visitors in a building or an office. The system is an automated visitor management system where all visitor information is screened before the visits, providing a safe environment for the company. The TimeTec VMS also secures visitor information, available for future use and reference. In this article, we will demonstrate how the admin can manage and monitor visitors from the TimeTec VMS web portal Dashboard.
Process
A. Admin View
1. Login into the TimeTec VMS website using admin credentials. Go to Dashboard which is the homepage of the TimeTec VMS website.
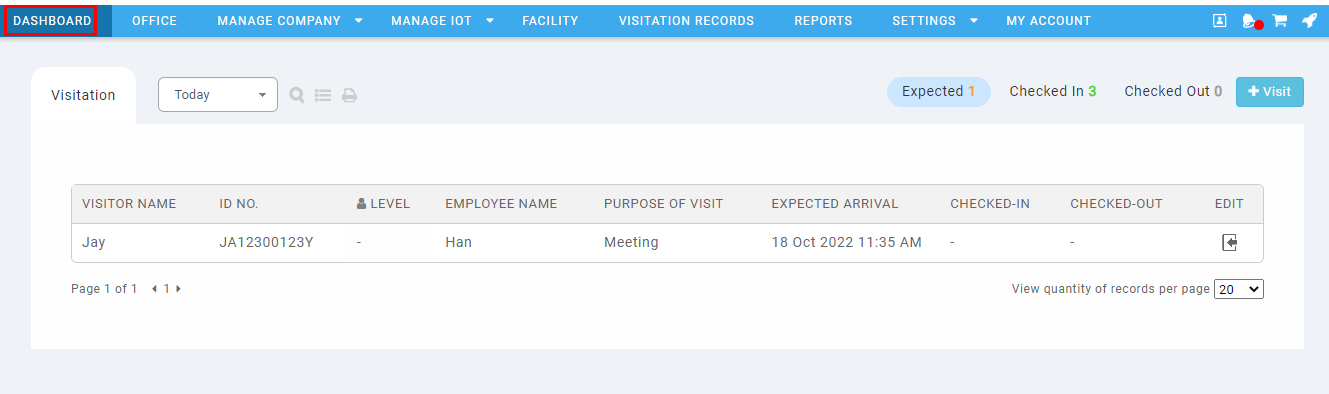
2. Visitor lists are divided into three categories based on their visitation status: Expected, Checked-In and Checked-Out.

3. The Expected category will display visitors that have been invited or pre-registered, waiting for their arrival, and are being checked in by the admin/security/front desk officer. You may view visitor information including the host they are meeting with and the expected arrival date and time. The system admin will have access to check the visitor in by clicking on the check-in button under the Edit column.

4. For the Check-In category, visitors that have been registered via the Walk-In registration method or pre-registered visitors that have been checked in will be displayed in the list. You may view their information including the checked-in date and time. For system admin, there will be a checkout button under the Edit column to check the visitors out.

5. Selecting the Checked Out category will display the visitors that have been checked out by the system. You may view visitors' information including their checked-in and checked-out time.

6. By default, the date for the display will be for today’s list. You may filter to view the records of yesterday, the last 7 days, the last 30 days, the last 60 days or all the time.

7. Clicking on the search button will enable the search box for each field where you may insert the keyword to search visitors.

8. To filter the column, you may click on the Column Filter button and select the fields to be included in the display. Please note that you may only select up to 8 columns at a time.

9. Clicking on the visitor’s name will open the visitor's information page. You may review visitor’s details, check-in and checked-out activities and visitation details. You may also block visitors from here to restrict them from future visits. Once blacklisted, the system will pop up an error message upon inserting the visitor’s ID number for registration.

.png)
Note: If some of the screenshots or steps viewed here are different from the ones in the current system, this is due to our continuous effort to improve our system from time to time. Please notify us at info@timeteccloud.com, we will update it as soon as possible.


"Buy Oxycontin (20mg) painkiller medicine online with various vendors offering fast and efficient delivery options. Enjoy timely relief from discomfort without delay by saying goodbye to discomfort.
ReplyDeleteVisit Here: Order Oxycontin Online"