

Manage System Roles in TimeTec Claim

Introduction
TimeTec Claim offers access rights control to authorize users to manage the system roles within the organization. This article will guide you to manage the system role and add admin(s) in the TimeTec Claim efficiently.
TimeTec Claim offers access rights control to authorize users to manage the system roles within the organization. This article will guide you to manage the system role and add admin(s) in the TimeTec Claim efficiently.
By default, there are two types of User Roles in the system:
1. Master (System Administrator) - has full access and is responsible for setting up and maintaining the TimeTec Claim system.
2. Normal Users - can create and customize the access rights to be assigned to other admin personnel, depending on the rights given by the Admin roles.
Process
A. Add System Roles.
1. Go to TimeTec Claim > User > Manage System Roles & Admin

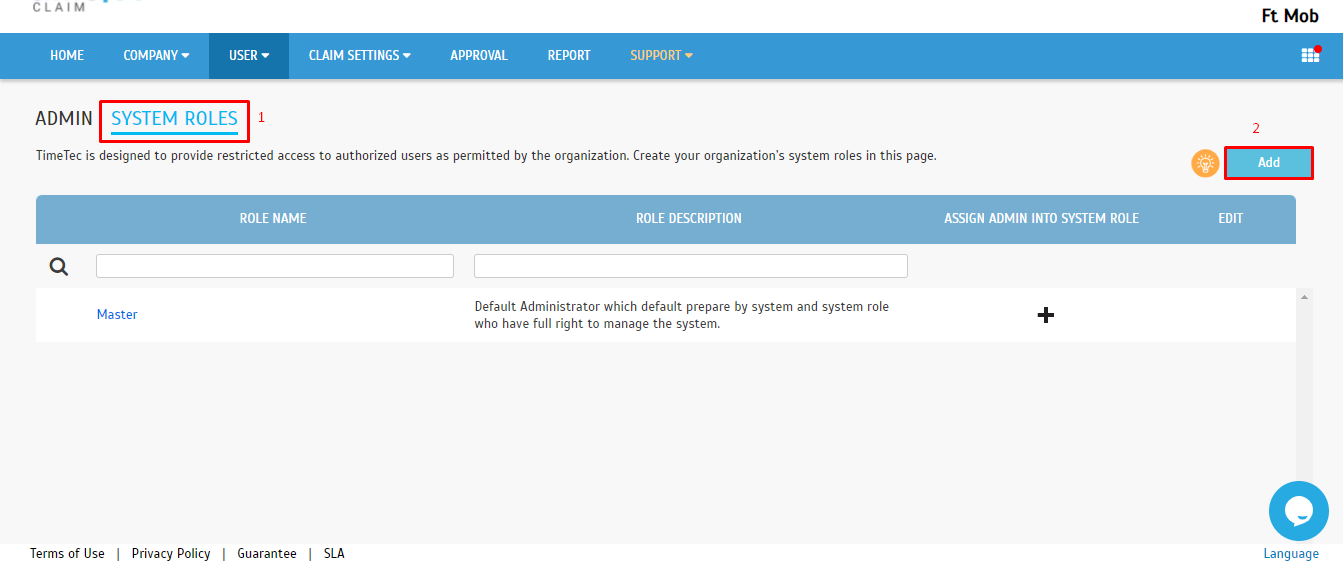
I) At the pop-up window, there will be an option to allow users to copy the access rights from existing System Roles or edit the copied role, if necessary. A quicker process to create a new yet similar system role. Else, fill up the System Role Name and Description.
II) Copy Access Rights from - an option to allow users to copy the access rights from existing System Roles or edit the copied role, if necessary. A quicker process to create a new yet similar system role.
III) System Roles Name :
a - Full Division: allow Admin to access all user information in the Organization Structure
b - Partial Division: allow Admin to access a limited amount of user information for selected divisions.
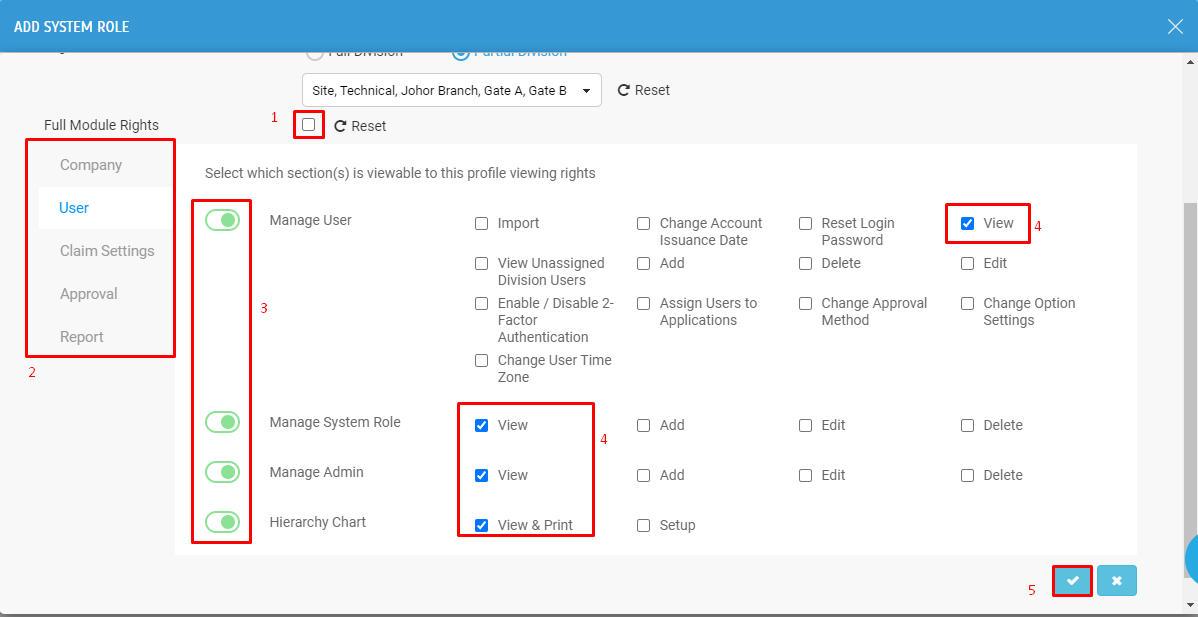
1. Full Module Rights - Set the access rights for the System Role by ticking on the Full Module Rights to allow all modules access in the TimeTec Claim, while unticking it will change the accessibility of the module for the role.

3. Unticking the Full Module Rights will allow the Master to select the required access they want to give to the user. By default, when enabling the access, the system will only allow access to View Only and for another access such as Add, Edit, Delete, Etc. The Master needs to turn on the access manually by clicking the selected box. Finish the process by clicking the Submit button.
B. Assigning Admins into the System Role
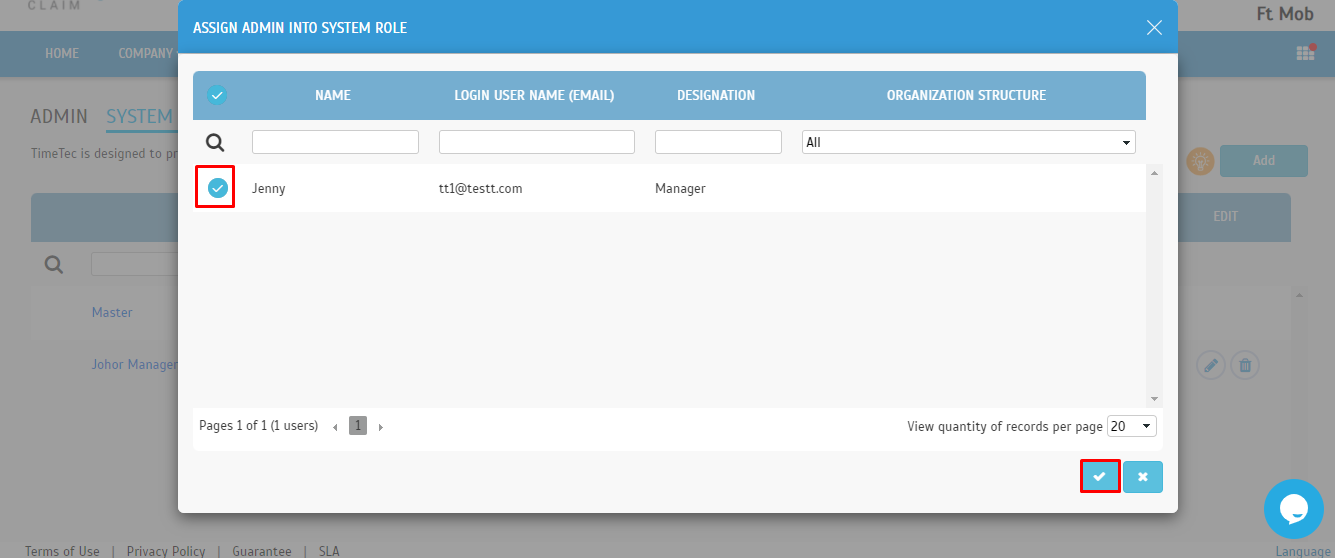
1. After setting up the System Roles, the Admin can also be easily assigned under the System Role by clicking on the ‘+’ button.

2. Select the required user > Click on Submit.
Once the + is clicked, a pop-up window will appear and a list of Admins (excluded from the role) will be displayed for selection.
C. Configuring System Role While Adding Admins Into the System
1. System Roles can also be arranged specifically while adding an Admin into the system. Click on Admin tab > Click Add.

2. At the pop-up window, select the existing system user (based on their email) that you wish to assign as the Admin and select the relevant System Role and click on Submit.
Remark : Default System Role is Master if the users do not wish to create any System Roles within the system.
Remark : Default System Role is Master if the users do not wish to create any System Roles within the system.

Note: If some of the screenshots or steps viewed here are different from the ones in the current system, this is due to our continuous effort to improve our system from time to time. Please notify us at info@timeteccloud.com, we will update it as soon as possible.


0 comments:
Have any questions or inquiries about FingerTec? Drop your input here.