

TA 200 Plus Wifi Setup

Introduction
FingerTec offers an array of time attendance devices to fulfill the market's requirements. However, on top of the various selection, there are select devices customizable to the client's specific requirements such as adding a Wi-Fi. To get your device customized, please do not forget to mention to our sales team beforehand so we can prepare it right before shipping the device to you. Unfortunately, there are circumstances when you need to add Wi-Fi after you have shipped to the device to you so here is how to configure your WiFi on one of our customizable readers, TA200 Plus Wi-Fi.
Note: Not all FingerTec devices can be customized for Wi-Fi. Find out FingerTec devices that can in the following link HERE!
Process
A - Wi-Fi Setup
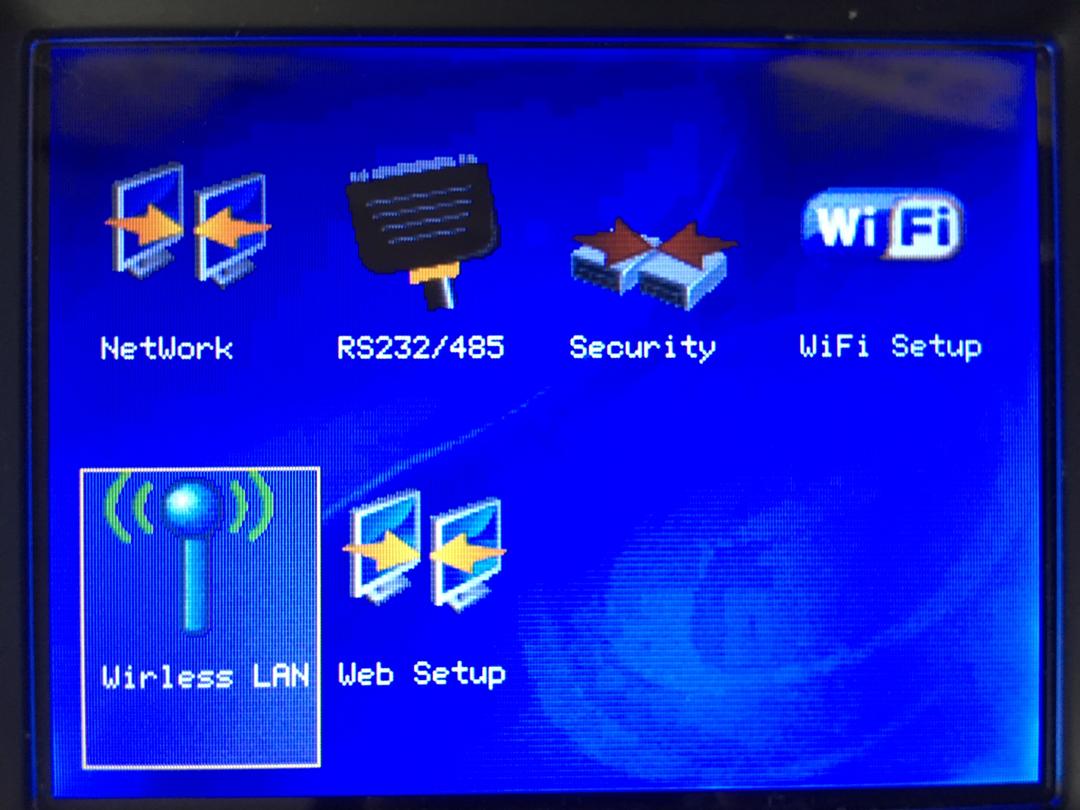
1. Check out available wireless within your network range from your device. Go to Menu> Comm. > Wireless LAN. TA200 plus Wi-Fi can only support 2.4 GHz Network band. Therefore, Wi-Fi that uses 5.0 GHz network band will not be visible or connected to the device.
2. Use the navigation key to select your Wi-Fi. Press M key to set up the Wi-Fi.
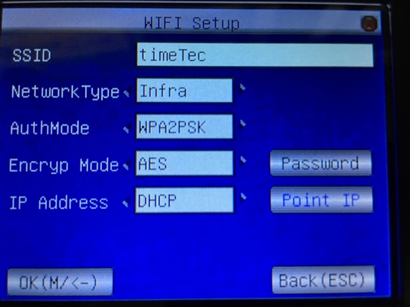
3. Refer to the table below for the security settings supported by the device. These settings have been set up on the server. Thus, it is advisable to consult an IT person for details on these settings.
Settings
| ||
SSID
|
Wifi name
| |
Network type
|
Infra
|
Adhoc
|
AuthMode
|
Open
|
Open
|
Shared
|
SHARED
| |
WEPAUTO
|
WEPAUTO
| |
WPAPSK
|
WPANONE
| |
WPA2PSK
| ||
Encrypt Mode
|
AES
|
WEP
|
TKIP
|
NONE
| |
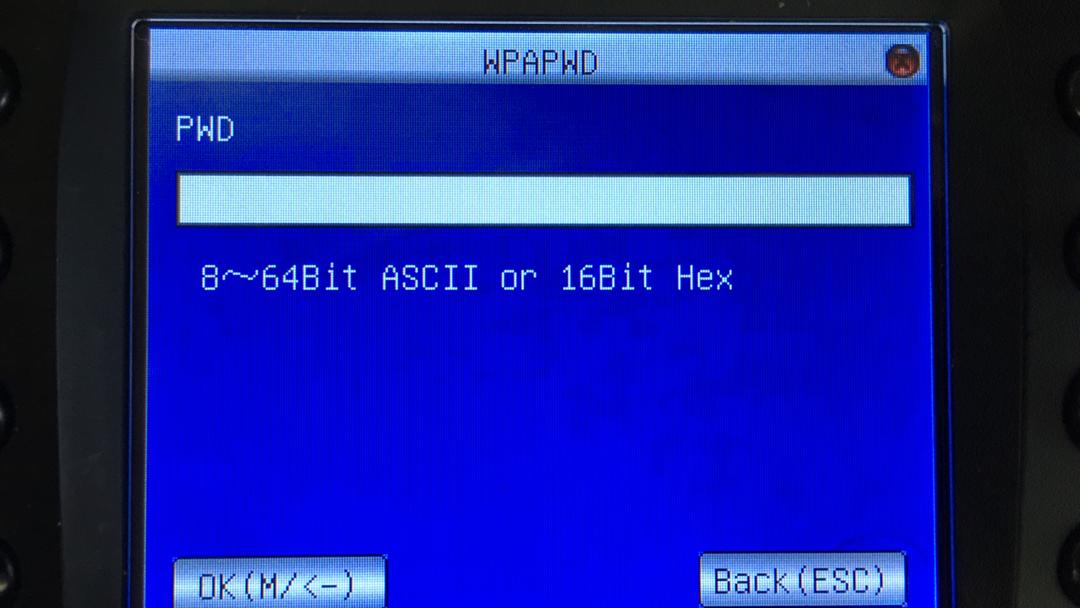
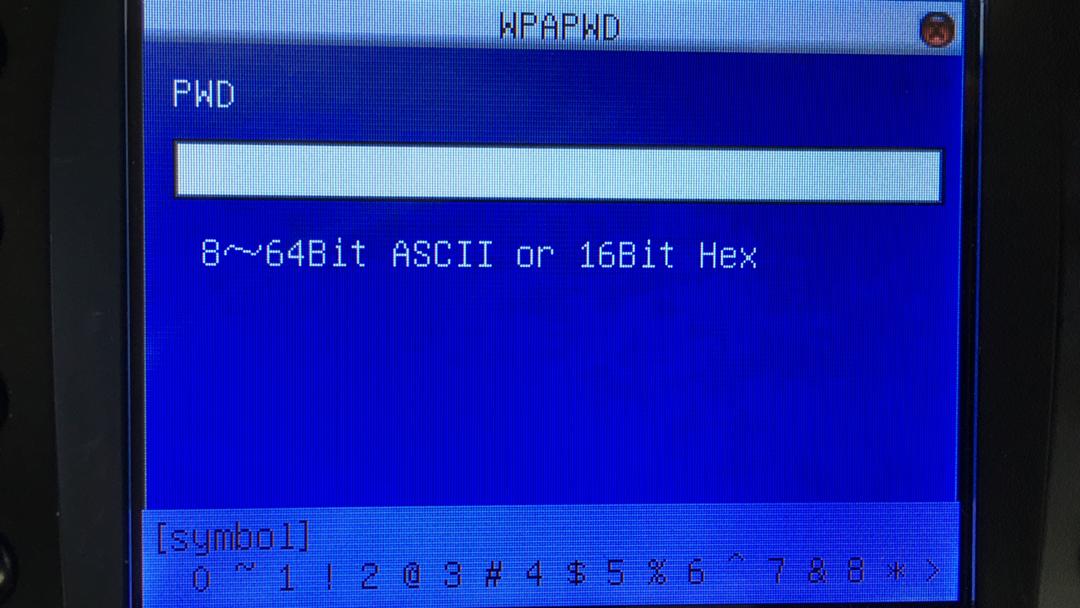
Password
|
Space not available
| |
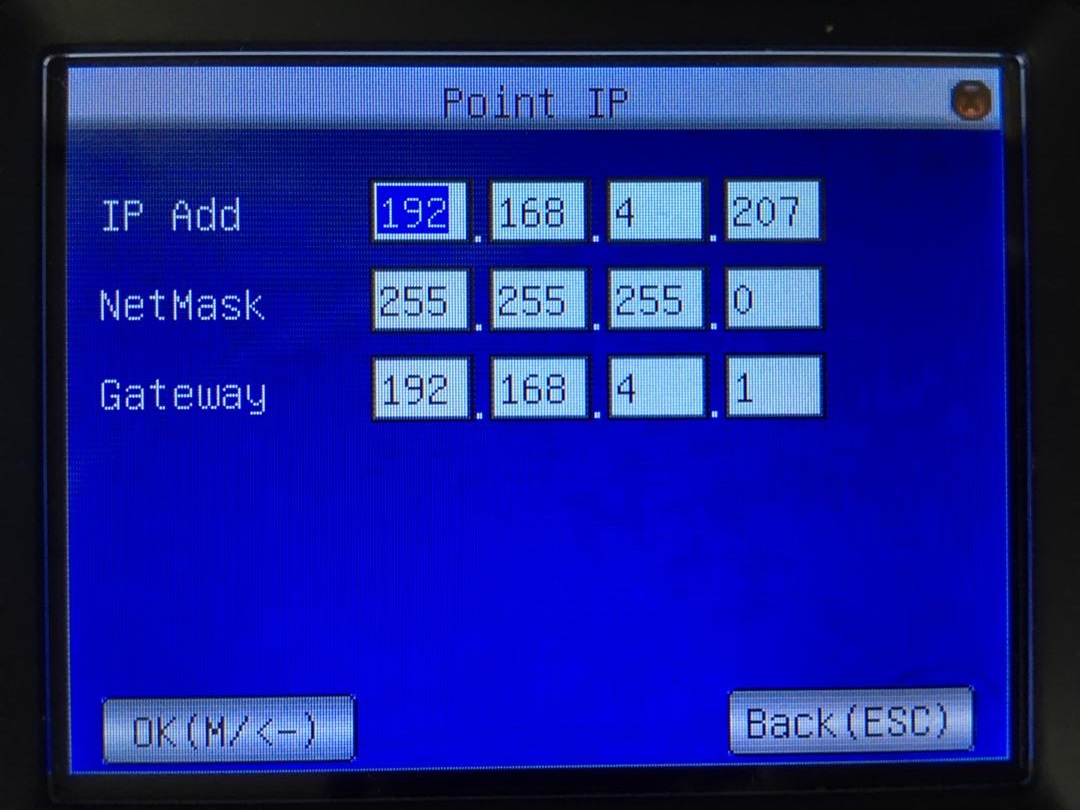
IP Address
|
Manual
|
DHCP
|
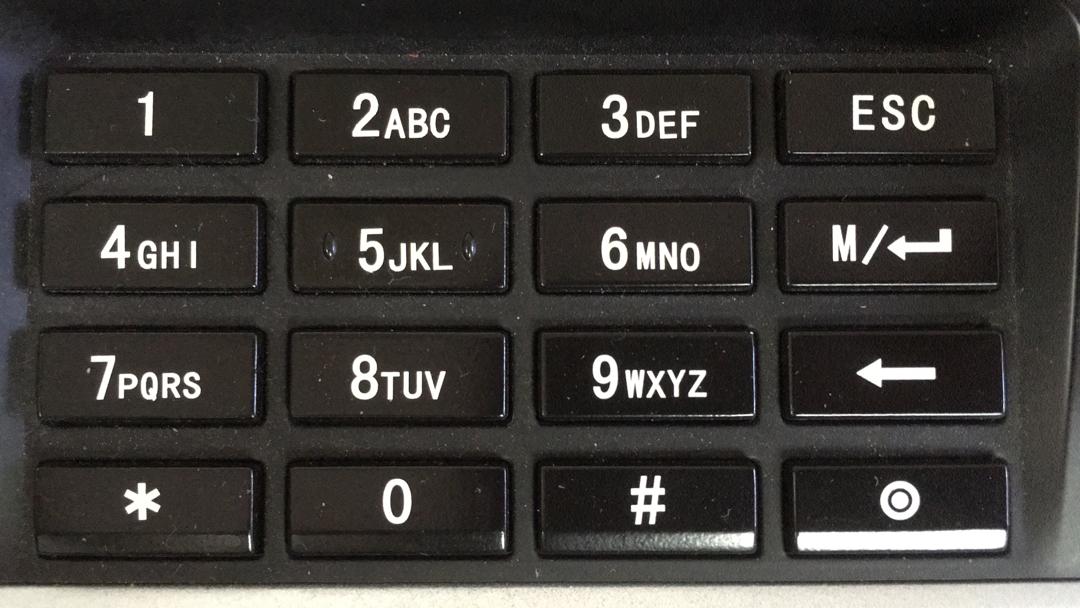
4. By default, the keypad is in numeric keypad for you to insert the password. However, you may change it to the alphabet by pressing the * button and press the number according to the alphabet that you need. If your password requires a symbol, press the * button again. If you need more symbols, click on the right button to view other selection. Please bear in mind that space is not an option for the password.
Alphabet
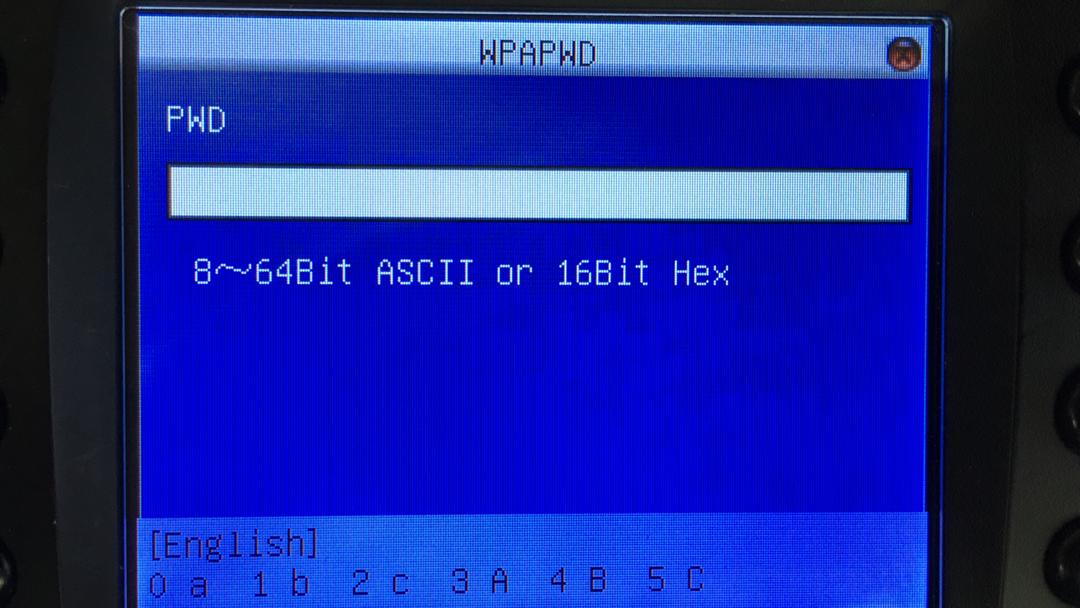
Symbols
5. IP Address selection will be either in Manual or DHCP. If you select Manual, you need to fill up all the details as shown below. For DHCP, you are not required to manually assign an IP address.
6. When you have completed the settings, restart the device to ensure that the changes take effect on the device.
B - Test connection
TA200 plus Wi-Fi does not show any signal bar on the desktop. To test your Wi-Fi, you need to follow the following steps:
1. Connect your PC to the same Wi-Fi network that your device is connected to.
2. Use command prompt to ping device IP address. If the DHCP is set, go to Menu> Comm> Wi-Fi setup. You will see a new IP address for that, already assigned by DHCP. If it shows the IP address not available, please check your Settings.

Here is an example, if you are confused about the Wi-Fi security settings.
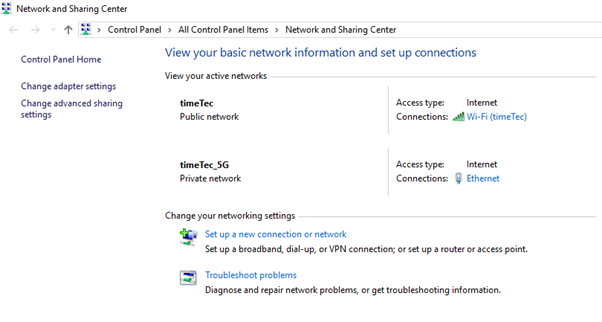
1. By using the Pc that is already connected to the targeted Wi-Fi, go to Control Panel> All Control Panel Items> Network and Sharing Center> click connection of connected Wi-Fi network> WIFI status> Wireless Property> security.


Setting
| ||
SSID
|
Timetec
| |
Network type
|
Infra
| |
AuthMode
|
WPA2PSK
| |
Encrypt Mode
|
AES
| |
Password
|
Abcdf123
| |
IP Address
|
Manual
|
DHCP
|
Table 2
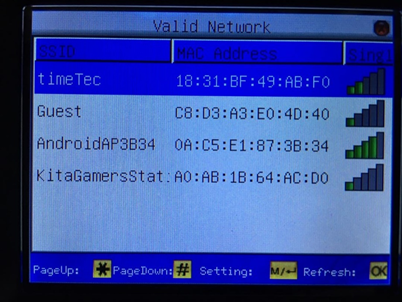
4. Select target Wifi SSID (TimeTec)> set security settings by referring to table 2. Press (M / <-) button, save and restart the device.
5. After the device boots up, go to Menu> Comm. > Wi-Fi Setup. You can see the device Ip Address that is already assigned by the server. (192.168.4.225)
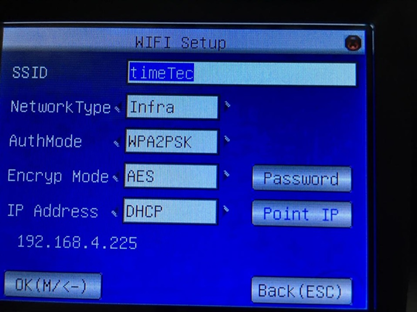
6. You can check the device connectivity by pinging device Ip Address.


What a surprise. I never thought they could connect to Wifi
ReplyDeleteThanks for sharing
the device is not connected but the wifi got no problem, i went to ingress it show error -307. anyone know how to solve this problem?
ReplyDelete