How To Configure ‘Overtime Only After’ Feature in TimeTec TA


Introduction:
Overtime Only After is an option that is available on Group Duty Roster whereas it allows the system to treat extra working time as Overtime or OT whenever the predefined value is exceeded. Here we will be discussing on how to configure the Overtime Only After feature in our Smart Solution, TimeTec TA.

Benefits:
Depending on company policies regarding payroll calculation, by using Overtime Only After option, the HR administrator can choose to accumulate the extra working hour for their employees either by weekly or by monthly basis as the options are available in Weekly, Bi-Weekly, Semi-Monthly or Monthly setting. Below are the necessary steps needed to be taken in order to configure the Overtime Only After feature.

Process:
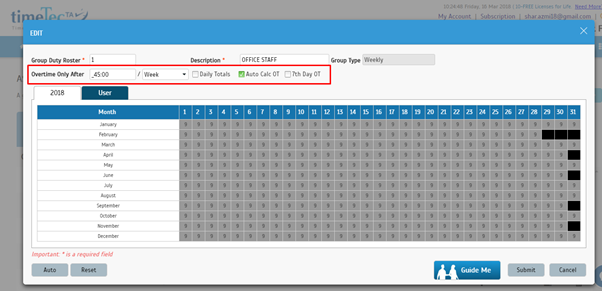
The OverTime Only After feature is available under Group Duty Roster setting (TimeTec TA > Schedule > Assign Schedule and Users into Roster > select Roster)

Case study 1:
For example, if a predefined working hours in a week is set at 45 hours and an employee works a total of 50 hours for that particular week; 5 hours will thus be considered as OT for the employee. If the total working hours does not exceed 45 hours, TimeTec TA will in turn treat it as normal working time.
 

Step 1
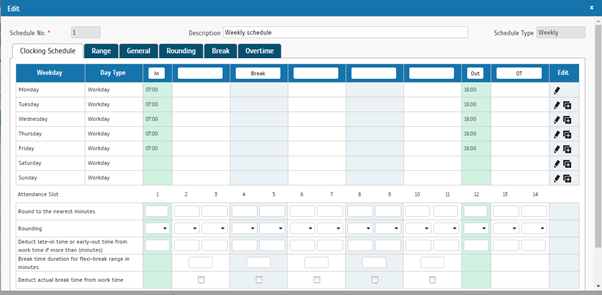
Create the clocking schedule. E.g.: IN - 0700 / OUT – 1600 (Monday to Friday)
 

Step 2
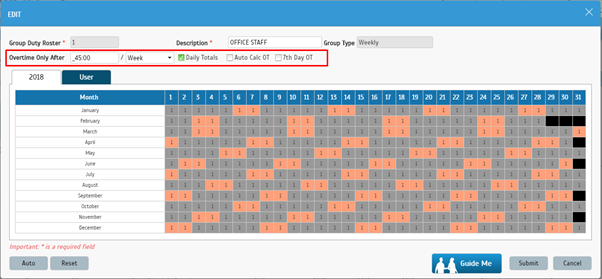
Create the group duty roster and set Overtime Only After to 45.00 hours per week with Daily Total.
 

Step 3
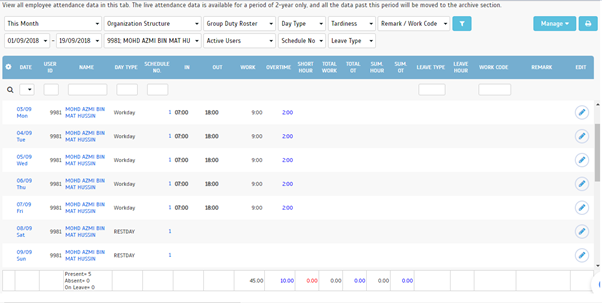
Download and Generate the Attendance sheet based on the Check In and Check Out time as shown below, whereby if the total working hour exceeded 45 hours, the system will then calculate the extra working hour as Overtime.
 

Step 4
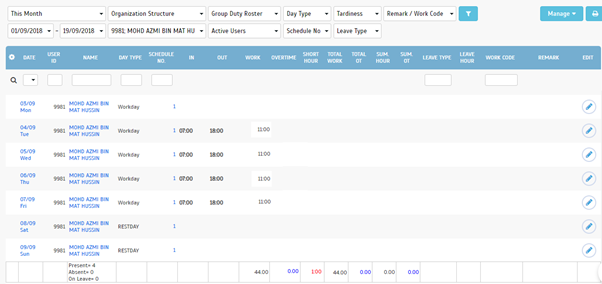
However, if the total working hour within the weekly basis does not exceed 45 hours, then the system will calculate it as short.
 

That’s it! You’re now all set to enjoy the convenient feature of Overtime Only After within TimeTec TA. Note that users can also check the reporting on Daily Totals, Auto Calculate OT and 7th Day OT if the rule applies.

Note: If some of the screenshots or steps viewed here are different from the ones in the current system, this is due to our continuous effort to improve our system from time to time. Please notify us at info@timeteccloud.com, we will update it as soon as possible.

How To Change Unlock Option In TimeTec Security


Introduction
In TimeTec Security, System Admins will be allowed to control all users access via mobile application. There are 4 types of unlock options that TimeTec Security offers, which is Tap To Unlock, Voice Command, Auto Unlock and Scan QR code. What’s more, the system admin is also able to set the unlock option according to their preference. Below is a short guide on how this can be done:

Process:
1)Tap To Unlock
1. Login to TimeTec Security, Tap Menu icon (top left) and choose Configure Access. Select your Smart Access Device and tap on Setting > Choose Tap to Unlock.
2.  To set the unlock option according to your preference, tap Menu icon (top left) and choose Access. Tap on the Name of your Smart Access Device and the setting option for your unlock method will be shown. You can then set the configuration accordingly.
2) Voice Command
1.  Tap Menu icon (top left) and choose Configure Access. Select your Smart Access Device and tap on Setting > Choose Voice Command.
2.  To set the unlock option according to your preference, tap Menu icon (top left) and choose Access. Tap on the Name of your Smart Access Device and the setting option for your unlock method will be shown. Furthermore, system admin can also choose the Voice Command Language and the preferred Question & Answer in addition to setting personal question and answer for the command to access the door.
3) Auto Unlock
1.  Tap Menu icon (top left) and choose Configure Access. Select your Smart Access Device and tap on Setting. Choose Auto Unlock.
2.   To set the unlock option according to your preference, tap Menu icon (top left) and choose Access. Tap on the Name of your Smart Access Device and the setting option for your unlock method will be shown. Once configured, a countdown will be shown once you are near to the device when unlocking the door. Hence, you can set your Auto Unlock Countdown accordingly.
4) Scan QR Code
1.  Tap Menu icon (top left) and choose Configure Access. Select your Smart Access Device and tap on Setting. Choose Scan QR Code. There are 2 types of QR code that will be provided – IN and OUT.

2.   To set the unlock option according to your preference, tap Menu icon (top left) and choose Access. Tap on the Name of your Smart Access Device and the setting option for your unlock method will be shown. By selecting this option, users are required to scan the QR Code in order to access the door. Please be informed that this option will also record the user IN and Out within the Access Records.

Note: If some of the screenshots or steps viewed here are different from the ones in the current system, this is due to our continuous effort to improve our system from time to time. Please notify us at info@timeteccloud.com, we will update it as soon as possible.

Ingress Release Note v3.1.6.10 & v3.1.6.15


For this month, FingerTec has released Ingress software v3.1.6.10 & v3.1.6.15 , which adds 17 new
features and 12 bugs fixes to enhance the user experience when using Ingress Software.

New Features and Enhancements:
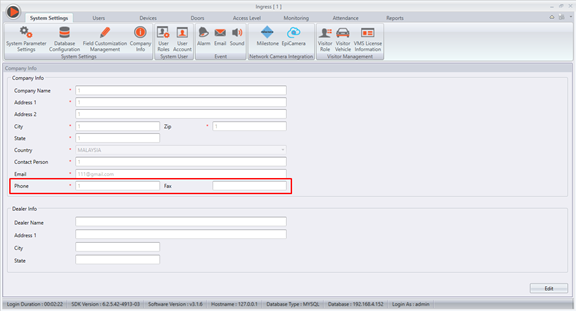
1. Added Phone and Fax in Company Info.

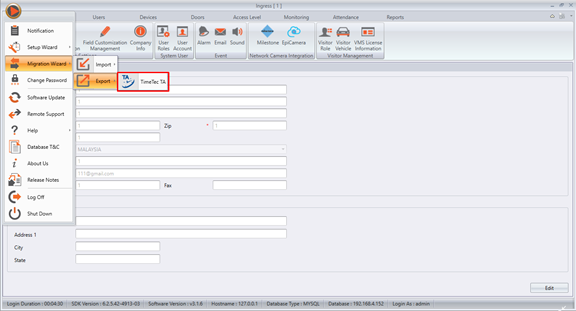
2.  Added Export migration to TimeTec TA.

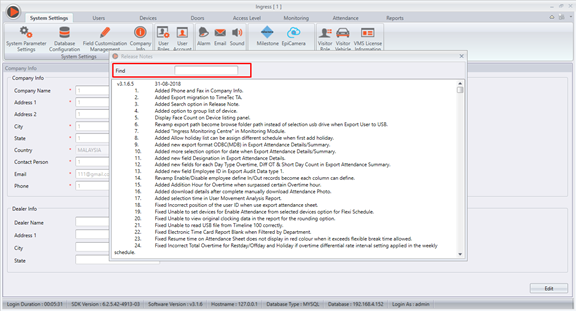
3.  Added Search option in Release Note.

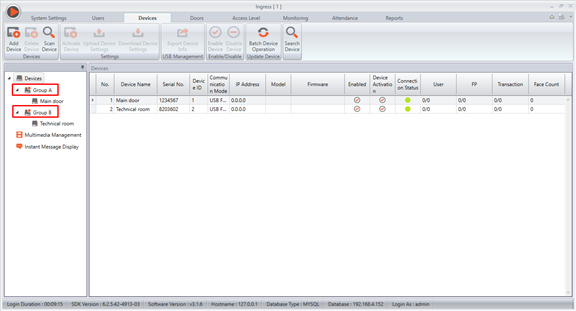
4.  Added option to group list of device.

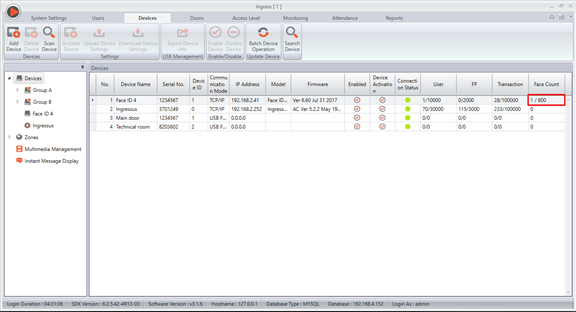
5. Display Face Count on Device listing panel.

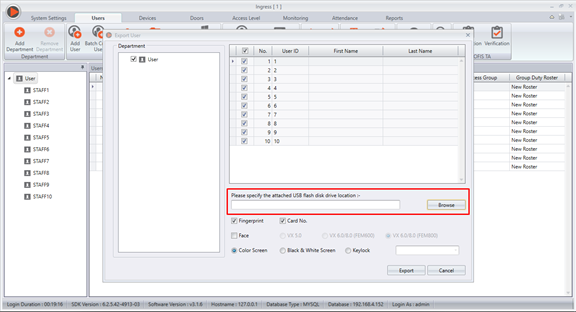
6. Revamp export path to browse folder path instead of the selection of USB drive when exporting
users to USB.

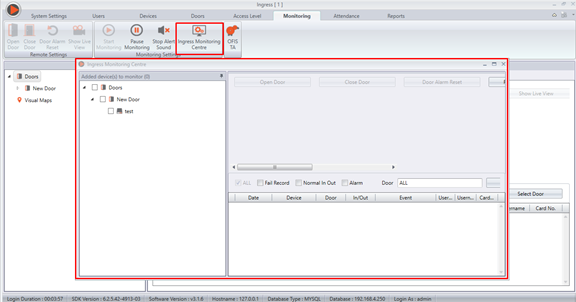
7.  Added "Ingress Monitoring Centre" in Monitoring Module.

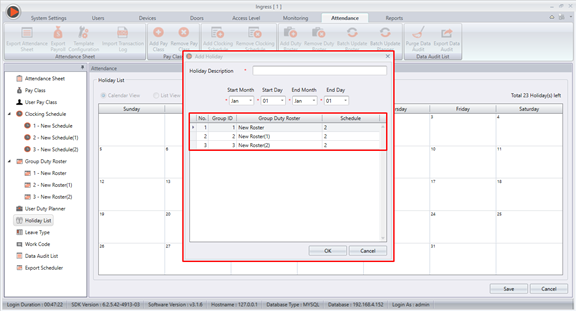
8.  Added Allow holiday list to be assigned in different schedules when first adding holidays.

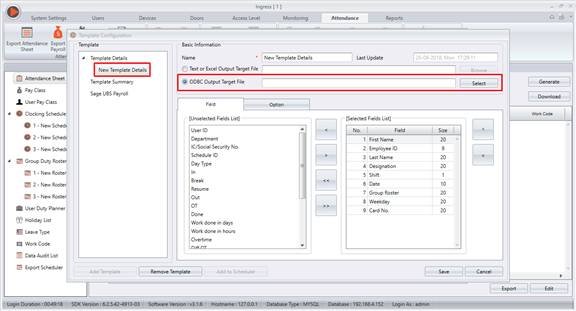
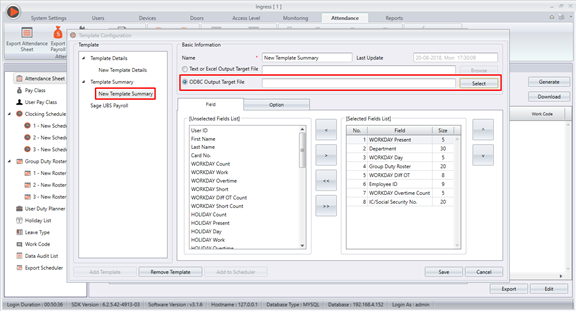
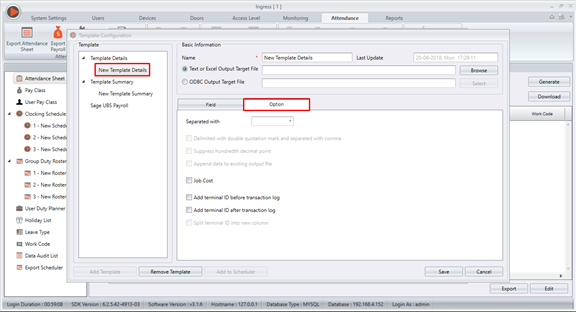
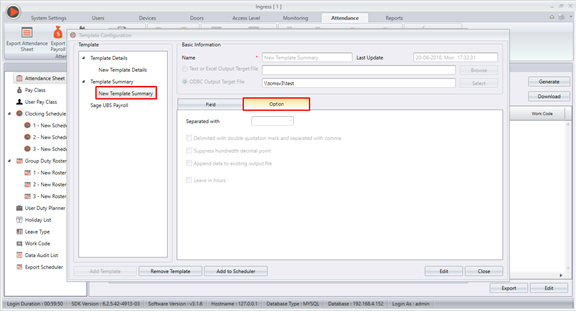
9. Added new export format ODBC(MDB) in Export Attendance Details/Summary.


10. Added more selection option for date when exporting Attendance Details/Summary.


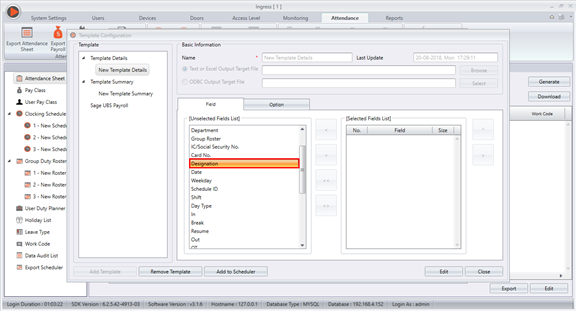
11.  Added new field Designation in Export Attendance Details.

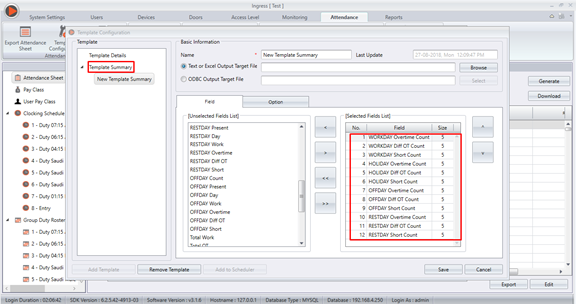
12.       Added new fields for Overtime Count, Diff OT Count & Short Day Count in Export Attendance
Summary for each Day Type.

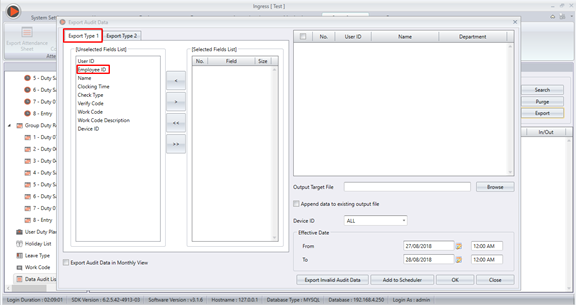
13.  Added new field for Employee ID in Export Audit Data type 1.

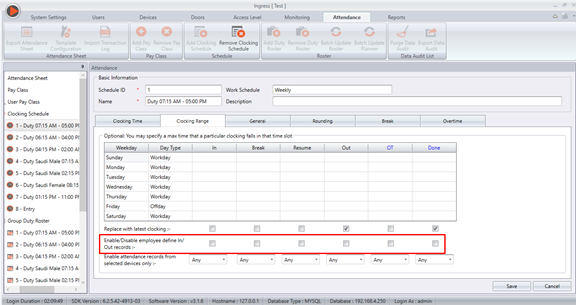
14. Revamped Enable/Disable employee define In/Out records into columns that can be defined.

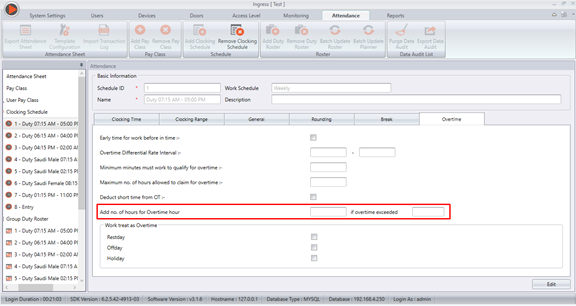
15.      Added no. of hours for Overtime hour when surpassed certain Overtime hour in the clocking
schedule settings.

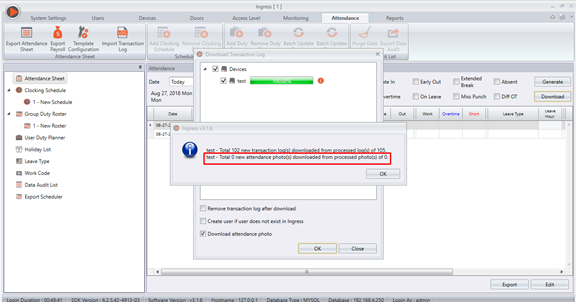
16. Added download details after manually downloading the Attendance Photo.

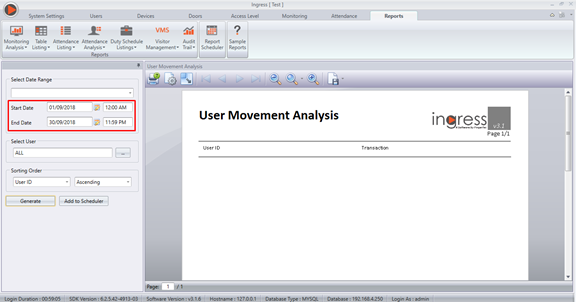
17. Added date and time filter in User Movement Analysis Report.

Bugs Fixed (v3.1.6.10):
1. Fix Incorrect position of the User ID when exporting the attendance sheet.
2. Fixed Unable to set devices for Enable Attendance from selected devices option in Flexi Schedule.
3. Fixed Unable to view original clocking data in the report for the rounding option.
4. Fixed Unable to read USB file from Timeline 100 correctly.
5. Fixed Electronic Time Card Reporting Blank when Filtered by Department.
6. Fixed Resume time on Attendance Sheet does not display in red colour when it exceeds the
flexible break time allowed.
7. Fixed Incorrect Total Overtime for Restday/Offday and Holiday when overtime differential rate
interval settings are applied in the weekly schedule.
8. Fixed Attendance sheet report not showing the leave indicator when In/Out Clocking option is not
selected.
9. Fixed Tardiness Report showing late IN.
10. Fixed Basic Rate becoming 0.00 when exporting using Employee ID in Export Sage UBS
Payroll.
11. Fixed MYOB payroll leave export Reduce to 1 column.

Bugs Fixed (v3.1.6.15):
1. Fixed Missing Employee ID option in the Export Scheduler Audit List Type 1 template.


Note: If some of the screenshots or steps viewed here are different from the ones in the current
system, this is due to our continuous effort to improve our system from time to time. Please
notify us at info@timeteccloud.com, we will update it as soon as possible.

TimeTec TA Made Easier With TimeTec TA Wizard


Introduction
TimeTec TA is a cloud-based time attendance system that offers various features to ensure a systematic time attendance management. The registration process is very quick and once completed, TimeTec TA wizard is easily made available to guide the user on the basic features of TimeTec TA.

TimeTec TA Wizard will assist users especially new users in using TimeTec TA for the first time. As such, users will be able to perform basic functions such as adding user, setting up the organization chart as well as configuring schedules. To experience TimeTec TA and its wizard, please follow the steps below:
Process:
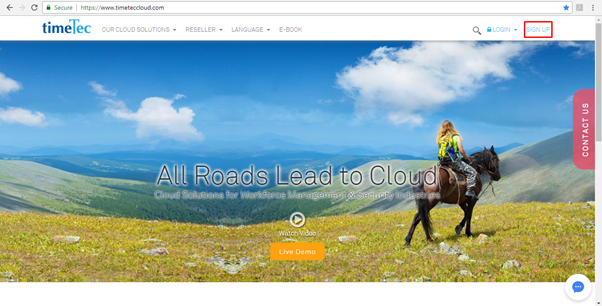
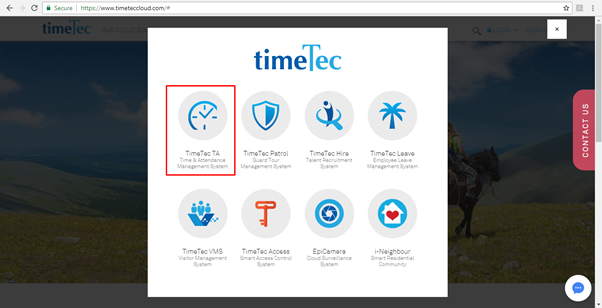
1. Go to www.timeteccloud.com and then click on SIGN UP.
 
2. Then, click on TimeTec TA Time & Attendance Management System.
 

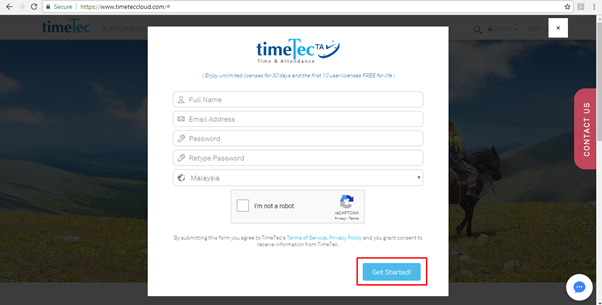
3. Next, key in your Full Name, Email Address and Password and the country. Note that the password must be at least 6 characters along with combination of uppercase letter and alphanumeric. Once completed, tick on the ‘I’m not a robot’ captcha and the Get Started! button.
 

4. Next, key in your Company Name, Industry, Contact Number, Time Zone and No. of Employees within the organization. Click on Create Your Account button after filling up the required fields.
 

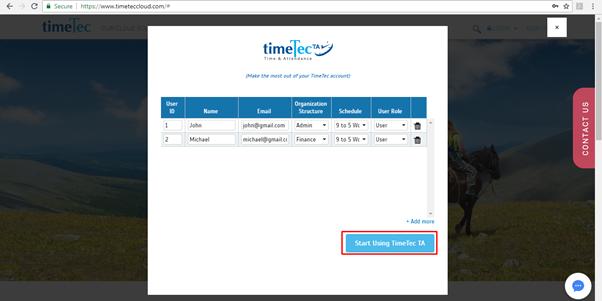
5. Afterwards, you will be prompted to key in the user details (user ID, email, organization structure, schedule and user role) for TimeTec TA. Click on the + Add more button to add users. Note that you can also start navigating to TimeTec TA page by clicking on Start Using TimeTec TA button.
 

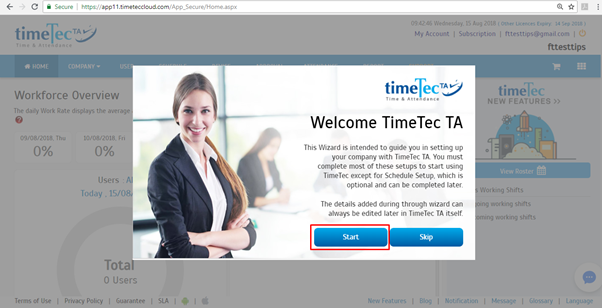
6. Once in TimeTec TA main page, a TimeTec TA wizard message will be displayed. Users can thus begin TimeTec TA wizard by clicking on the Start button. If you wish to skip TimeTec TA wizard, please click on the Skip button.
 

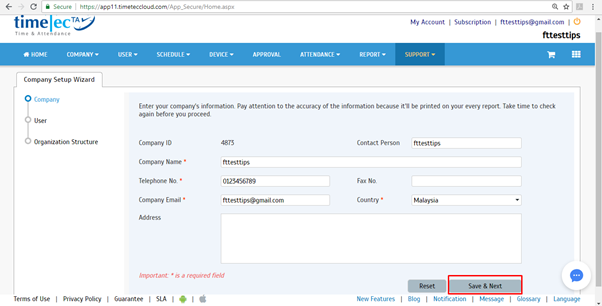
7. Initially, the wizard will redirect users to the Company Setup Wizard. In here, users can edit the company details and after completing, please click on the Save & Next button.
 

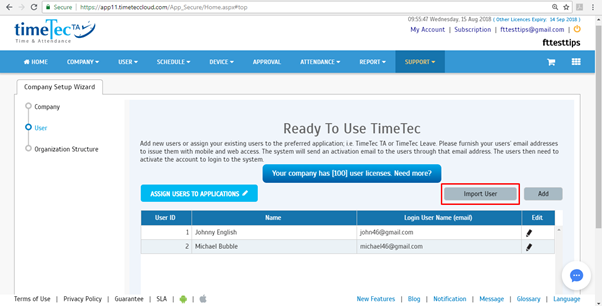
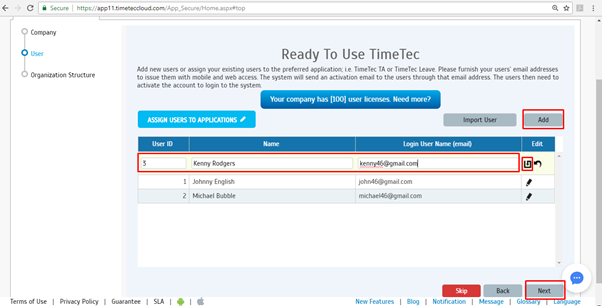
8. Next, users will be directed to the user section, whereby they can choose to import the user or manually add the user. Click on Import User button to begin importing users. For more information about importing users to TimeTec TA, please refer to the following link:
http://www.fingertectips.com/2017/01/batch-add-user-into-timetec-ta-made.html
 

9. If you wish to manually add the user, click on Add button. Fill in the User ID, Name and Login Email of the user. Click on Update logo after filling in the data and then the Next button to navigate into the next page.
 

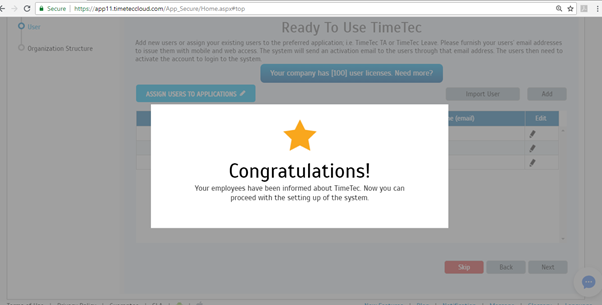
10. A message will then be displayed to inform you that the added employees have been informed about TimeTec TA via email.
 

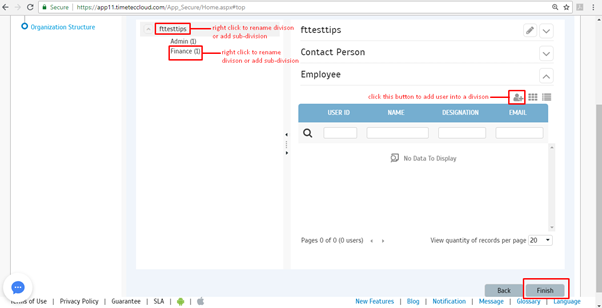
11. Moving on to the organization structure section. Users may rename the division or add a new division by right-clicking on the division name. Click on Add User symbol to start adding the user into the division. Once done, please click on the Finish button.
 

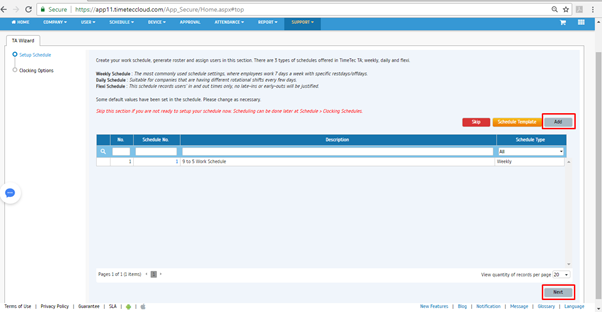
12. Subsequently, the wizard will direct you to the schedule configuration section. Click on the Add button to add a new schedule and click Finish once done setting up.
 

13. Lastly, users will be directed to the Clocking Option section. Within this page, you will find more detailed information and instructions regarding clocking option such as Geo-location, Wifi, Time Beacon, NFC and Supervisor Mobile Clocking. Click on each tab to view more details on each type of clocking option. Once done, click on the Finish button.


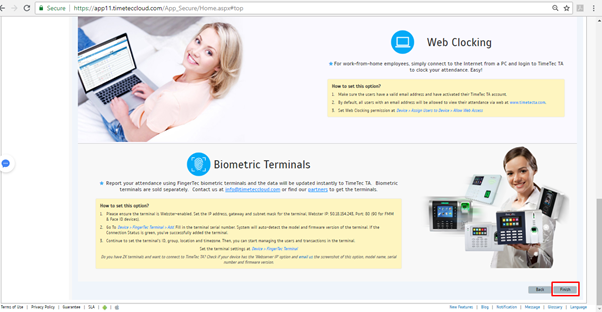
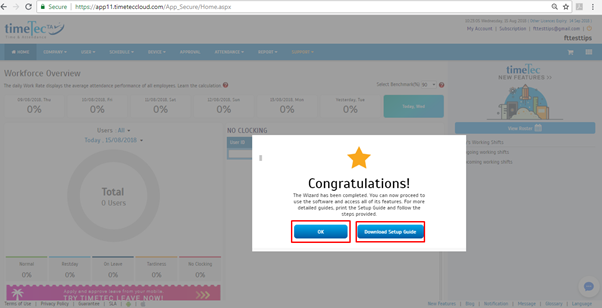
14. A congratulation message will pop-up to indicate that the wizard has finished. Click on the OK button to return to TimeTec TA main screen or click on the Download Setup Guide to know more about TimeTec TA feature.
 

Note: If some of the screenshots or steps viewed here are different from the ones in the current
system, this is due to our continuous effort to improve our system from time to time. Please
notify us at info@timeteccloud.com, we will update it as soon as possible.