Showing posts with label Access. Show all posts

Manage System Role in TimeTec Access


Introduction
In view of security concerns, TimeTec Access offers the access rights control to authorize users to manage the system role within the organization. By default, there are two types of User Role:

1. Master (System Administrator) who has full access and is responsible for setting up and maintaining the TimeTec Access system.

2. Normal User - TimeTec Access allows users to create and customize the access rights. Depending on the rights given by the Admin roles, normal users will also be able to assign roles to selected employees. 
We target to improve better user experience. In doing so, this article will provide some tips on managing system roles and the admin modules more efficiently and effortlessly. This is how it can be done:

Process
Step 1 - Add System Role:
Click on the System Role tab, create a new System Role with specific access rights by clicking on the Add button.

At the pop-up window, there will be an option to allow users to copy the access rights from existing System Roles or even to edit the copied role, if necessary. This is to quicker the process in creating a new yet similar system role. Fill up the System Role Name and Description.

Upon selecting the Full Division will allow the Admin to access all users’ information in the Organization Structure while Partial Division will only allow Admin to access a limited amount of users’ information.


Next, selecting Access Point will allow Admin to access and manage the access location of the devices. All depends on the preconfigured Access Point settings.

Subsequently, set the access rights for the System Role by ticking on the Full Module Rights. This will allow all modules access in the TimeTec Access while unticking it will change the accessibility of the module for the role.


Step 2 - Assigning Admins into the System Role:
After setting up the System Roles, the Admin can also be easily assigned under the System Role by clicking on the ‘+’ button.


Once the + is clicked, a pop-up window will appear and a list of Admins (excluded from the role) will be displayed for selection. 


Step 3 - Configuring System Role While Adding Admins Into the System:
On the other hand, System Roles can also be arranged specifically while adding an Admin into the system. To add an Admin into the system, please click on the Add button under the Admin tab.

At the pop-up window, select the existing system user that you wish to assign as the Admin and select the relevant System Role. Note that the default System Role is Master if the users do not wish to create any System Roles within the system.


Note: If some of the screenshots or steps viewed here are different from the ones in the current system, this is due to our continuous effort to improve our system from time to time. Please notify us at info@timeteccloud.com, we will update it as soon as possible.

How To Customize User Privileges For Face ID 2 FMM


Introduction:
FingerTec Face ID 2 FMM terminal consists of a few types of privileges such as User, Enroller, Admin and Super Admin. As such, each of the privilege has a different authority and access into the terminal. In this article, we will thus be showing how you can customize the User Privileges in Face ID 2 FMM. Please refer to the process below to get started:

Process:
User Role
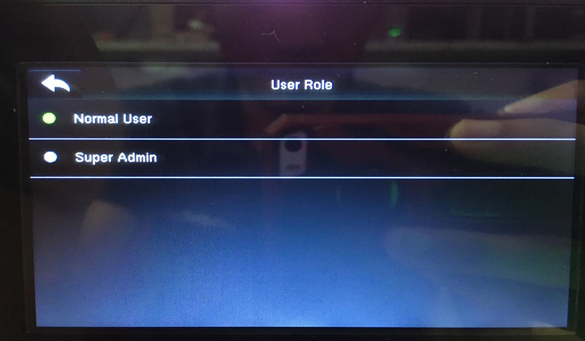
By default, whenever enrolling a new user into Face ID 2 FMM, the user roles that are available for selection will be listed as Normal User and Super Admin.


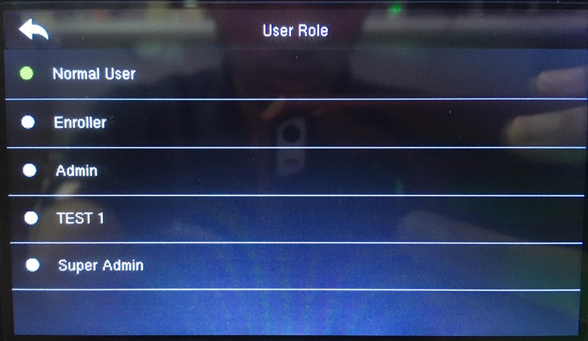
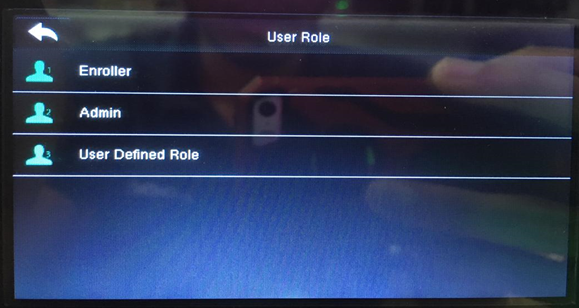
However, by selecting the User Role menu, note that there are 3 other roles that can be enabled for the device:

1. Enroller
2. Admin
3. User Defined Role


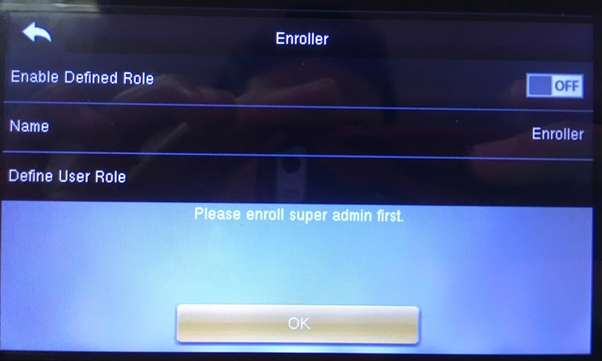
Before proceeding further, it is important that you first enroll at least one Super Admin before enrolling any other users. This is because without Super Admin, the system will prevent you from enabling a user role that you required.


Customizing User Role


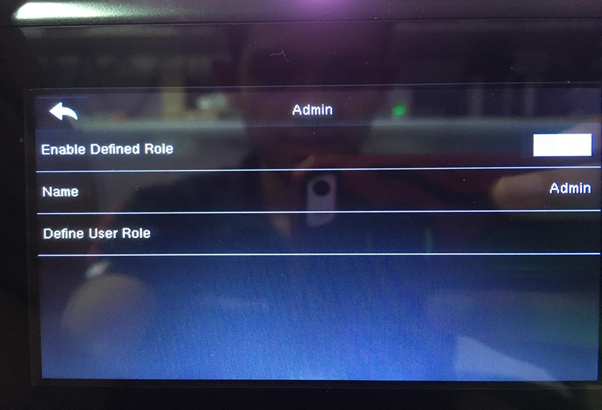
Once added the Super Admin, you can now proceed to customising your preferred User Role. In doing so, you will be presented with these 3 options:

i. Enable Defined Role - Set on/off to enable/disable your User Role.
ii. Name - This field allows you to assign a name for the User Role.
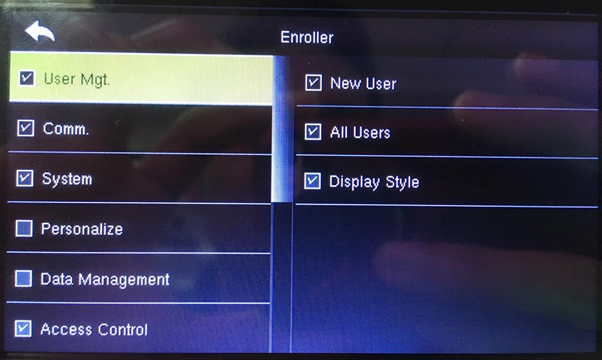
iii. Define User Role - In this field, you are given the choice to select any function that can be accessed by this User Role. Please tick the function that you wish to enable access or vice versa as shown in the screenshot below.


After enabling the User Role being configured, you will now able to select the customized User Role during the enrollment process.


That’s it, you’re all set and ready to start your very own customization process.

Note: If some of the screenshots or steps viewed here are different from the ones in the current system, this is due to our continuous effort to improve our system from time to time. Please notify us at info@timeteccloud.com, we will update it as soon as possible.
TimeTec Access - Allow Offline Access


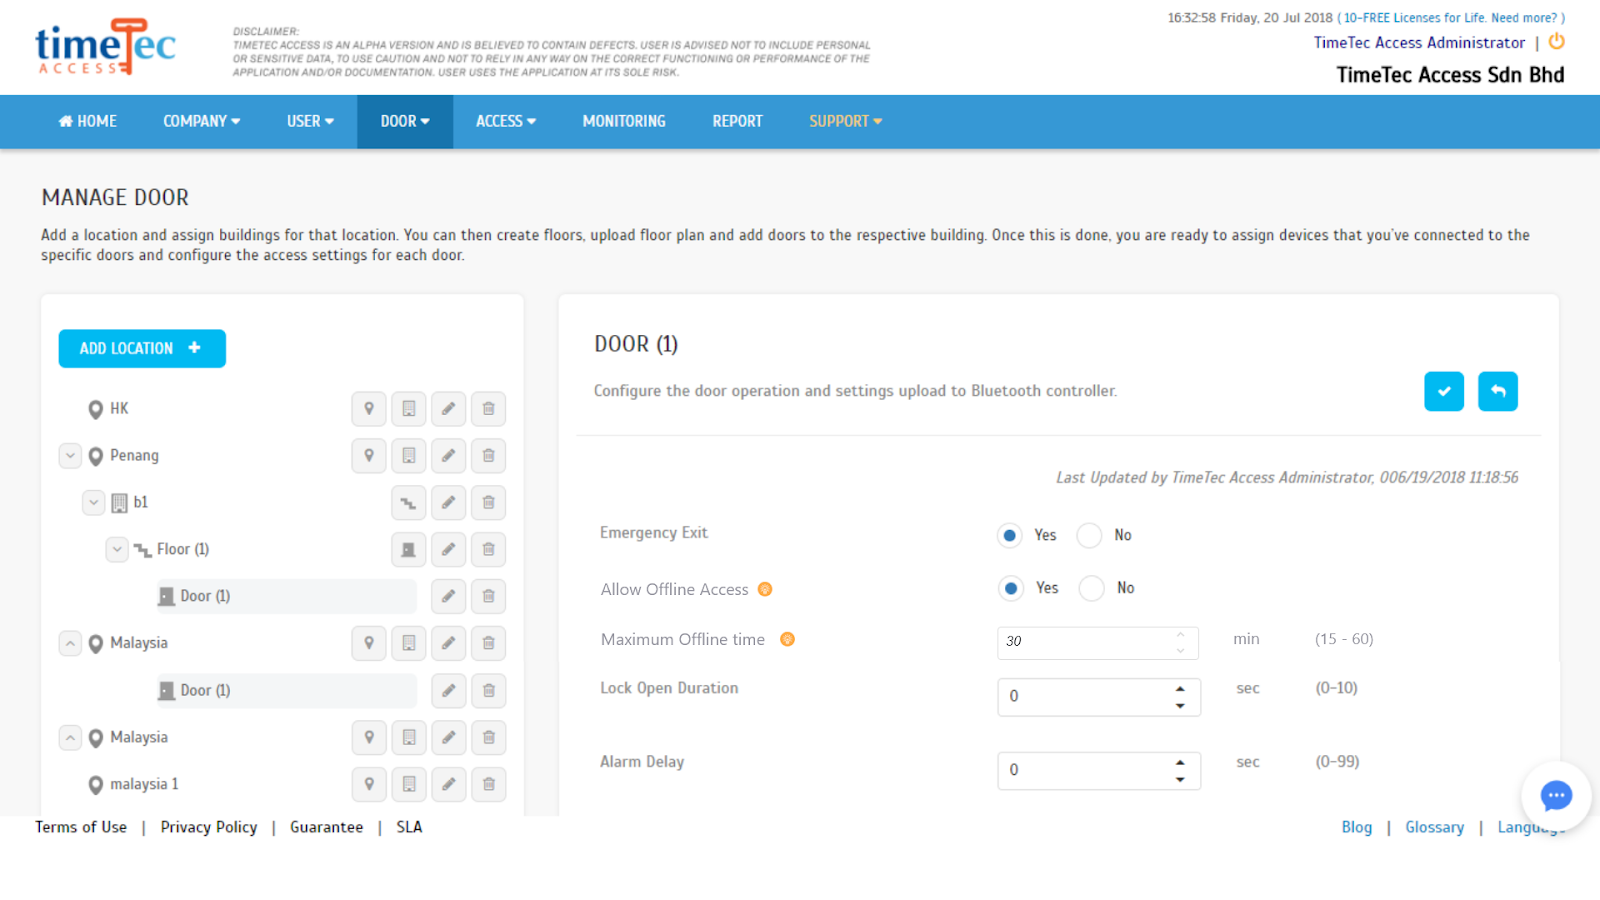
Allow Offline Access and Set Maximum Offline Time

By default, user’s TimeTec Access Mobile App must be connected to the Internet in order for the
date, time and access permission to be synced with the data from TimeTec Access cloud server. This is to avoid the users from manipulating the smartphone date and time, and exploit the system.

However, there are certain locations whereby the users’ smartphones have zero or minimum Internet
connectivity. This option thus enable the users to continue using the Mobile App for door access
without the need for an Internet connectivity under a designated time period (Maximum Offline
Time). When using this setting, the Mobile App will only connect to the Internet according to a
predefined time interval.

For example, if you enabled Allow Offline Access and the Maximum Offline Time is set as 30
minutes; therefore, when a user launches the Mobile App at 9:00 am, the App will subsequently
connect and sync to TimeTec Access cloud server. Hence, the user can now use the Mobile App to
access doors even though there is no Internet connection. This is because the App uses the access
permission stored in its memory to determine the user’s access right up till 9:30 am. As such, any
period after the established time period and the App will erase the access permission stored in its
memory which in turn requires the user to connect to the Internet again.

During implementation, it is recommended that the system admins check the Internet connectivity of
the area before installing TimeTec Access BLE-5. If the Internet connectivity is poor at the selected area, the system admins can configure the Maximum Offline Time to 30 minutes and onward to
further increase flexibility for the users. Additionally, the system admin can also improve the Internet
connectivity by installing WiFi access point.


Note: If some of the screenshots or steps viewed here are different from the ones in the current system, this is due to our continuous effort to improve our system from time to time. Please notify us at info@timeteccloud.com, we will update it as soon as possible.