

How To Enable/Disable GPS & Web Clocking In TimeTec TA

TimeTec TA is a versatile smart solution that provides employees with various clocking methods to assist in enhancing the productivity within the workplace. Hence, in this article, we will be discussing on how to enable/disable GPS & Web Clocking in TimeTec TA.
Process:
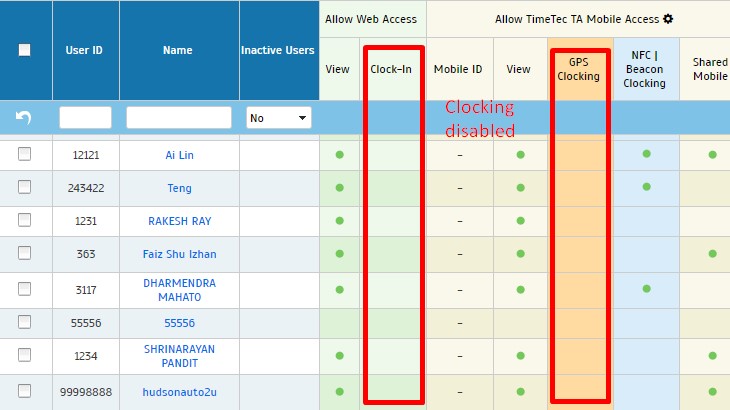
At the ‘Assign Users to Device’ page, Admins can assign users to different clocking devices to enable viewing or reporting of attendance via the selected devices. Here is how one can Enable/Disable GPS/Web clocking through this module:
- Login to TimeTec TA using your computer browser, and Select Assign Users to Device from the Device tab.

- Click on ‘Edit’ icon at User’s tab and Set Web Clocking to ‘Yes/No’ to Enable/Disable.
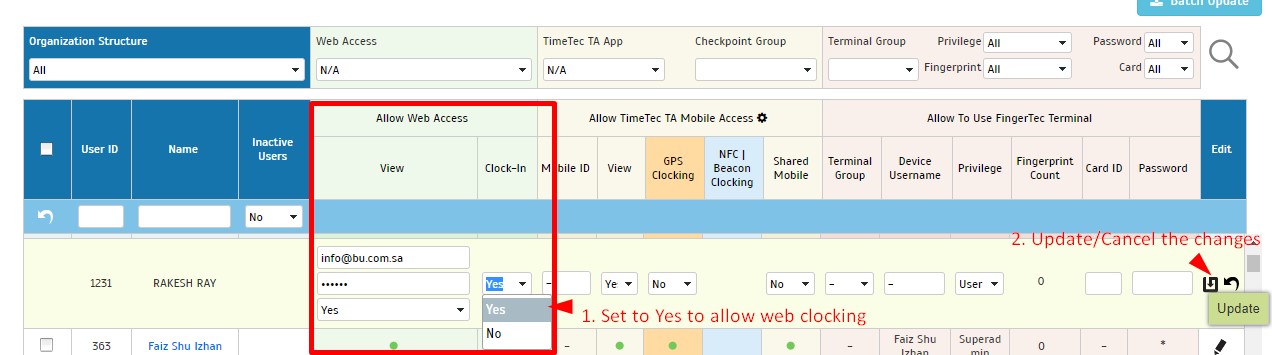
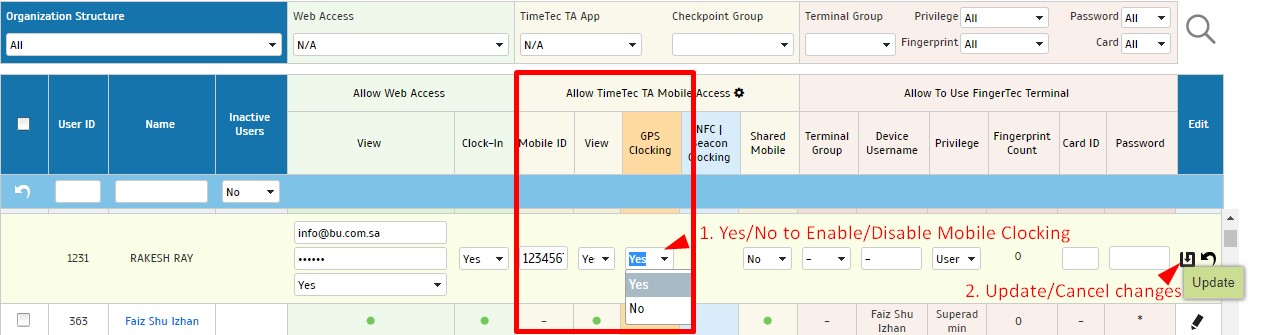
- To Enable/Disable GPS Clocking, Set the GPS Clocking option to Yes/No. Next, click Update/Cancel to save the changes.
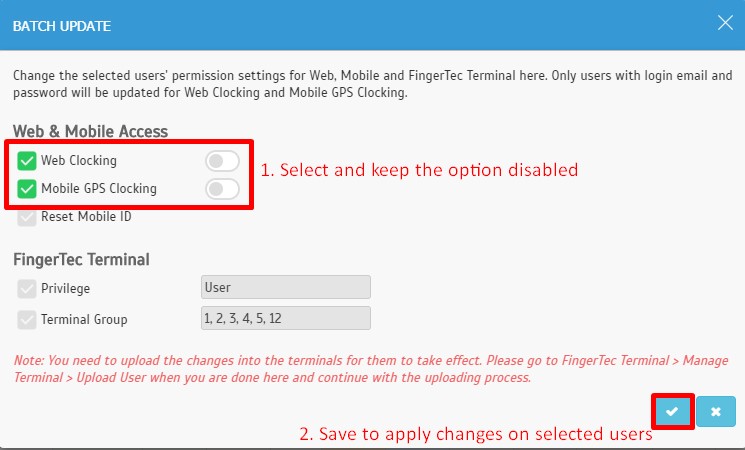
Batch Update:
To change the Web and Mobile Clocking, as well as FingerTec Terminal permission settings for more than one user, Admins can likewise use the Batch Update option accordingly.
First, select all of the relevant users, then click ‘Batch Update’ to adjust the settings.
Next, select Web/Mobile Clocking and Enable the option to allow for Web Clocking or Disable the option to prevent users from accessing the function. Please refer to the following:
To Enable-
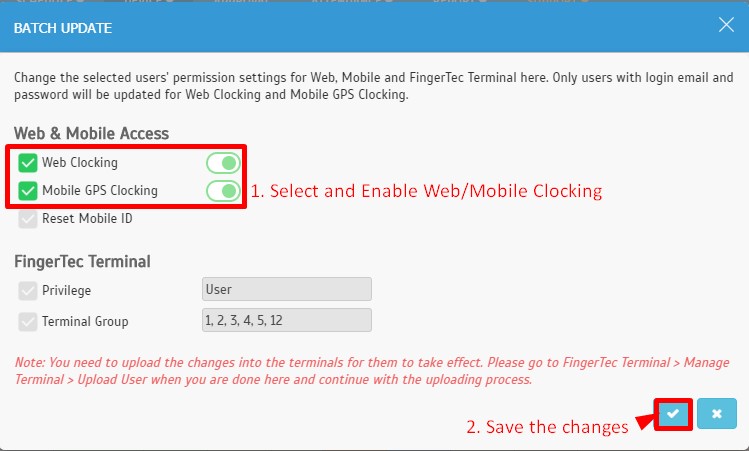
To Disable-
Note: If some of the screenshots or steps viewed here are different from the ones in the current
system, this is due to our continuous effort to improve our system from time to time. Please notify us at info@timeteccloud.com, we will update it as soon as possible.


0 comments:
Have any questions or inquiries about FingerTec? Drop your input here.