

Start WiFi Clocking With TimeTec TA App

This post was originally published in May 2018 and has been updated in August 2018.
Introduction
Within TimeTec TA, users previously had 3 different ways to personally clock their attendance from a smartphone. Following our latest release we are notching that up to 4, by offering one more clocking method to users, known as Wifi Clocking. With this added feature, employees will now be able to clock-in via smartphone as long as they are connected to a pre-enrolled Wifi Checkpoint, for which they have also been assigned as user.
Thus, the latest range of personal clocking options in the mobile app will now include:
- GPS Geolocation
- Beacon
- NFC
- Wifi Checkpoint (NEW)
Before employees can use Wifi Clocking, the Admins first need to make some configurations in the system (i.e. Wifi Access Point & User assignment settings). You can choose to do the initial setup either through the TimeTec TA mobile app or in the Web application. We will cover the steps for both platforms below.
Meanwhile, for the employees, please refer here for additional guidance on mobile clocking.
Process
Admin Setup (Mobile app)
To use this clocking option, Admin must first add the necessary Wifi Access Points to the system as clocking Checkpoints and then assign users to the relevant Checkpoints.
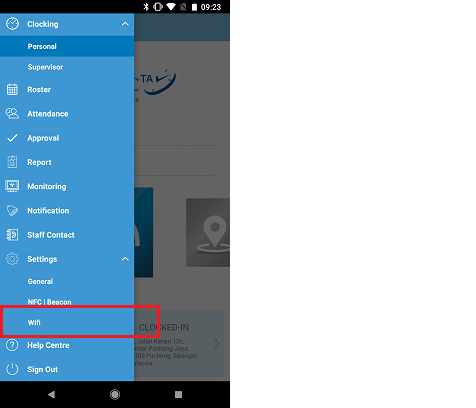
1. Login to Mobile app > navigate to Settings > Wifi.
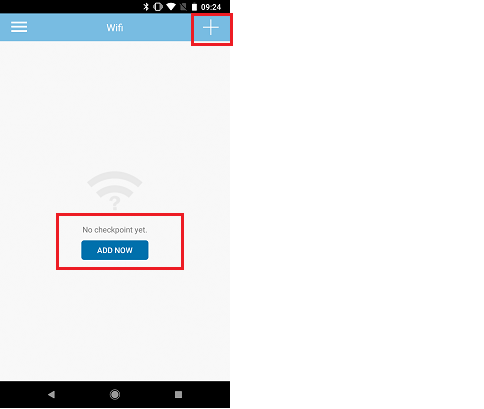
2. Select the “+” icon at upper-right corner or “Add Now” to add a new Checkpoint.
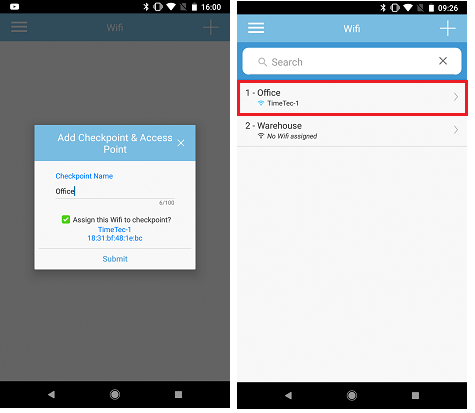
3. The system will auto-detect the Wifi Access Point of the current network your device is connected to. (You can also choose to rename or choose to untick “Assign this Wifi to checkpoint” to solely create a new Checkpoint without assigning the Wifi Access Point.)
Press “Submit” to add this Access Point as a new Checkpoint.
Press “Submit” to add this Access Point as a new Checkpoint.
4. Once added, select that Checkpoint to assign your users. Next, choose either the first tab, Organization Structure or the second tab, Assign Users (can only select one at a time).
Note: You can assign each user to more than one Checkpoint. That is advisable if your staff is not based in a fixed office and if they are always moving around the premises.
i. Organization Structure- Select the allowed Division(s) for this Checkpoint > Press tick to submit (upper-right corner)
Note: You can assign each user to more than one Checkpoint. That is advisable if your staff is not based in a fixed office and if they are always moving around the premises.
i. Organization Structure- Select the allowed Division(s) for this Checkpoint > Press tick to submit (upper-right corner)

ii. Assign Users- Individually choose the user(s) for that Checkpoint > Press tick to submit (upper-right corner).

iii. Later on, should you wish to, you can un-assign users at the last tab, Users Assigned.

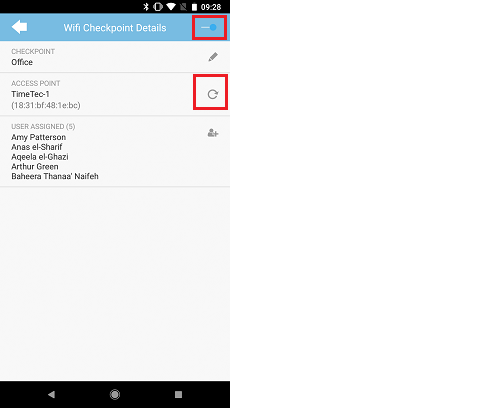
5. The Setup is now complete and you can view details of that Checkpoint. There are also options to disable the Checkpoint using a toggle button and to reset the access point.
Admin Setup (Web application)
1. Login to the Web application. Go to Device > Mobile Clocking > Wifi Access Points. Click on “+” icon to add a new Checkpoint.
1. Login to the Web application. Go to Device > Mobile Clocking > Wifi Access Points. Click on “+” icon to add a new Checkpoint.

2. Next, enter the Checkpoint Name, Wifi Access Point and MAC address > Update. All fields must be completed.

3. Once the checkpoint is added, click on ‘Assign Users/Divisions’. Next, choose either the first tab, Organization Structure or the second tab, Assign Users (can only select one at a time).
Note: You can assign each user to more than one Checkpoint. That is advisable if your staff is not based in a fixed office and if they are always moving around the premises.

i. Organization Structure- Select the allowed Division(s) for this Checkpoint > Press tick to submit

ii. Assign Users- Individually choose the user(s) for that Checkpoint > Press tick to submit.

iii. Later on, should you wish to, you can un-assign users at the last tab, Users Assigned.

4. The Setup is now complete and you can view or edit details of that Checkpoint. There are also options to disable the Checkpoint using a toggle button and to reset the access point.

After Setup
1. Now, users are allowed to use Wifi Clocking. You may ask them to refer here for guidance on using Wifi Clocking.
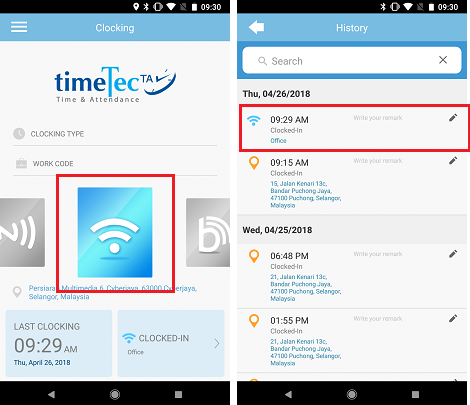
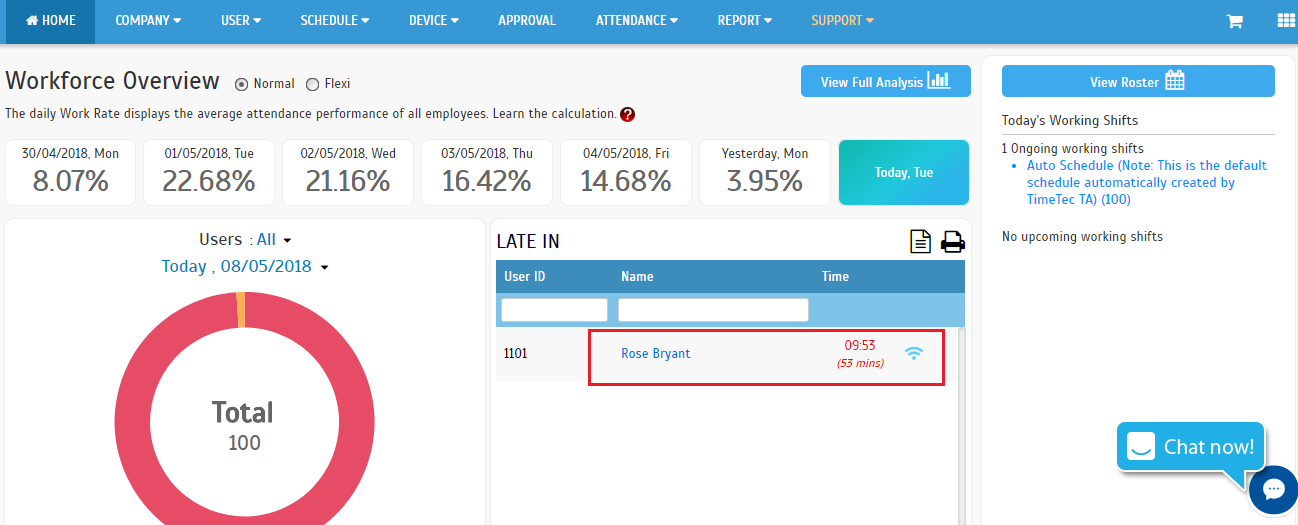
2. Additionally, Wifi Clocking method will be shown throughout TimeTec TA, for example:
i. WiFi clocking method in Admin Dashboard
ii. Data Audit List

iii. Mobile Location Tracking Report – Wifi Clock-In


0 comments:
Have any questions or inquiries about FingerTec? Drop your input here.