

Export File to Other PCs on the Same Network Range via Ingress / TCMS V3
Introduction:
Previously, we have introduced a new feature for Ingress and TCMS V3 software, whereby you can export the Attendance and Transaction Data automatically by date or time into a dedicated folder path under Attendance Module. Therefore, we will now brief and guide you on how to export the file into other PCs that have the same network range with the main PC.
Benefits:
By choosing this option, you can export the file and manage it in other PCs automatically, whereby the system can then run the process based on the settings in the Export Scheduler option.
Process and Setting:
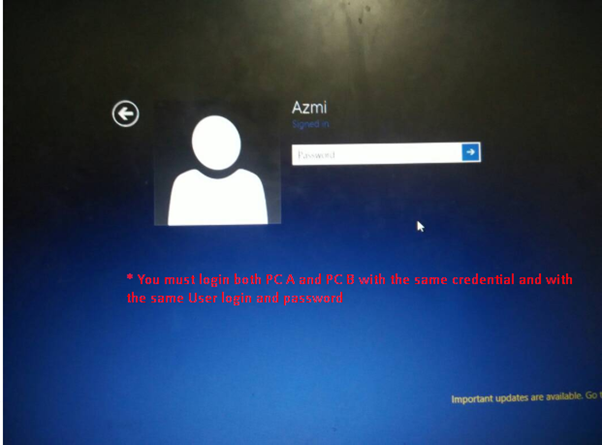
1. You must create both PCs with the same credential or same User Login and Password. For example: PC A (main PC with Ingress/TCMS V3 software) & PC B (the location where the file will be saved) must have the same credential as indicated in the picture below.
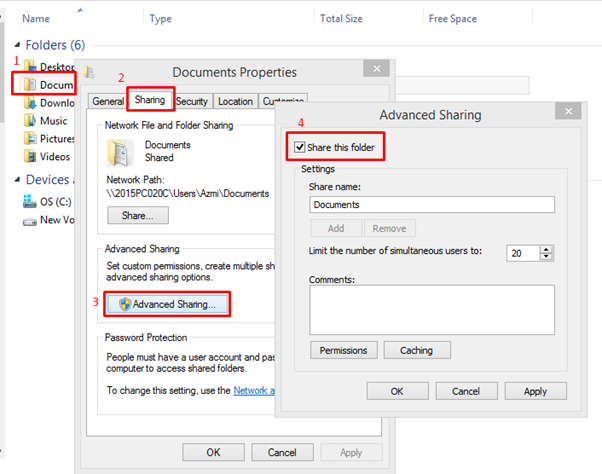
2. Configure or share the folder from PC B so that it can be accessed from PC A.
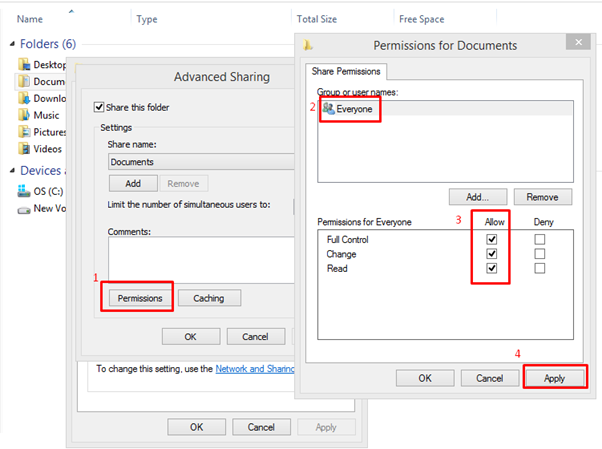
3. Then, allow the folder sharing permission to Everyone, and test whether you can access the sharing folder on PC B from PC A (Main).
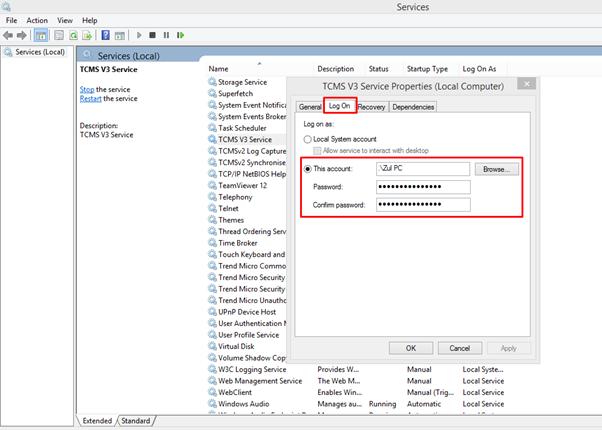
4. After finishing the sharing folder configuration, you need to login to PC A with the same PC B credential. Next, setup the Log On services for Ingress/TCMS V3 by proceeding to Control Panel > Administrator Tools > Services > Ingress/TCMS V3 Services > right click and select Properties > select Log On > select The Account and key in the Login and Password credential similar with PC B.
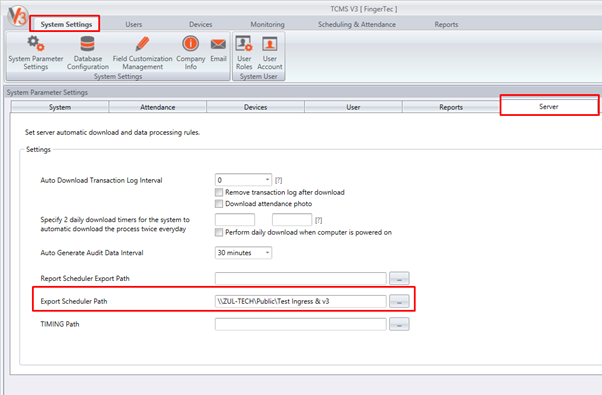
5. Moving on, start Ingress/TCMS V3 software and setup the Export Schedule Path by heading to System Setting > Server > Export Scheduler Path and choose the folder/location that you want to save the file.
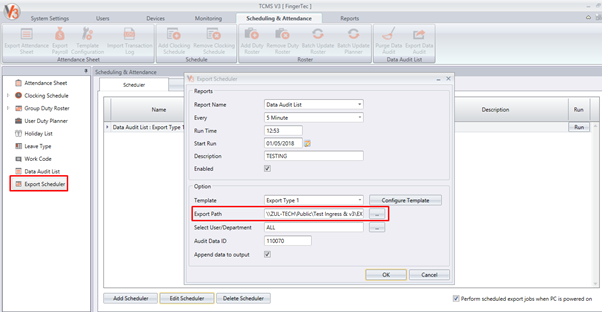
6. Configure the Export Scheduler settings from Attendance > Export Scheduler, and choose the correct Export Path on PC B. Please also refer to these tips on how to use the Export Scheduler: http://www.fingertectips.com/2017/11/export-scheduler-for-attendance-and.html
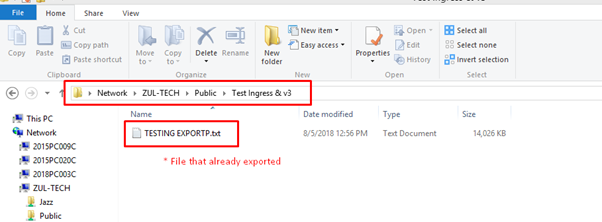
7. Lastly, check the results on PC B as to whether the file has been saved or not.
Note: If some of the screenshots or steps viewed here are different from the ones in the current system, this is due to our continuous effort to improve our system from time to time. Please notify us at info@timeteccloud.com, we will update it as soon as possible.


0 comments:
Have any questions or inquiries about FingerTec? Drop your input here.