

How to Apply, View or Cancel Your Leaves in TimeTec Leave via Web at www.timetecleave.com

Introduction
One of the best features of TimeTec Leave is that it provides users with more than one avenue for leave application and approval. When managing your leaves, you can either proceed with the Web Application or opt for the Mobile App. Even better, you can also switch between both platforms anytime, based on whichever you find is more convenient. Besides Leave Application from the users, Admins can also approve leaves via both channels as well.
In this post, we will mainly brief users on how to apply, view and cancel leaves when using the Web Application.
Note that for users of TimeTec Leave Mobile App, please refer to our earlier post here for more information on how to apply, cancel and approve leaves directly on the App.
Process
Note:
For TimeTec Leave users to be able to login and carry out leave application request, Admin will first need to add users into the account and provide users with their credentials (login user name & password).
Before we begin, please note that the explanation below will be divided into 3 sections:
i. Guide for System Admin
ii. Guide for Normal User
iii. Guide for User Assigned as Admin
Before we begin, please note that the explanation below will be divided into 3 sections:
i. Guide for System Admin
ii. Guide for Normal User
iii. Guide for User Assigned as Admin
GUIDE FOR SYSTEM ADMIN
A) How to Apply
1) APPLY (on behalf of users) at Home > Leave Overview > Apply.
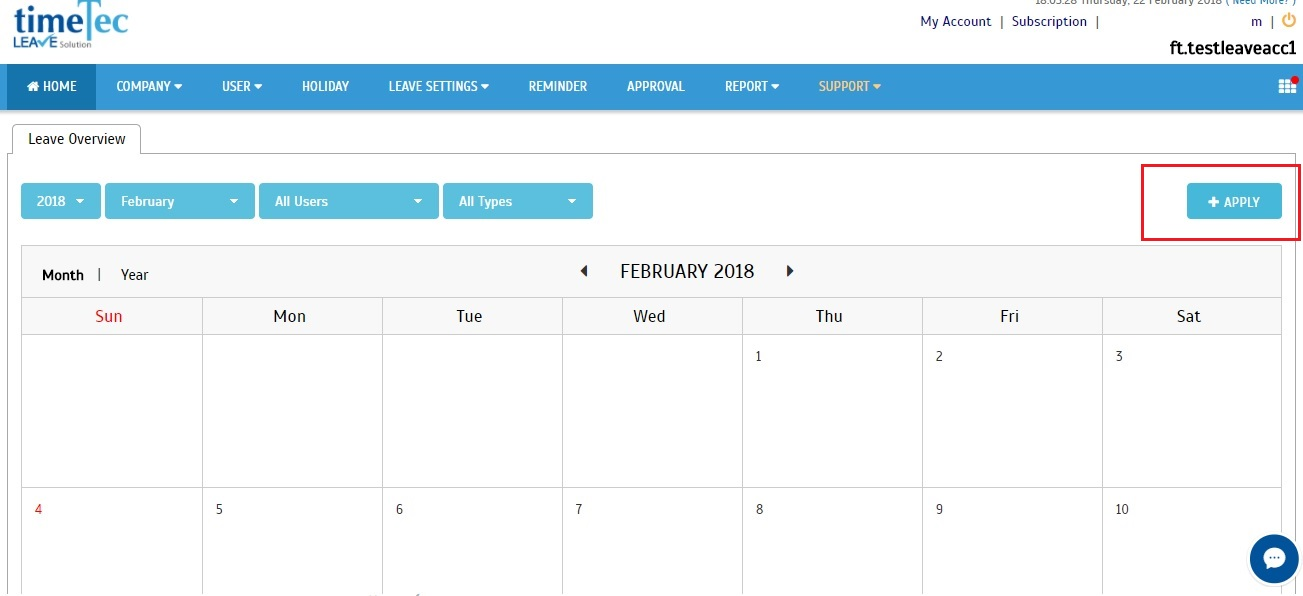
2) Note that System Admin is not considered as a user for leave management and can therefore only apply leave for other users. To proceed, please select user from the drop down list > fill up the leave request form > click Submit.

B) How to View Leaves
Application Pending Approval
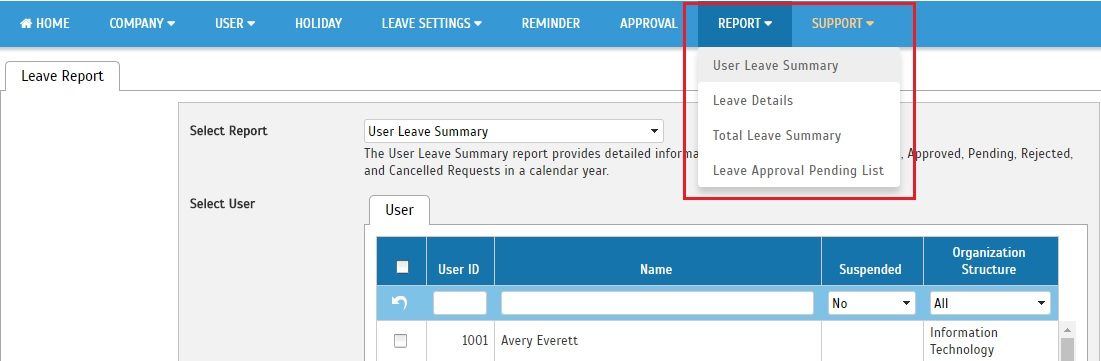
1) To view leaves Pending Approval, go to Report > Leave Approval Pending List. Select the user, date range and leave type applicable > Generate.
Application Pending Approval
1) To view leaves Pending Approval, go to Report > Leave Approval Pending List. Select the user, date range and leave type applicable > Generate.
Approved Request
1) You can also view details of users’ approved leaves by generating Reports.
C) How to Cancel Leaves
1) Request for leave cancellation must be done through the user’s own account. Admins do not have privilege to initiate cancellation (unless they have also been assigned as the user's leave Approver). Refer to the guide below for how Normal user can cancel leaves.
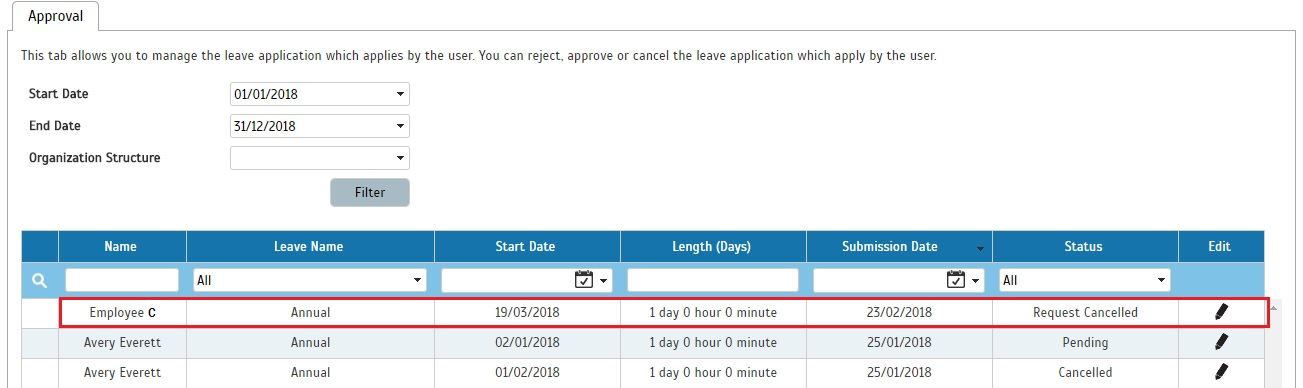
2) Cancellation can also be initiated by the Approver(s) at Approval page.
2) Cancellation can also be initiated by the Approver(s) at Approval page.
D) How to Approve Leave
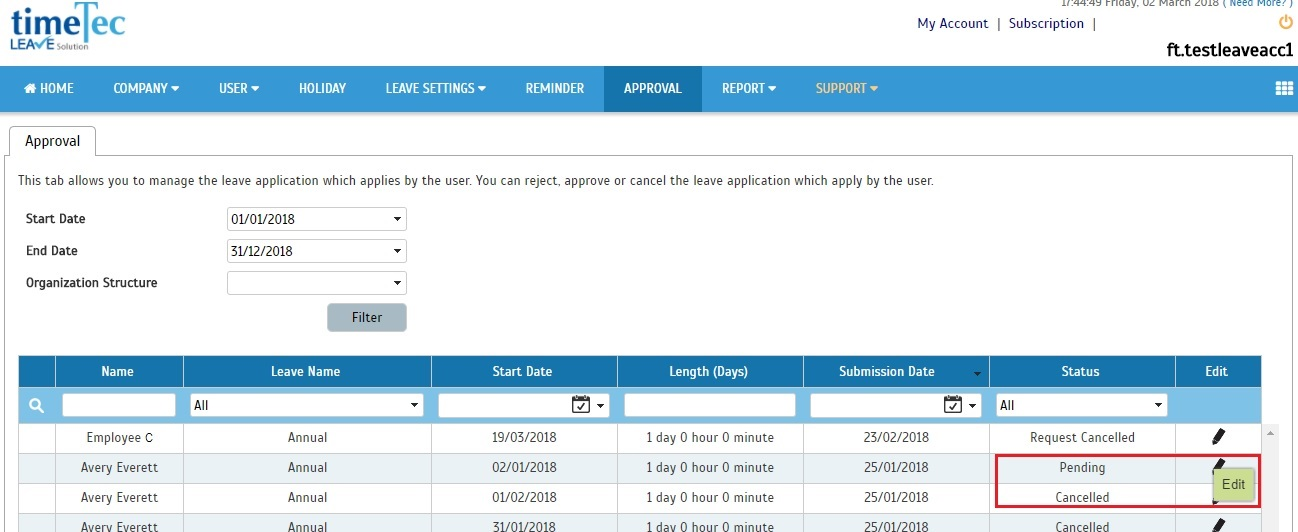
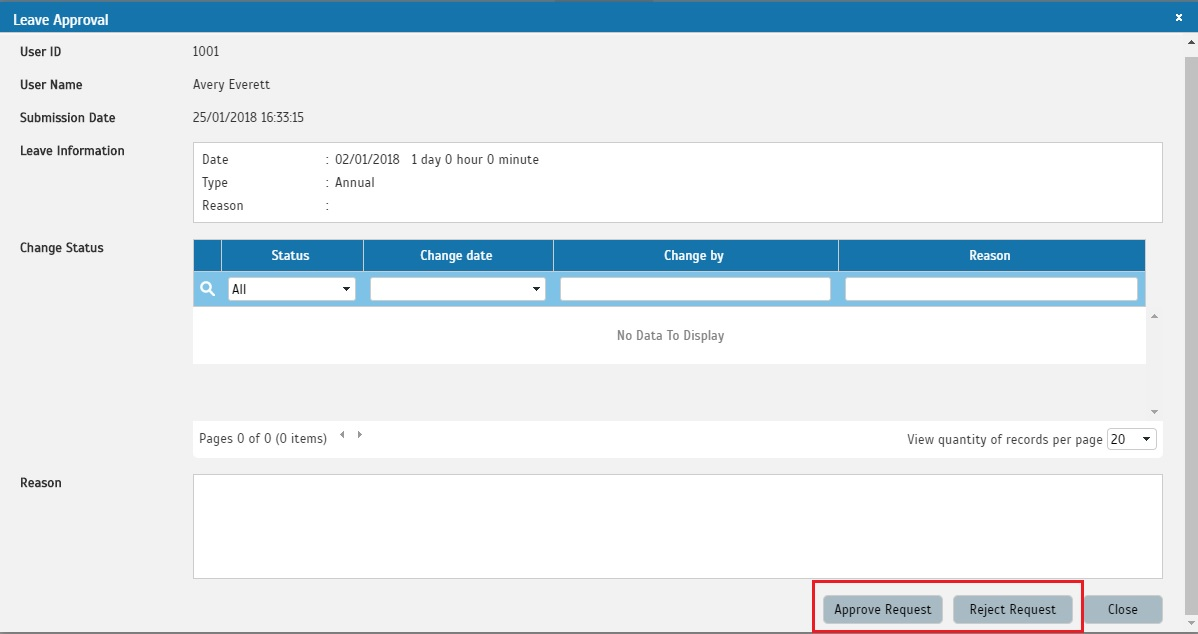
1) Go to Approval > select the leave that is ‘Pending’ in Status column > click Edit.
GUIDE FOR NORMAL USER
A) How to Apply for Leave
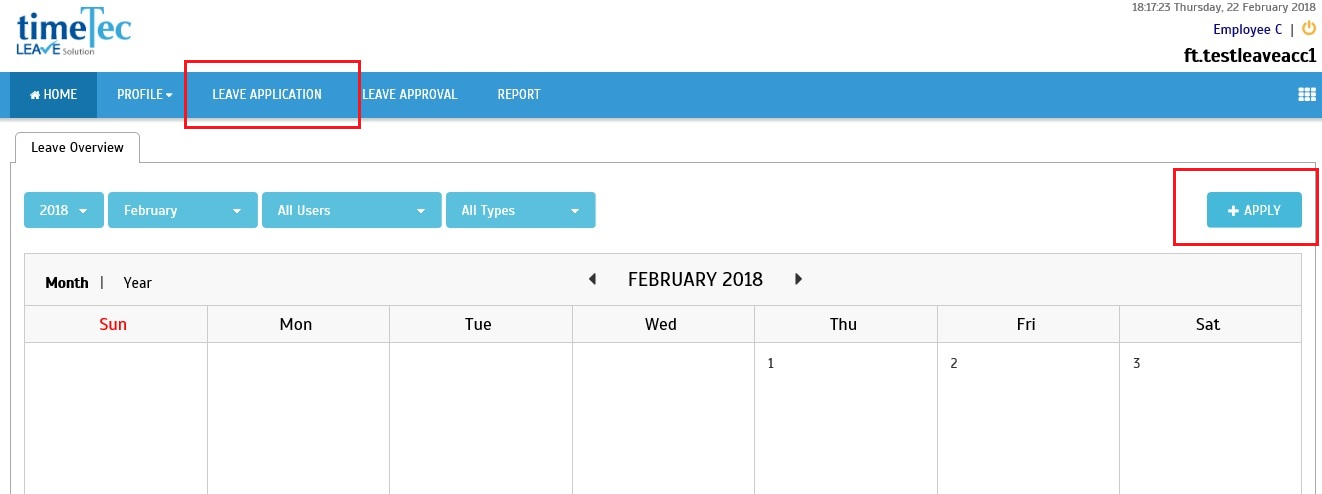
1) For normal users, there are 2 ways to apply on the web. APPLY at:
a) Leave Application or
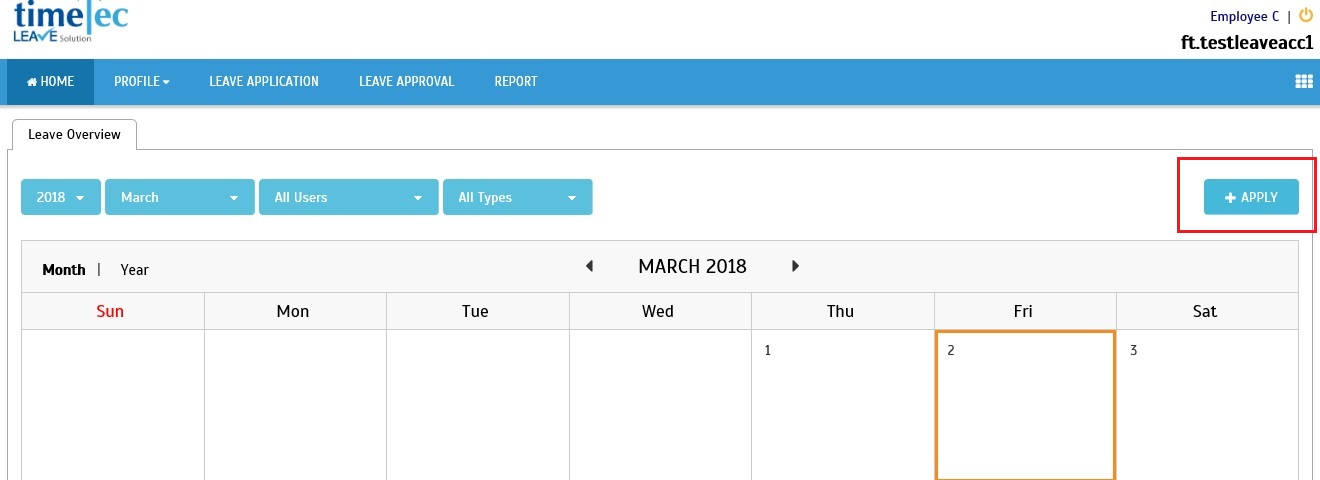
b) Home > Leave Overview > Apply
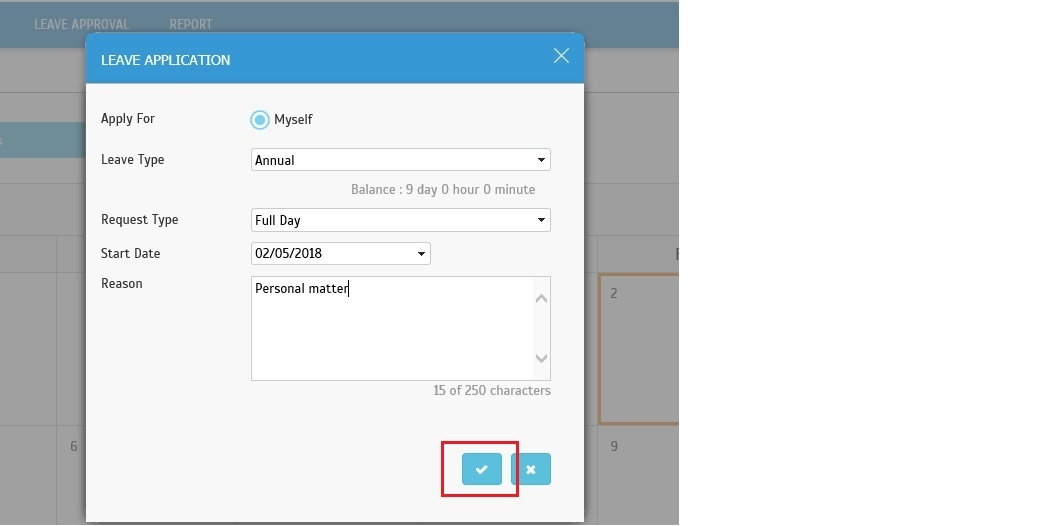
2) If you apply at Leave Application, please note that there are 2 sections as follows:
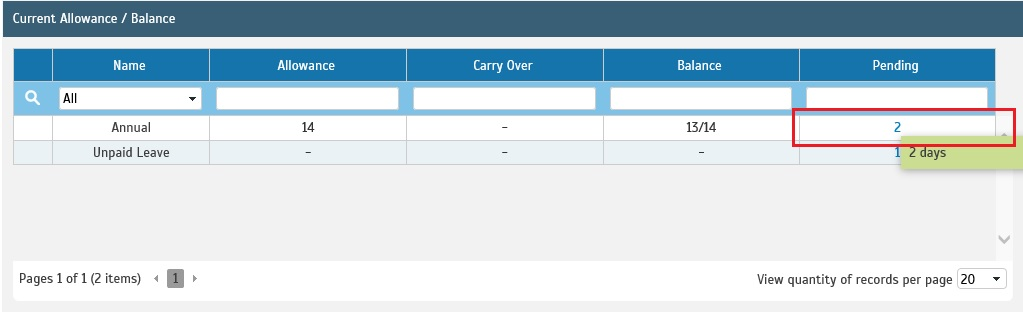
a) Current Allowance / Balance:
- Display Leave Balances including a Pending column. Click on the balance to view or edit leaves that are pending approval.
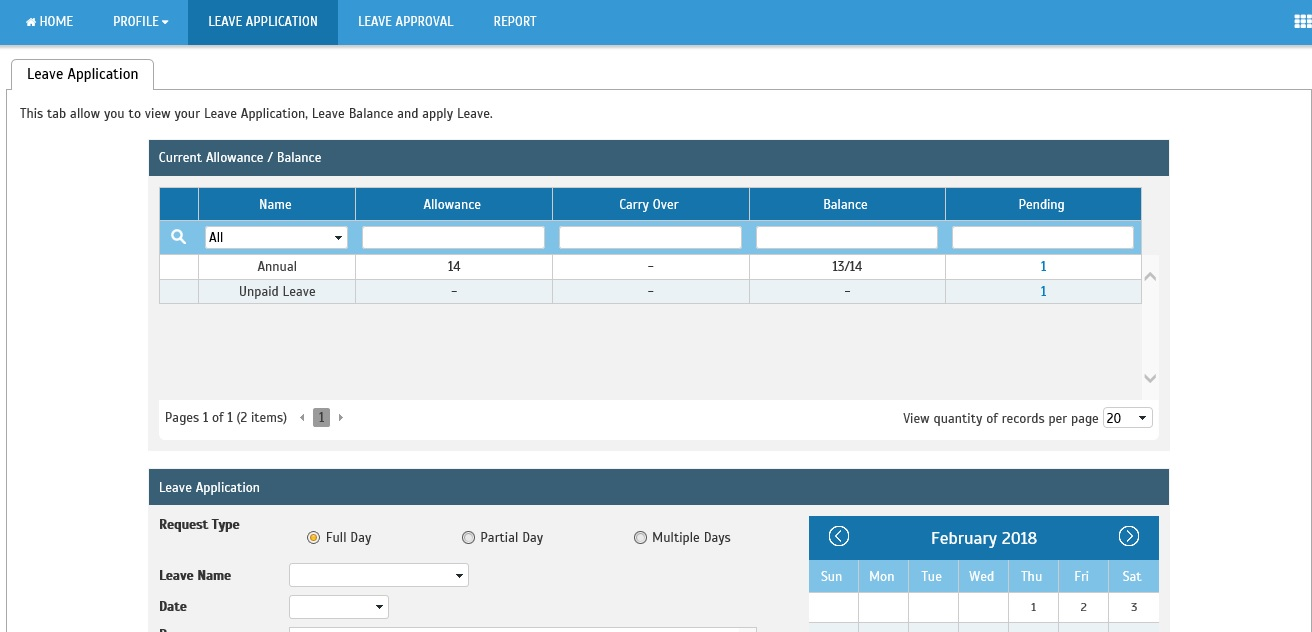
b) Leave Application:
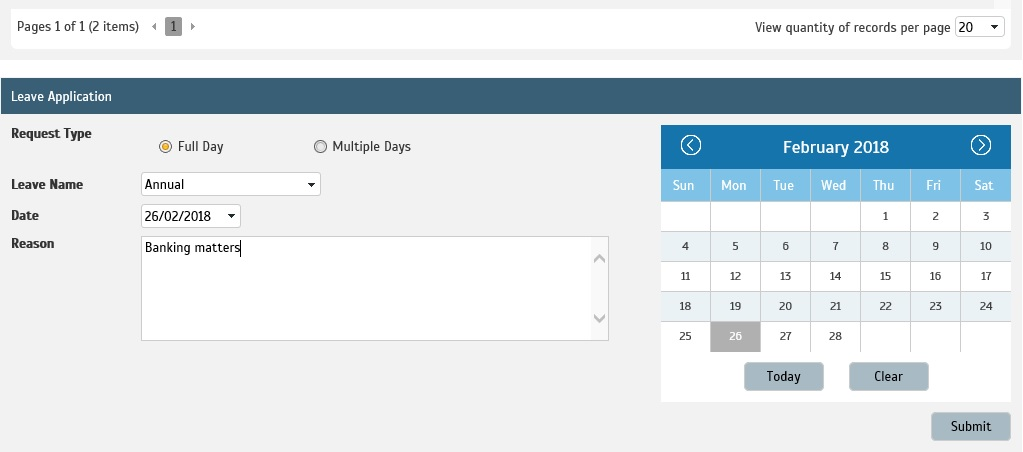
- Fill up the request > click Submit.
3) Another method is to apply at Home > Leave Overview > Apply.
B) How to View Leaves
Application Pending Approval
1) As mentioned, you can view the Pending application at Leave Application page in the Current Allowance/ Balance table. Click on the balance.
Approved Request
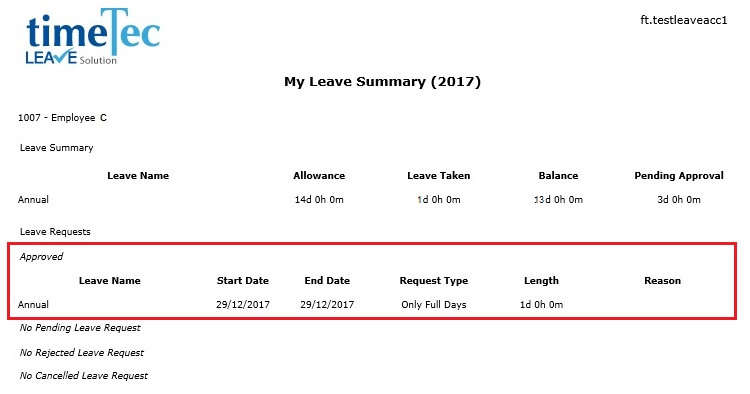
1) You can view your leaves that have been approved at Report > My Leave Summary. Select the applicable Year and click Generate.
C) How to Cancel Leave Application
Application Pending Approval
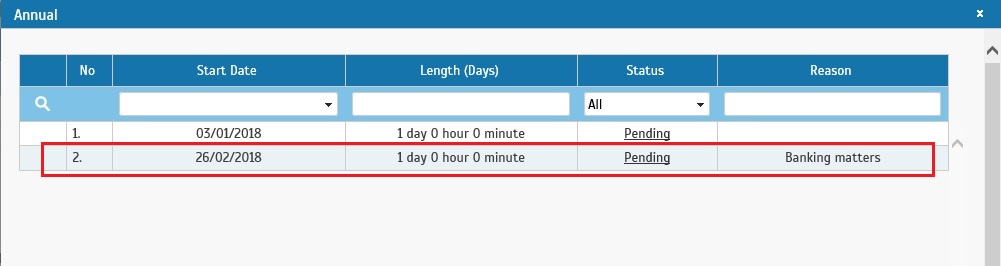
1) To cancel leaves Pending approval, go to Leave Application > Current Allowance / Balance > click balance under Pending column > click on Status Pending.
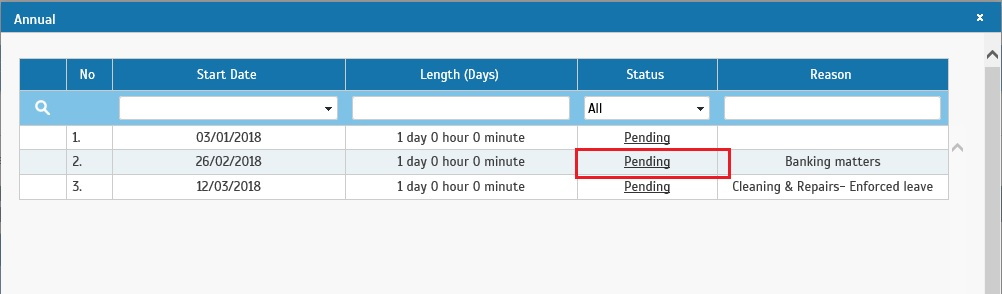
2) Enter the reason for the cancellation and click Submit.

Approved Request
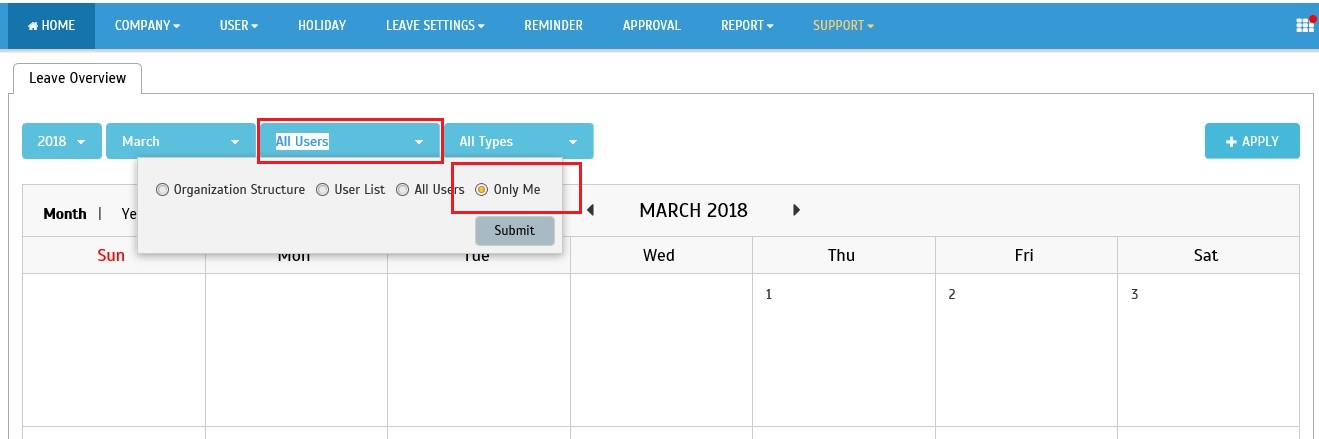
1) To cancel approved leaves, go to Home > Leave Overview > select filter for users as “Only Me” > Submit.
2) Select the leave from the appropriate calendar date > Enter the reason for the cancellation > click Request Cancellation > Confirm.
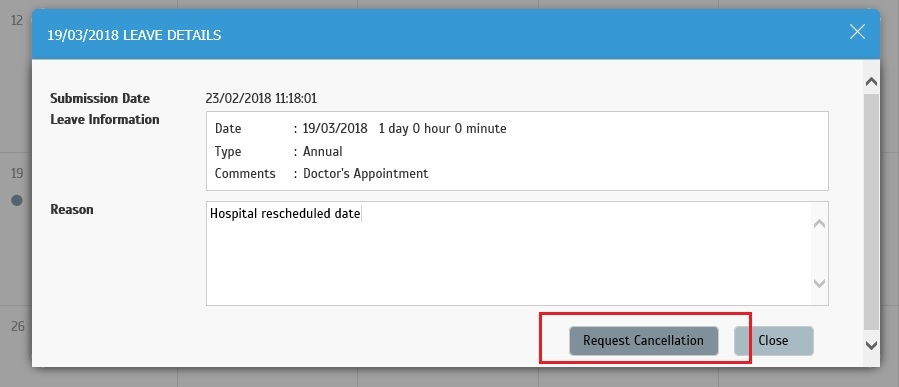
3) The cancellation request will be submitted for approval.
GUIDE FOR USER ASSIGNED
AS ADMIN
1) Within TimeTec Leave, there are 2 kinds of users: Normal user and User assigned as Admin.
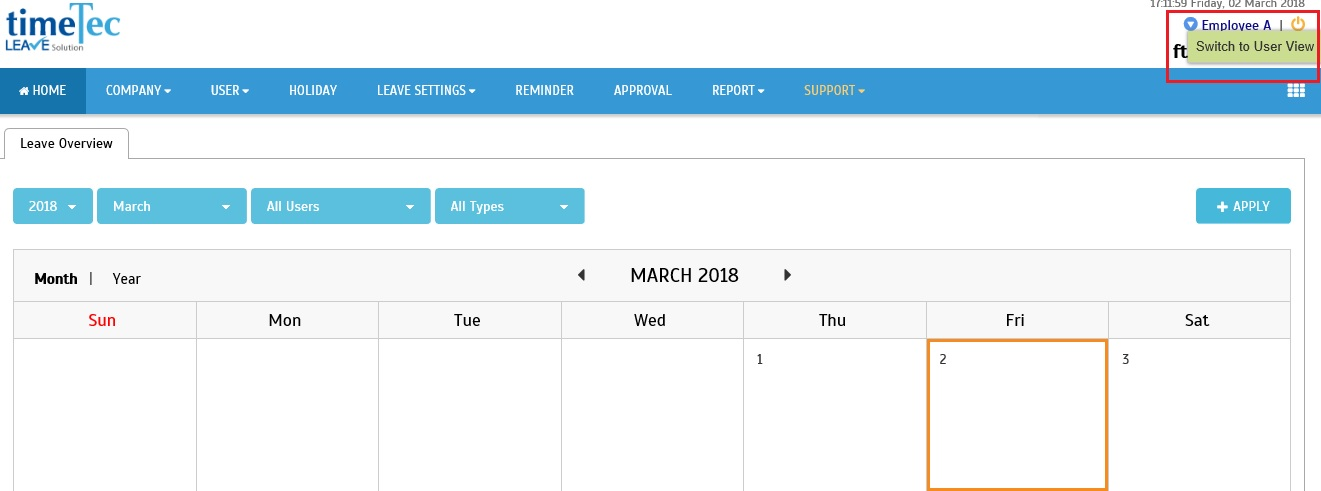
2) If you have been assigned as Admin, your role comes with additional access rights. Therefore, besides a ‘User View’ to help manage your own leaves, you can also switch to an ‘Admin View’ in the web application.
3) To switch views, please click on View Change button next to user name at the upper-right corner.
4) Refer to below for an example of what you will see when you log in:
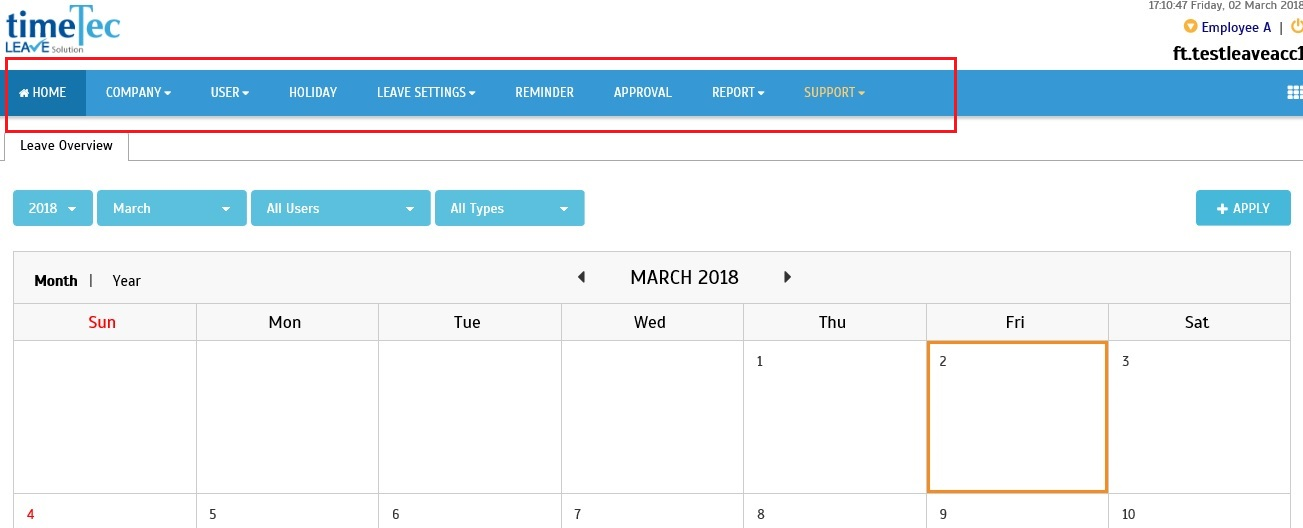
Admin View
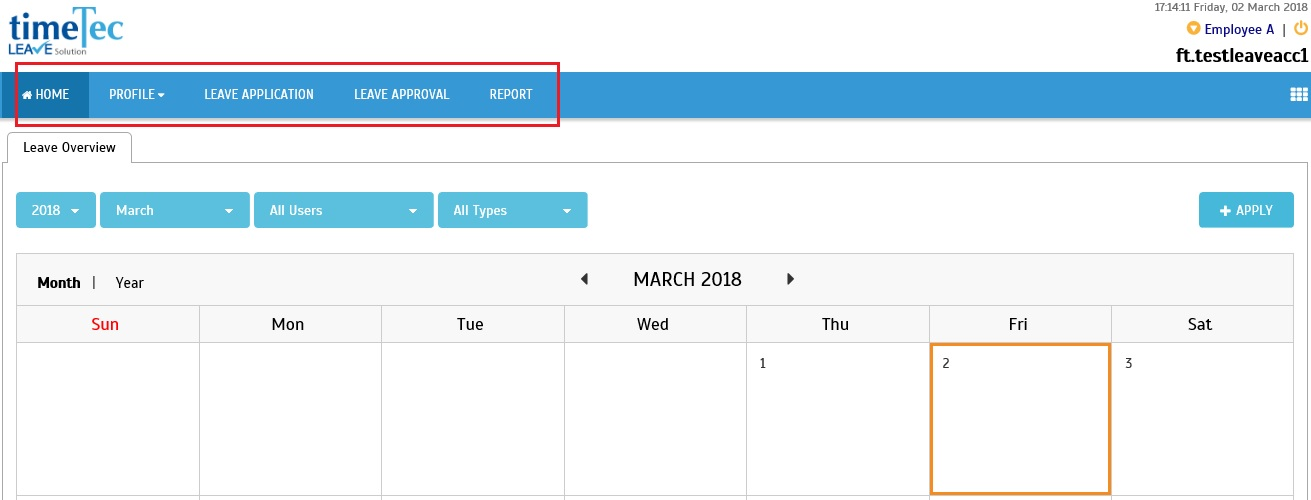
User View
B) How to Apply, View, Cancel & Approve Leave
1) As Admin you can either apply leave for yourself or apply on behalf of other users.
2) The leave application, view and cancellation function in your Admin View/ User View is similar to the flow used for System Admin and Normal User respectively.
3) Due to that, to manage your own leaves in User View, refer to the Guide for Normal User above.
4) To manage other users' leave, refer to the Guide for System Admin above.


0 comments:
Have any questions or inquiries about FingerTec? Drop your input here.