

How To Customize Visitor Details via Web

Introduction
It is very important for residential management to record every visitor’s details before allowing the visitor to enter a neighborhood. The detail information of a specific visitor can be viewed in the walk-in registration form. The information includes name, identity card number, phone number, the purpose of visit and etc and all of this information is available on the web for the admin.
The management can customize the information required from their visitors and therefore, we have prepared a short guide on this topic.
Steps required:
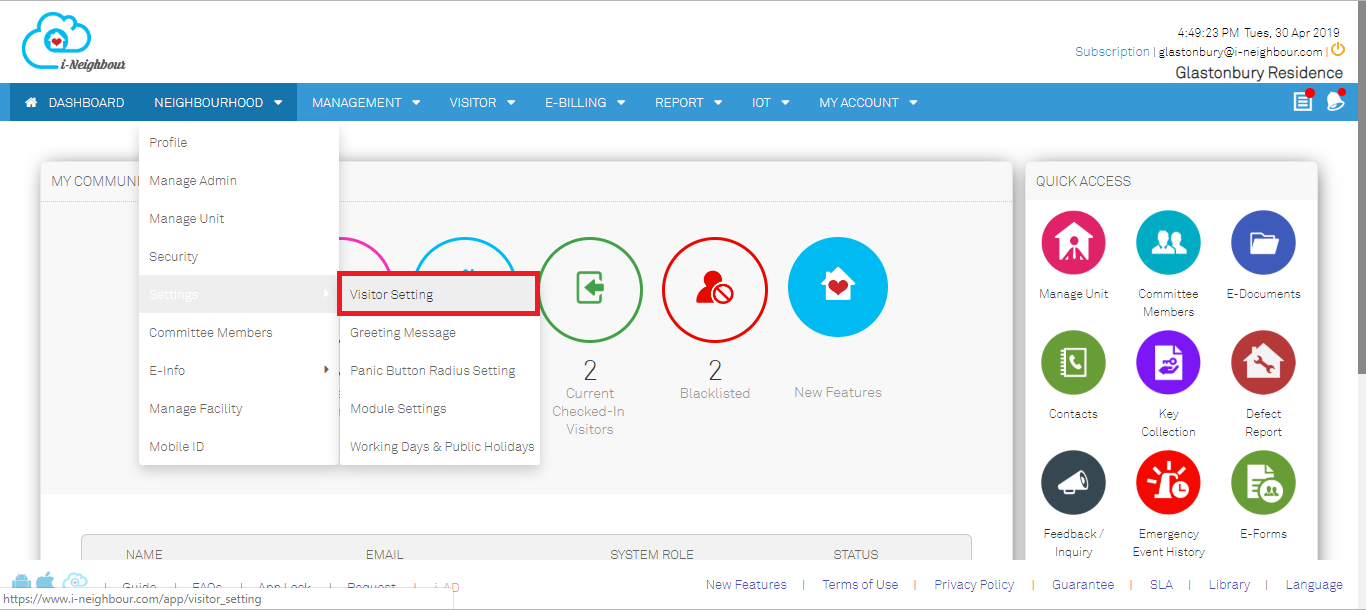
1. Login to i-Neighbour admin web portal. Select Neighbourhood > Settings > Visitor Settings.
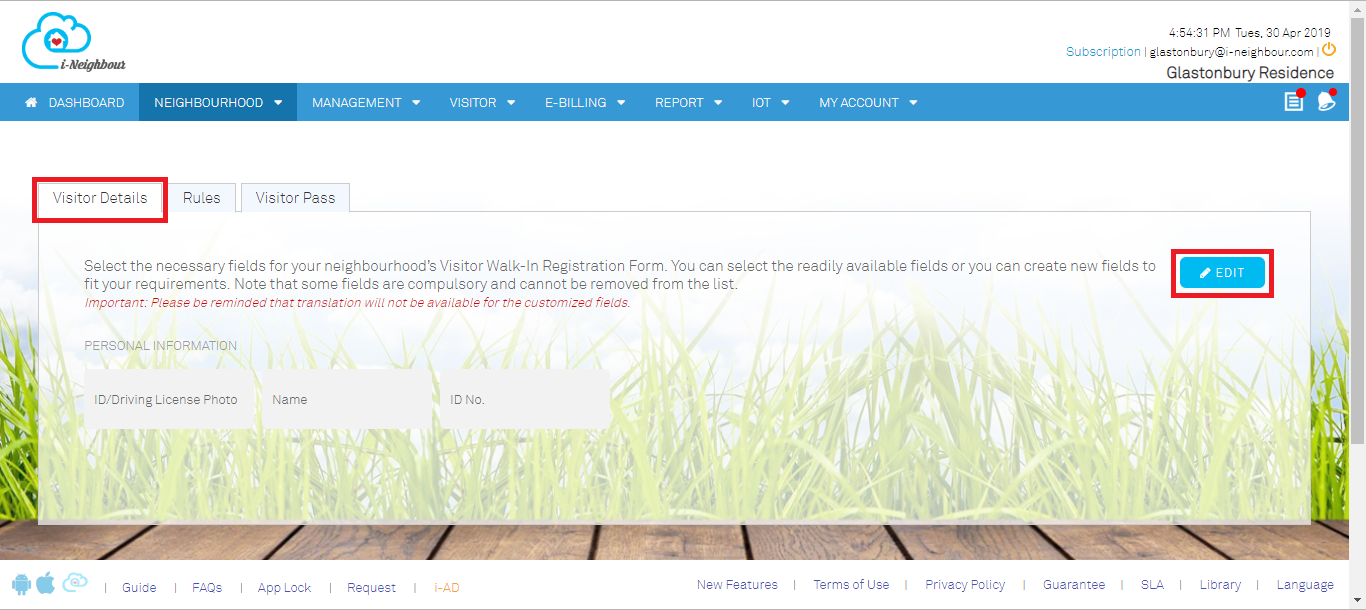
2. Select ‘Visitor Details’ and click on the ‘Edit’ icon on the right screen. The three (3) visitor details (ID/Driving License, Name and ID No.) displayed in the picture below are already set as default in the i-Neighbour web for visitor registration and cannot be removed.
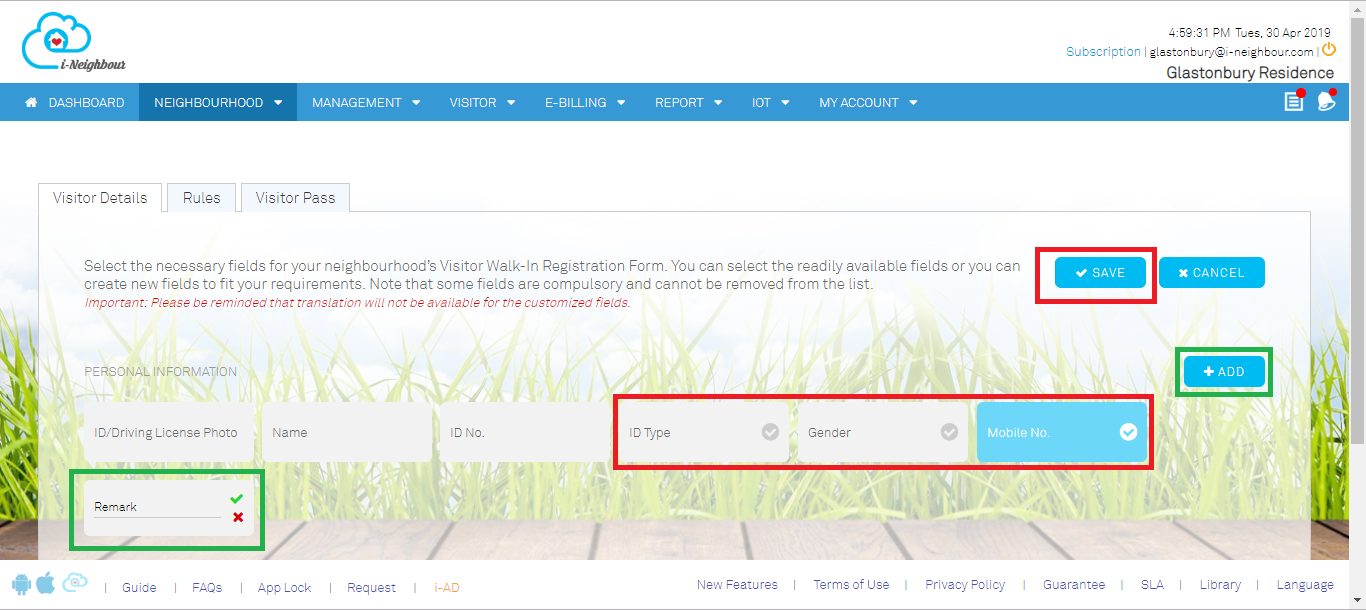
3. Upon clicking the Edit button, there are another three visitor details displayed in the red box below that are already added in the web by i-Neighbour. These visitor details are optional and they are irremovable.
To enable the visitor details, click on the desired details and it will turn into blue. The selected visitor detail(s) will be displayed in the walk-in registration form. If you need other information on the visitors, click the +ADD button on right the screen and write the field that you want to add. Then, click on the check icon. To confirm, click on Save.
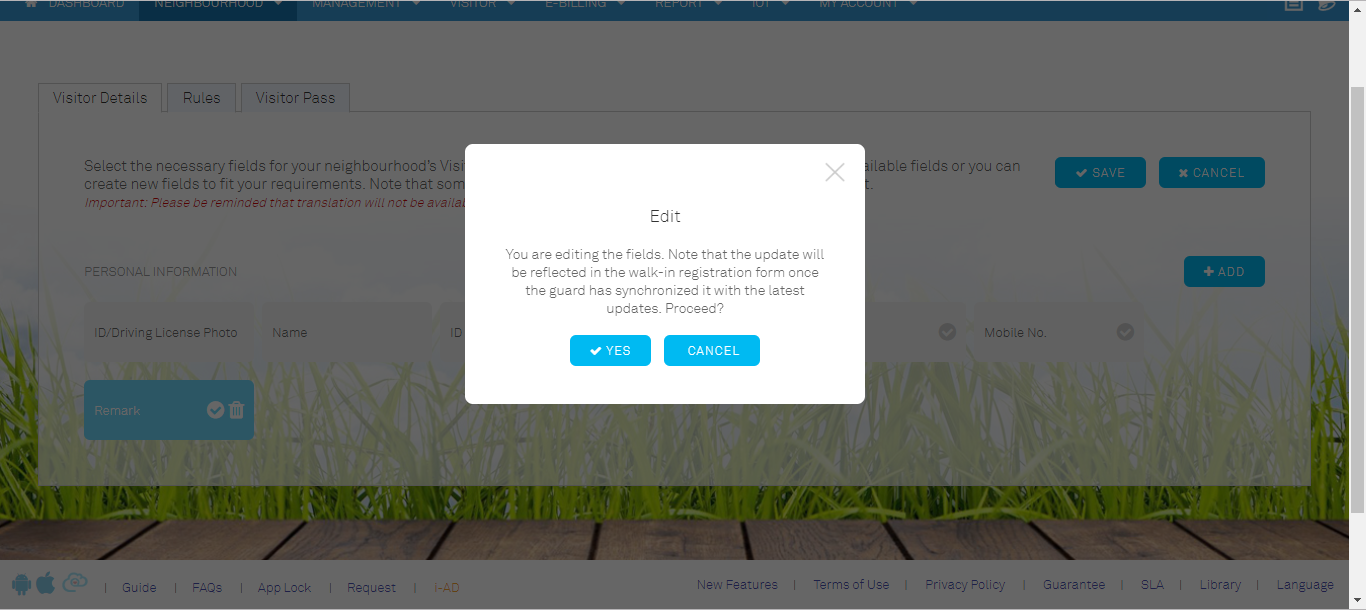
4. An alert message will be prompted. The added visitor details will be reflected in the walk-in registration form once the guard has synchronized it with the latest updates. Click Yes to proceed. The guards must synchronize their i-Visit to get new detail information of the visitors.
5. The added new visitor details are successful.

6. From the i-Vizit view, the newly added details (Mobile No. and Remark) are already displayed in the app for visitors record.

If you are still having problems after completing all of the steps stated above, please contact us via support@i-neighbour.com
Note: If some of the screenshots or steps viewed here are different from the ones in the current system, this is due to our continuous effort to improve our system from time to time. Please notify us at info@i-neighbour.com, we will update it as soon as possible.


0 comments:
Have any questions or inquiries about FingerTec? Drop your input here.