FingerTec TimeTec Web Trial Run
Update: We will no longer be offering TimeTec Web Trial. Please go to TimeTec Cloud for the 30-day FREE Trial version.
Person to Involve in the Test Run
We recommend assigning the following persons to be involved in the on site proof of concept Test Run of TimeTec Web:
1. MIS/IT specialist
An MIS/IT specialist is an important person to setup the physical server, MySQL database, Windows OS update, web components and TimeTec. He/she should be able to:
- Setup the physical server accordimeng to the recommended technical specifications.
- Ensure the Windows OS has up-to-date hotfixes and files.
- Connect the physical online with Fixed IP address.
- Install/manage/housekeep the MySQL database.
- Install/manage the web services components/files in the Windows OS.
- Install TimeTec and connect it with the MySQL database.
2. System Administrator
The System Administrator is the person with full access to all modules/sections of Time Tec to setup/run the system. He/She must go through a full training session in order to handle and operate TimeTec and to process attendance and reports.
We recommend the Administration or the Human Resource Manager to act as the System Administrator during the trial period.
3. System Operator
A System Operator is the person who can access TimeTec to configure working rules/calendar and process attendance records. He/she can preview/print/save reports for all employees.
4.Managers of each branch or department
This refers to the person with the authority to view the records of users assigned under specific branch or department. He/she can preview/save/print reports of those under their supervision.
We recommend the Branch/Department manager from each department to be assigned with this authority.
5. Test person from each branch/department/different working scenario
Two persons from each department should be assigned to report attendance at the FingerTec terminals to generate records in TimeTec. We recommend each test person to follow individual working schedule/calendar to represent different working scenario.
However if you are doing a in house testing with the TimeTec Web, you will only require the System Administrator and test person from each branch/department/different working scenario.
Using FingerTec Terminals with TimeTec
1. Prepare physical server with fix IP address as Test Server.
We recommend to use Windows 7 Professional 64-bit, with 8GB RAM to achieve optimum performance during testing. The fixed IP address is important because you will need to insert it into each test terminal as the Webserver IP address.
In the event that you do not want to apply/purchase a fixed IP address, you still can run the tests. Simply install the physical server with a static IP address. The server will connect to FingerTec terminals on the same Local Area Network (LAN). You can use the server’s static IP address as the Webserver IP address. You can only run tests within the same LAN with this configuration.
2. Make sure you choose the suitable FingerTec models to test TimeTec Web
The FingerTec models that supports TimeTec Web are:
Time Attendance
- Fingerprint Verification
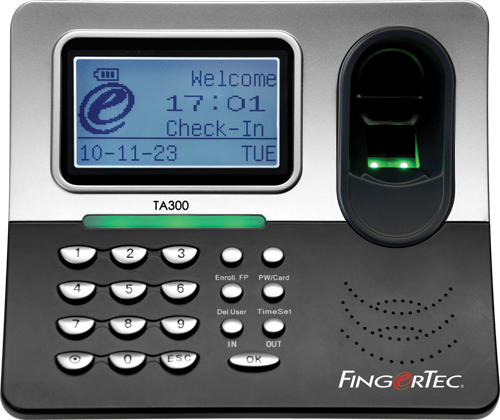
- Black/white display: AC103, TA103,
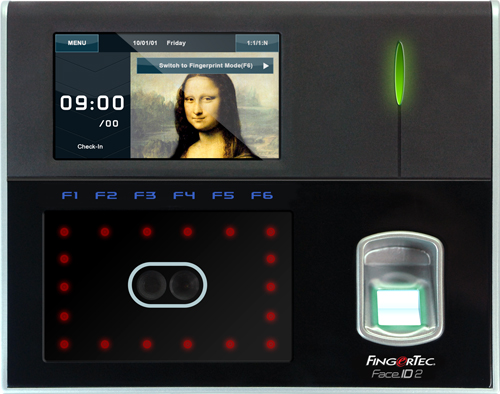
- Color screen display: AC100C, TA100C, TA100TC and TA200Plus
Access Control & Time Attendance
- Fingerprint Verification
- Black/white display: M2R2, R2R2i and H2i
- Color screen display: iKiosk 100 Plus, iKiosk 100, Q2i
- Card Verification
- Kadex *Upon request. Prices for TimeTec/ Webster enabled Kadex may vary.
Any models that are not listed above will not work with TimeTec Web. Please choose your terminals accordingly.
3. Update FingerTec terminals with the standard firmware
Visit
http://tips.fingertec.com > Download > Firmware > Select the terminal to download the suitable firmware. Update the test terminals with the latest firmware to make sure it is ready for testing with TimeTec.
4. Request customized TimeTec firmware and TimeTec Web trial product activation keys
Please send the serial number and the FingerTec model to
support@fingertec.com to request for a customized TimeTec firmware. Our Technical Department will send the firmware to you. Please update the TimeTec firmware into your test terminal. You will find that there are new options added in the Menu:
Black/White display models: Menu → Option → Comm. Option → Webserver IP
Color screen display models: Menu → Comm. Option → Webserver → Webserver IP
Insert the fixed IP into the Webserver IP address column and the Port as 8080.
For those who are not testing with the fixed IP address server, please use the server static IP address as the Webserver IP address.
The Technical Department will then send the TimeTec Web trial product activation keys together with the firmware. These key numbers are important for you to add and activate connection from TimeTec Web to your test terminals. The validity of each key will be for 3 months.
Installation of Windows OS updates, Web components, MySQL database and TimeTec
It is reccommended that an MIS/IT specialist carry out the following steps.
Step 1: First, check and make sure the Windows OS is installed with latest service pack/files especially Windows Installer
Step 2: Then check/install Microsoft .NET Framework 4.0 and Internet Information Service 6 (IIS) in the Windows OS
Step 3: Next, install MySQL 5.5 and connector to the Windows OS
Step 4: Install the Crystal Report components into the Window OS
Step 5: Finally, install TimeTec into the Windows OS
We strongly recommend to use the Windows 7 Professional/Ultimate 64-bit or Windows Server 2008 as the operating system. You can refer to the links below to download the related files to install your TimeTec Web server.
Important Components and Installers
Basic Setup & Configuration
Step 1: Add FingerTec terminals into TimeTec to establish connection.
Go into Device > FingerTec Terminal > Add
Step 2: Fill in the company’s information at Configuration > Company Profile
Step 3: Fill in the information for Branch/Department/Section at Configuration > Branch/Department/Section.
Step 4: Setup basic settings of TimeTec to display attendance data at Configuration > System Settings
Step 5: Create types of leave according to the company’s policy at Configuration > Leave Type
Refer to TimeTec Manual Chapter 4: Configuring TimeTec
Setting Up Different Levels of Access for Branch/Department Manager
Step 1: Create a login username and password for the System Administrator at Configuration > Username Account
Step 2: Create a login username and password for the Branch/Department Manager at Configuration > Username Account
Step 3: Create a login username and password for the System Operator at Configuration > Username Account
Setup of Attendance calculation
Step 1: Setup clocking schedule to define working time table and calculation rules at Schedule > Clocking Schedule
Step 2: Setup group duty roster to create working group and calendar at Schedule > Group Duty Roster
Refer to Chapter Setting Up Clocking Schedule &Setting Up Group Duty Roster
Report Attendance & Data Download
Employee reports attendance at the FingerTec terminals to generate attendance records. Administrator will then download the records into TimeTec and store it for attendance calculation.
To download data: Device → Manage Teriminals → Download Terminal Data
Administrator/system operator checks and prints attendance reports
Step 1: Administrator/System Operator checks attendance in TimeTec Web > Attendance. The administrator can edit attendance of employees accordingly.
Step 2: The administrator previews and print the reports at Report. Select the type of report > Preview > Print/Save into digital format.
Refer to Chapter Managing Attendance & Attendance Reports
Written by Pang,
Edited by Vincent


0 comments:
Have any questions or inquiries about FingerTec? Drop your input here.