Introduction
TimeTec offers a geofence feature which limits the GPS clocking within a preset location range. Due to the restriction, some staff might not be able to clock their attendance when they are outside of the permitted area. In TimeTec, the Admin can set a setting which can allow the staff to request for clocking outside of the permitted area, which then will need approval from the superior. Here we will guide you on how to request and approve out of area via TimeTec HR app.
Process
1. When a user wants to clock outside of the allowed Geofence area, a pop up notification will appear on the user phone app after the user clicks on the GPS icon.
2. You may check the View Map setting, to check for your current location and allowed location for clocking.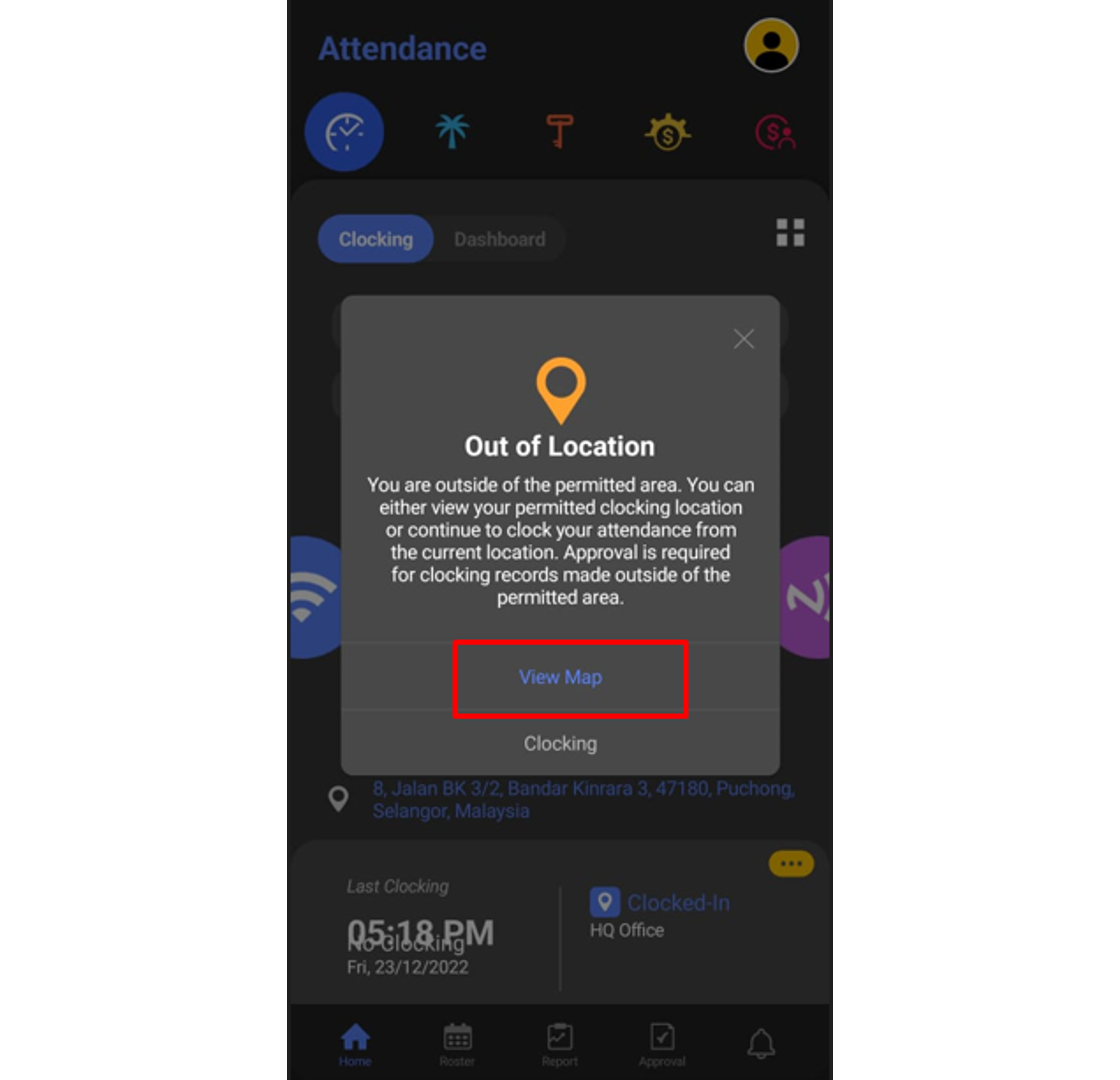
Location A - User current location
Location B - User’s allowed clocking location based on Geofence group in the system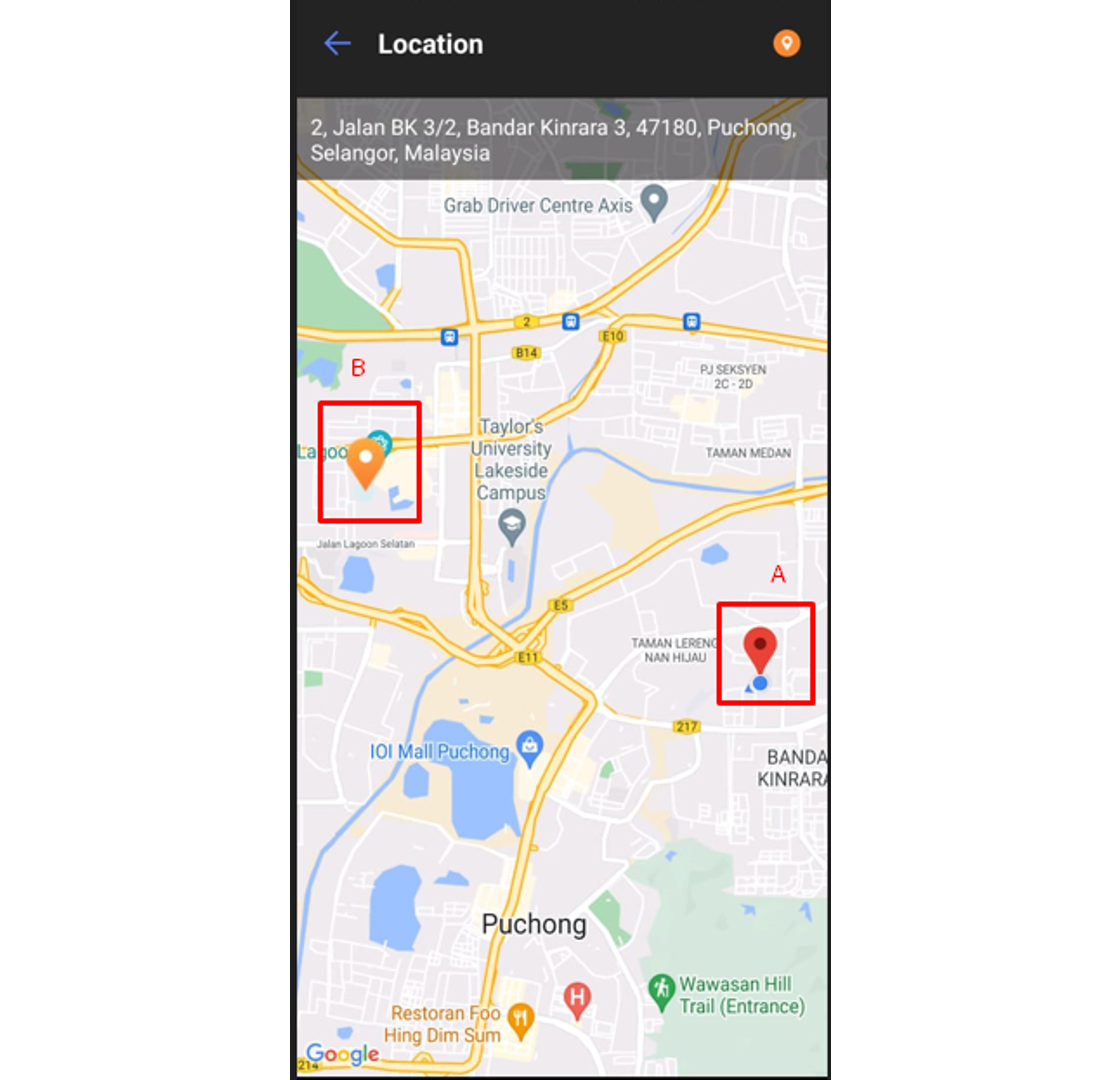
3. To apply for Out of Area Clocking, click on the Clocking button.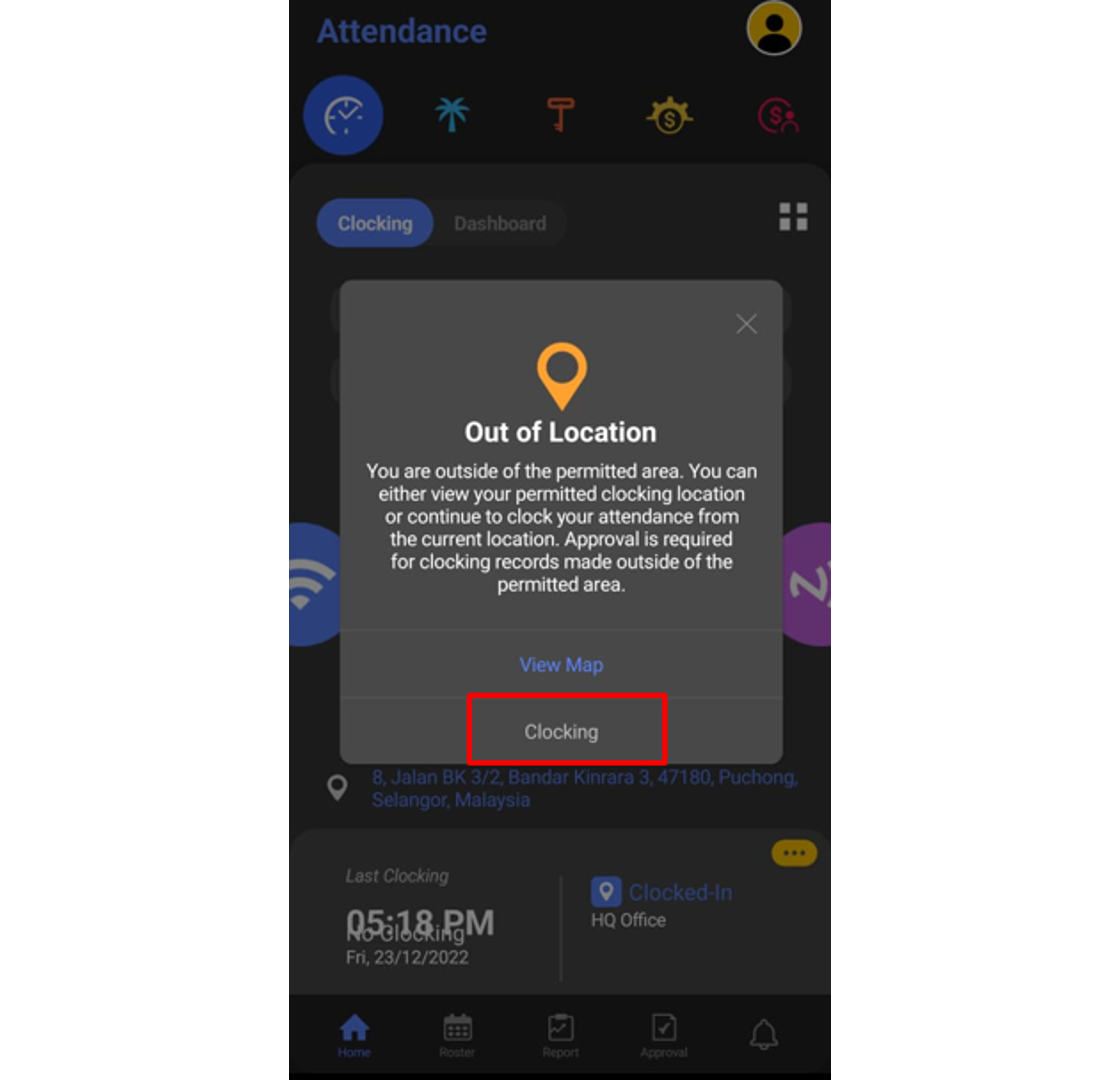
4. Fill up all the necessary information for each box and click Submit.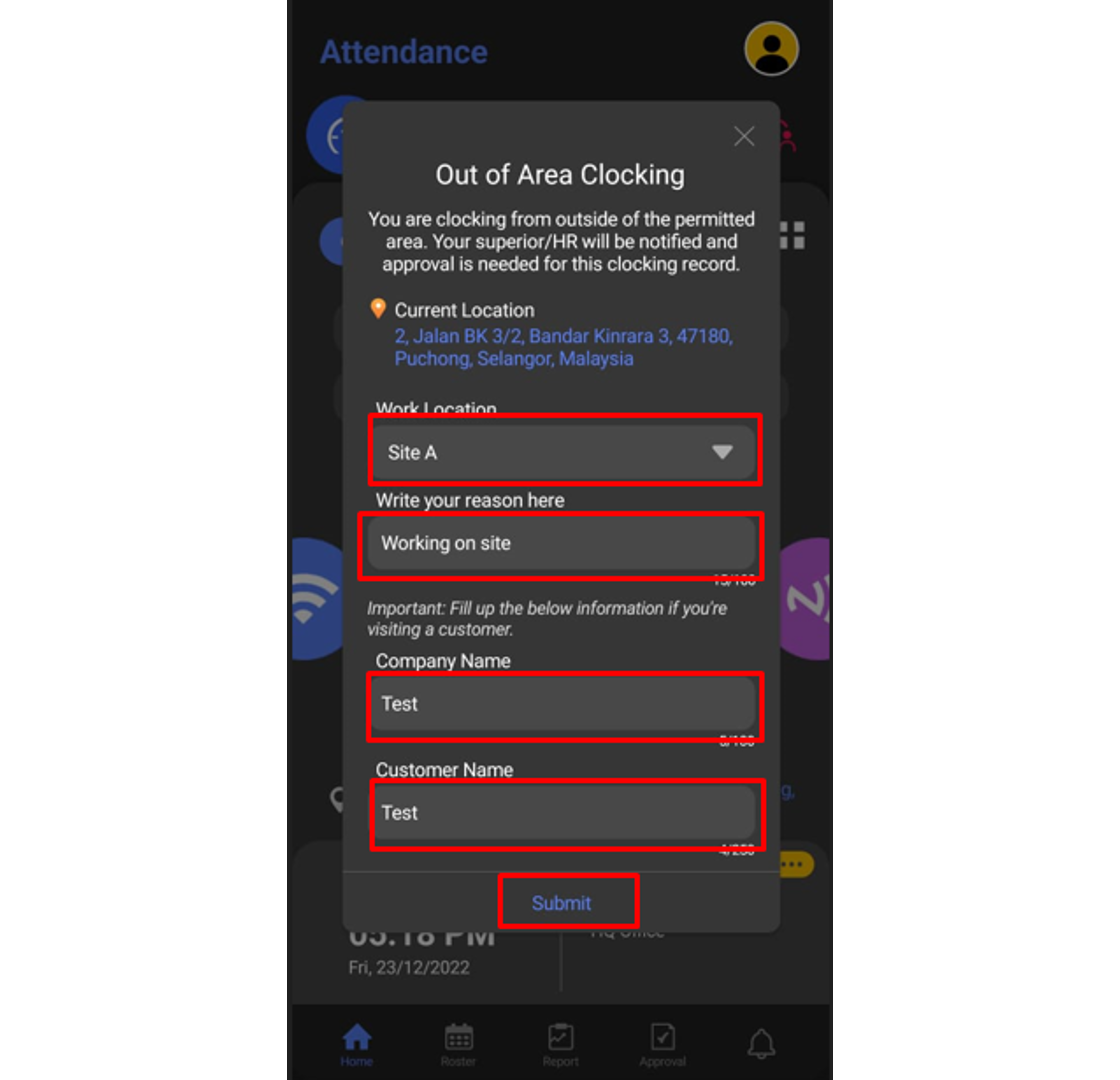
5. To check on your request status, click on the Features button.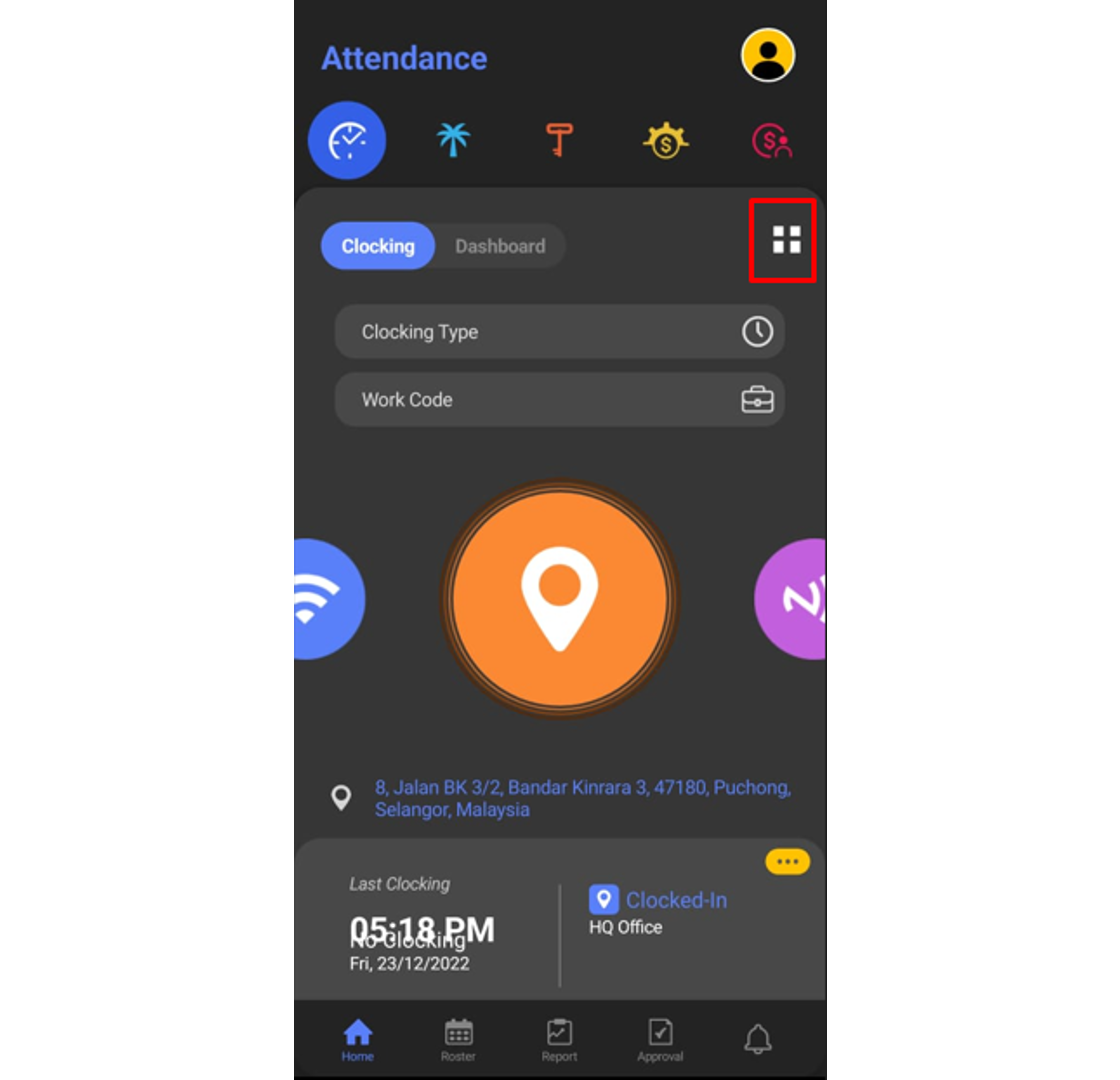
6. At the pop-up window, choose Out of Area Clocking.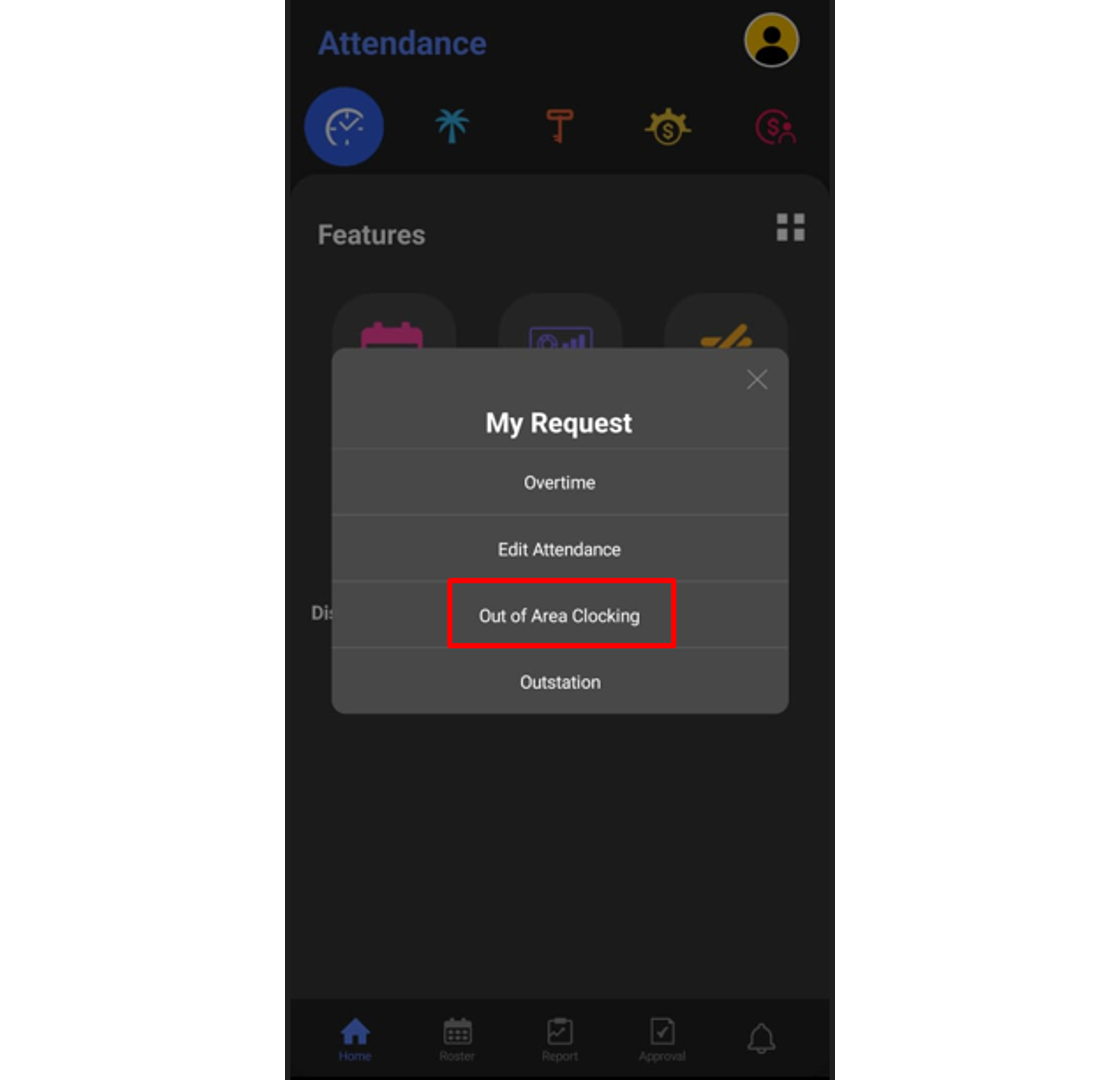
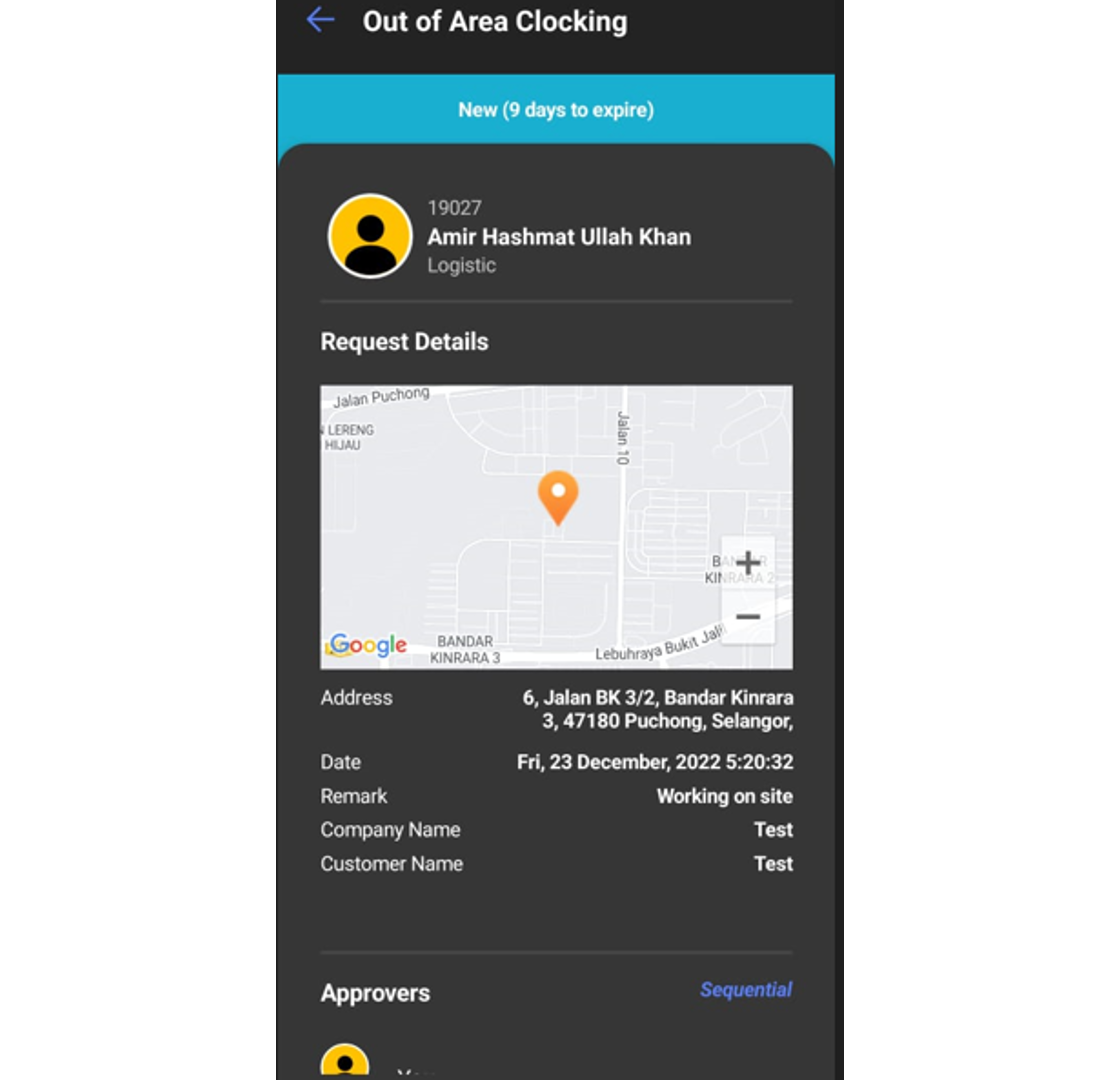
7. You can view the pending requests in this section.
 B. Approval for Out of Area Clocking request
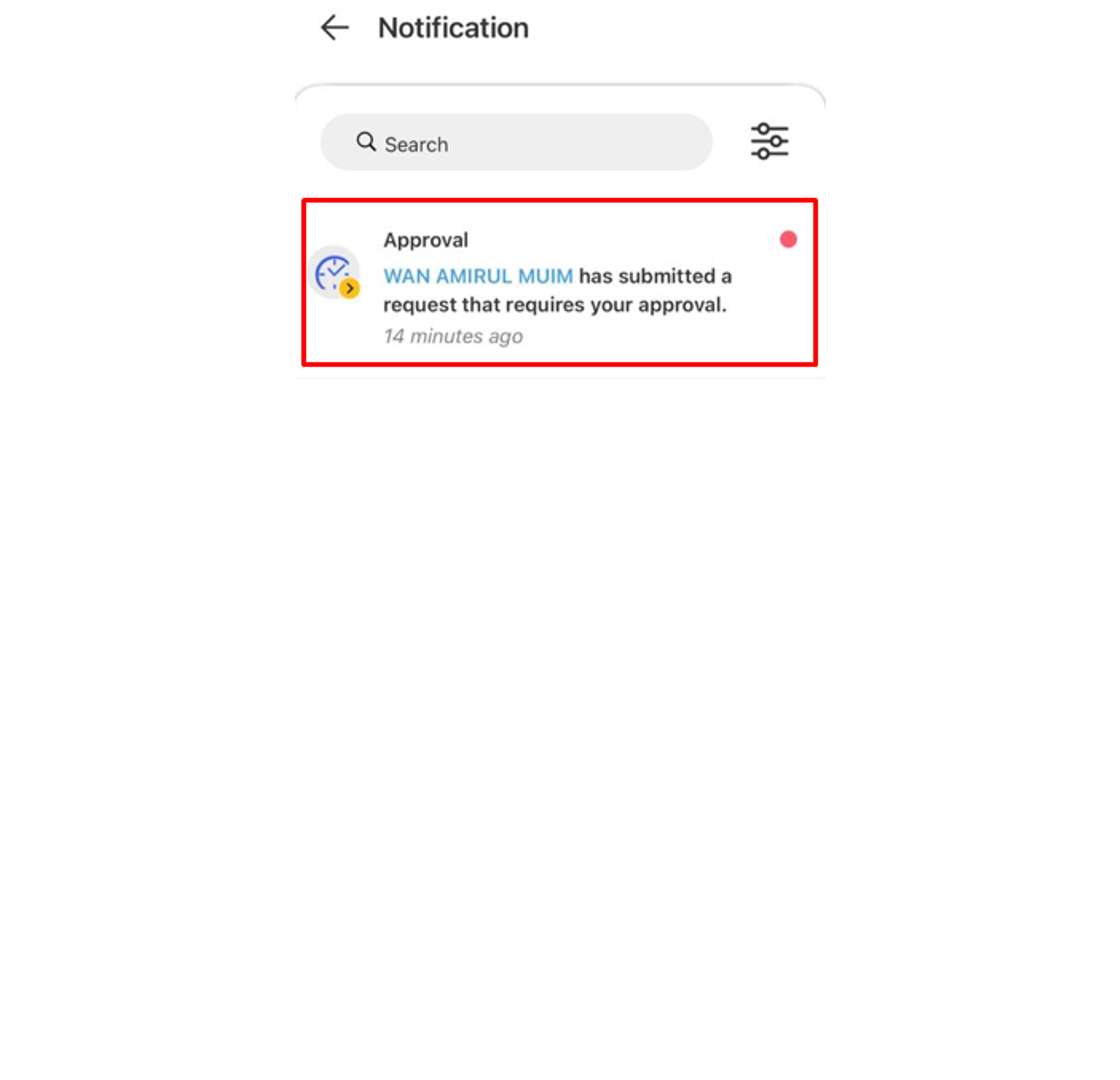
1. Approver can check any request submitted by their staff under the notification tab.
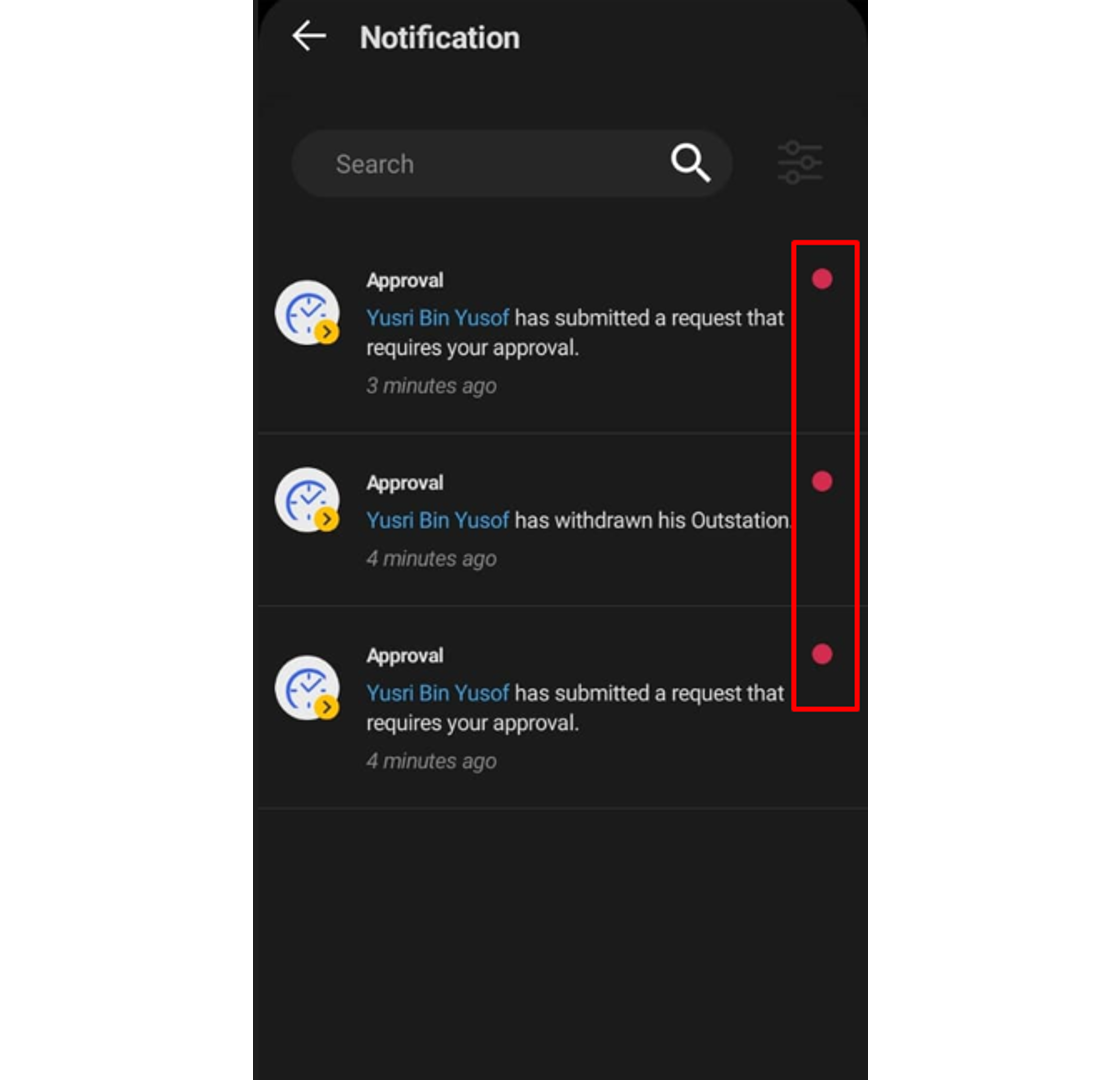 2. The approver can click at the Approval tab to view all staff requests and the status of each request. Click on the pending request (blue tab) to view the request that needs an approver to response.
3. The approver can fill up the comment section and response to the request (Approve or Reject).
4. Once Approve button is clicked, the request tab will change to green color.
Note: If some of the screenshots or steps viewed here are different from the ones in the current system, this is due to our continuous effort to improve our system from time to time. Please notify us at info@timeteccloud.com, we will update it as soon as possible.
Introduction
If you are a TimeTec HR mobile user and you need to request Admin to edit your attendance, what should you do? You can do this directly via the TimeTec HR App through an Approval for Edit Attendance function. This option will allow users to edit their attendance data and this step would require superiors’ approval.
There are two ways to request attendance edits, one is through a web browser and another is through TimeTec HR App. Let’s look at the steps to do it in TimeTec HR App.
Process
A. Request Edit Attendance
1. Login to Timetec HR App > Click on the feature button
2. Then click on the My Request icon
3. On the Pop-up notification, you may select Edit Attendance
4. Click on the + symbol to add a new Edit Attendance Request
5. Select the date to edit, fill in the correct clocking details and provide a remark. Click on the Send button once the information is complete.
6. Once the request is successfully submitted, a new pending request will appear under the Edit Attendance request.
7. Users can check the status of their request under the Approval tab whether it is Approved or Rejected.
 B. Approve Edit Attendance
1. As an Approver you will receive a notification for every request made by staff. Go to the Notification tab to view any of the new requests and select it to view its details. 2. Click the Approval tab to view all staff requests and the status of each request done by the staff. Click on the pending request (blue tab) which needs an approver response.
3. The Approver also will be able to fill up the comment section and response to the request whether to tap the Approve or Reject button. Select ‘Only disclose to approvers’ to limit the comment view to approvers only
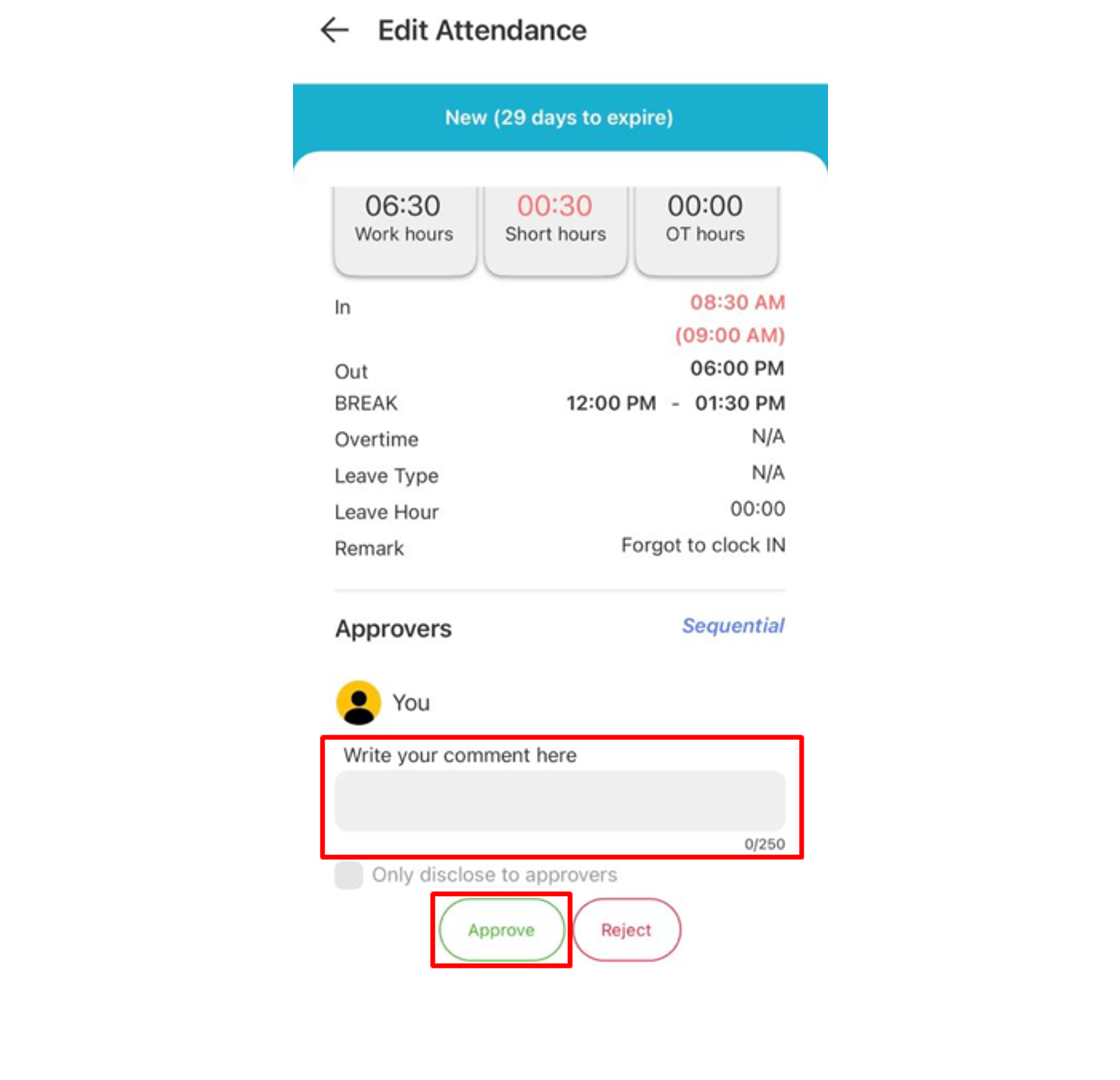
4. Any Approved request will change the Tab colour to Green.

Note: If some of the screenshots or steps viewed here are different from the ones in the current system, this is due to our continuous effort to improve our system from time to time. Please notify us at info@timeteccloud.com, we will update it as soon as possible.
Introduction
Visitors arriving with a QR code can be checked-in through the i-Vizit app at the security guard house.
1. Tap on Scan QR Code.
2. Tap on Visitor’s QR Code and scan the QR code on the Visitor’s phone/tablet
3. Tap Next when done.
4. Fill in the required information accordingly.
i. Tap on Snap Photo (OCR) to access the camera to capture visitor info.
NOTE: Please ensure the IC/ID card is placed in the middle of the tablet card holder.
ii. Tap on the Visitor Pass QR symbol and scan Visitor Pass QR (If any).
iii. Tap on Check-In when done.
Example: IC/ID Tablet Card Holder Placement
Visitor Pass Sample
5. Tap OK
Note: If some of the screenshots or steps viewed here are different from the ones in the current system, this is due to our continuous effort to improve our system from time to time. Please notify us at info@timeteccloud.com, we will update it as soon as possible.
Introduction
TimeTec Leave New Release v22.11.1.x has introduced us to a new feature for the Leave enhancement feature - Next-person-to-follow-up. Leave Application – Next person-to-follow-up feature is designed to allow the user to appoint their colleague for tasks or work progress. The feature will be set as default (Optional) in the system and application.
This feature allows users to pick another user(s) to follow up with their work / take over their jobs while they are on leave and is only available at TimeTec Leave Web and TimeTec HR.
Note: Users may choose up to 5 users to be notified that they are to follow up on the user's tasks while they are on leave.
TimeTec Web leave application
When applying for leave using the web application, the user may choose the next person to follow up at the bottom page application.
Once the application is approved, the next person to follow up will be shown on the calendar:

Timetec HR application
When applying for leave using the Timetec HR application, the user may choose the next person to follow up at the bottom page application. The next follow-up person will appear inside the calendar for users' reference.
Display follow-up person at Leave Overview > Leave Details. (Delegation)

Note: If some of the screenshots or steps viewed here are different from the ones in the current system, this is due to our continuous effort to improve our system from time to time. Please notify us at
info@timeteccloud.com, we will update it as soon as possible.