

Register Visitors in Ingress VMS (Walk-In Visitor, Visitor Check-IN/OUT)

Introduction
Ingress VMS is a Web Based Visitor Management System that is fully integrated with FingerTec Ingress Door Access System for a secure visitor management system. In this article, we will thus explain the required steps to setup Ingress VMS for the first time and how to register a visitor (walk-in visitor). Below are the process for the setup:
Process
A. Ensure all configurations are carried out in Ingress Software
Before we register a walk-in visitor in Ingress VMS, here are some of the initial setup that need to be carried out in Ingress Software:
1. Ensure the VMS license is valid.

2. Download all the users from the device into Ingress Software and proceed to create department as well as assign users into their respective departments.
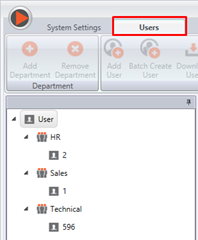
3. Create Access Level and assign all users within Ingress software into the access level. Note that you can also create a new access level group for the visitors. Once all the settings are done in Ingress software, please also make sure to synchronize the settings into the door.

4. Add Visitor Role.

5. Configure Ingress VMS language and check the VMS User ID; make sure that it does not not overlap with the Staff User ID (default from 90000-910000) and choose whether is it necessary for visitors to upload their photos.

B. Visitor Registration and Check-IN User
For offline visitor registration, there are 2 types of visitor:
· New Visitor
· Repeated Visitor
1. New Visitor
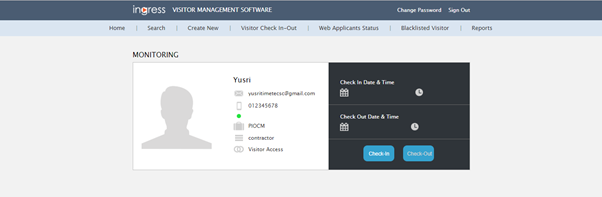
• Within the Ingress VMS dashboard, click on “Create New”.

• Fill in the user details.

• Click Enroll Card and insert the card number. By default, the device will read the first 10 digit RFID card number. Therefore, if the card number is 0008507046 129,52902, you will just need to key in 8507046.

• Insert visitor photo (optional). Moving on, click the Check-IN button to send the visitor card information into the device.
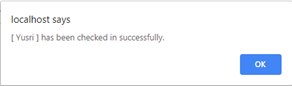
• The message below will prompt out and user will thus be able to access the door using the visitor card. Please be informed that the Visitor User IDs exported to the devices are based on the settings in Ingress software and cannot be changed because they are automatically assigned.

2. Repeated Visitor
• Within Ingress VMS dashboard, click on “Search”.

• Insert the Visitor Name and click the Pencil icon to edit the visitor registration.

• Proceed to the registration by clicking on “Add new”.

• The system will then show the previous registration details. If everything is on order, you can start adding a Visitor Card by clicking on “Enroll Card”.

• Click Check-IN button to send the visitor card information into the device.

C. Check-OUT Visitor
For Check-OUT visitors, there are 2 options:
· Via Card
· Force Check-OUT (If card is missing)
1. Check-OUT via Card
• To checkout visitors, click on Visitor Check IN-OUT and click the Check-Out button.
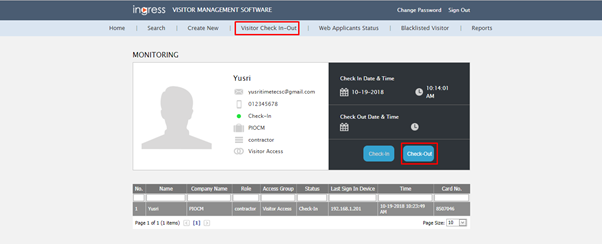
• Select Card ID and retrieve the card from the visitor. Next, fill in the card number in order to checkout the visitor.


2. Check-OUT via Force Check-OUT
• If the visitor misplaced their card, you will then need to select Force Check-Out and insert the reason/remark.
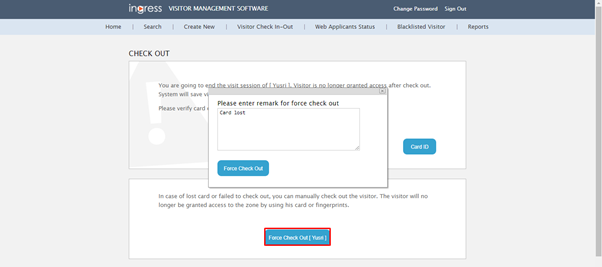
• Please be informed that if the user is checkout via Force Check-OUT, his/her name will be listed in the “Blacklisted Visitor” records.

Note: If some of the screenshots or steps viewed here are different from the ones in the current system, this is due to our continuous effort to improve our system from time to time. Please notify us at info@timeteccloud.com, we will update it as soon as possible.
Related Post
Ingress VMS Installation Guide


0 comments:
Have any questions or inquiries about FingerTec? Drop your input here.