TCMS V3 v2.1.6.7 Software Release

Wednesday, October 31, 2018 TimeTec 3 Comments


For this month, FingerTec has released TCMS V3 software v2.1.6.7, which adds 19 new features
and 8 bugs fixes to enhance the user experience when using TCMS V3 Software.


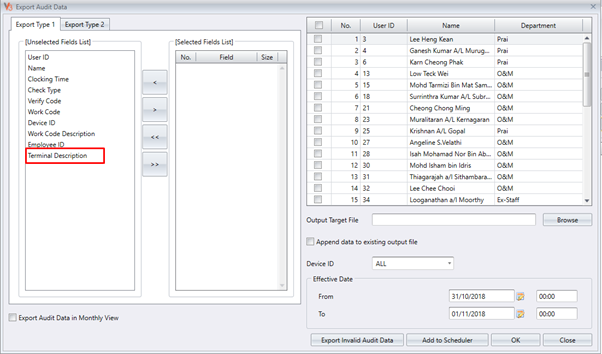
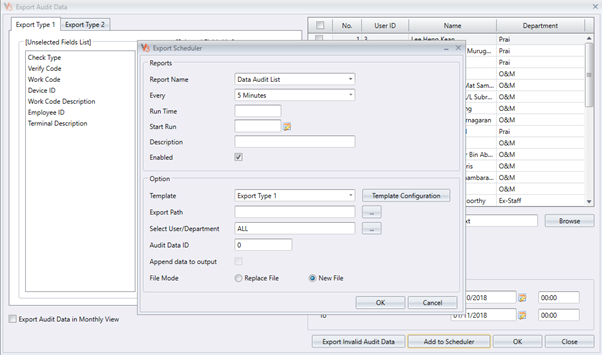
  1. Added Terminal Description in the fields list for Export Audit Data Type 1.


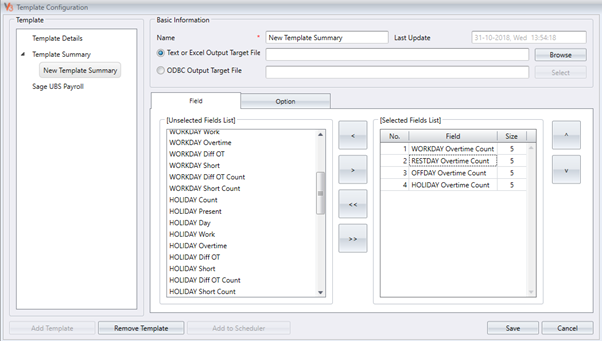
2. Added Workday, Restday, Offday, Holiday Overtime Count for Export Attendance
Summary.


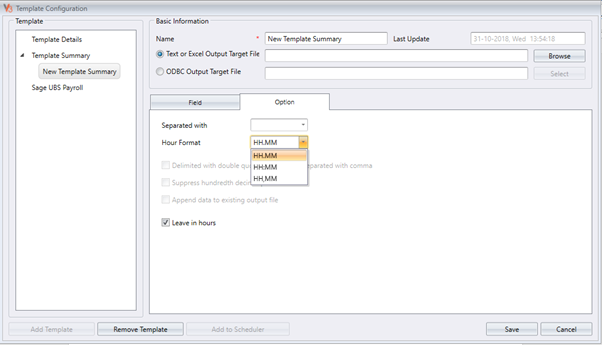
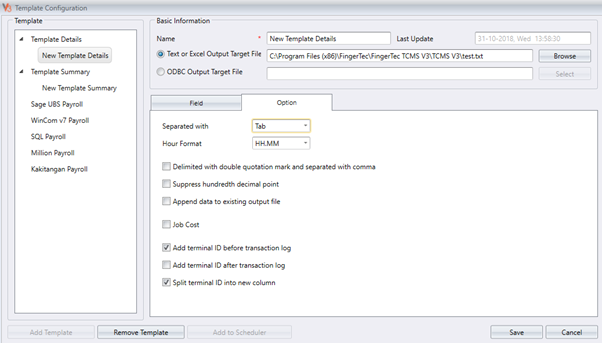
3. Added Hour Format (HH.MM or HH:MM) option in Export Attendance Details/Summary.


4. Added more selection options for date in Export Attendance Details/Summary.


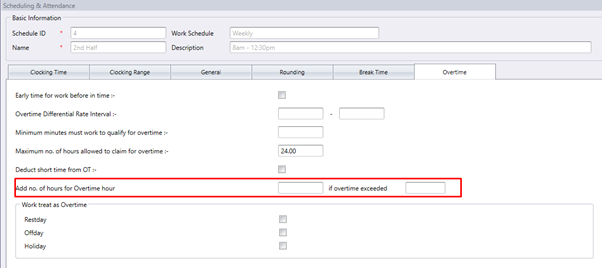
5. Added Additional Hours for Overtime when exceeded certain Overtime hour within
clocking schedule in Overtime settings.


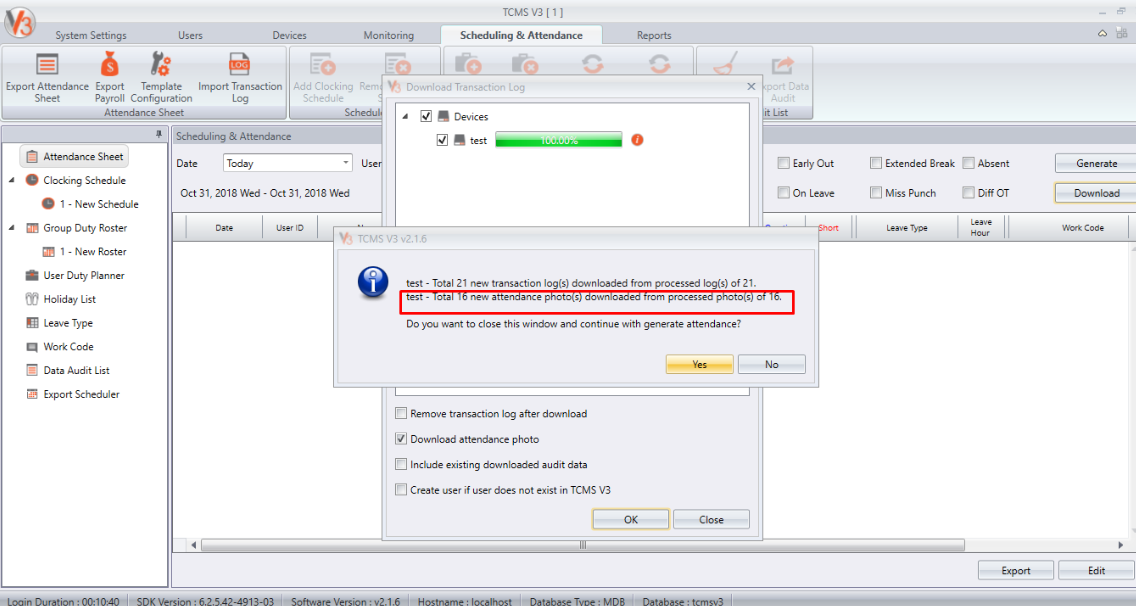
6. Added download details after manual download of Attendance Photo is completed.

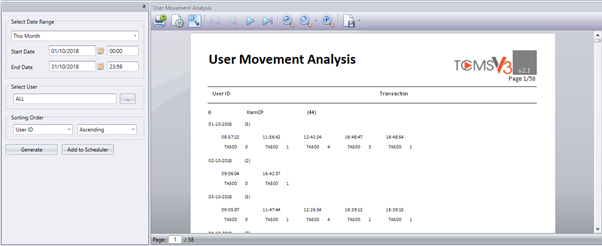
7. Added date and time filter in User Movement Analysis Report.


8. Added shortcut to Export Scheduler in Data Audit List & Template.


9. Added show last download attendance log in Device Activity.


10. Added import transaction log from TIMING with optional device.


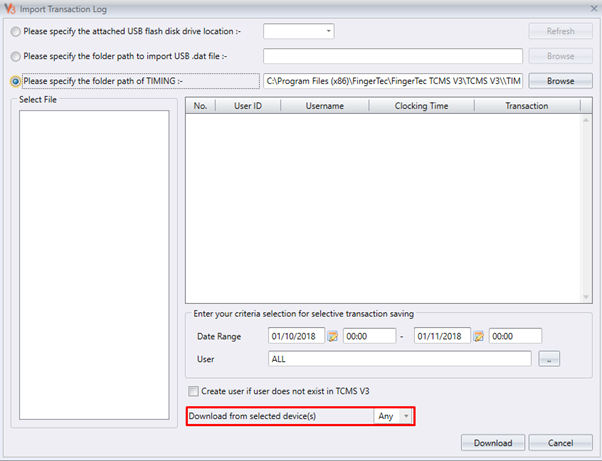
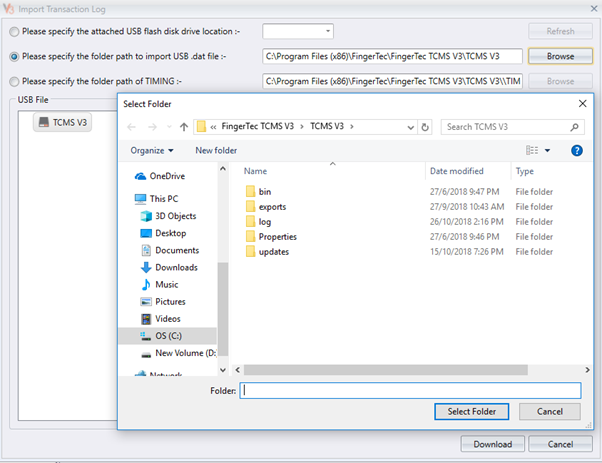
11. All USB related import & export will be selected based on Folder instead of Drive.


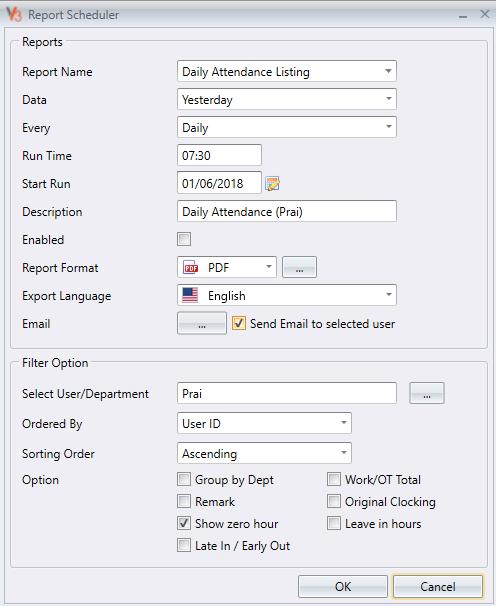
12. Allow sending of report scheduler to individual users.


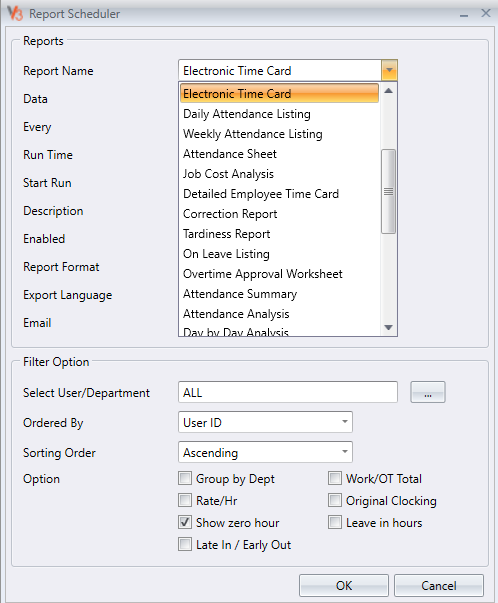
13. Enable export of reports in separate file based on User for ETC, Weekly, Daily &
Attendance Sheet.


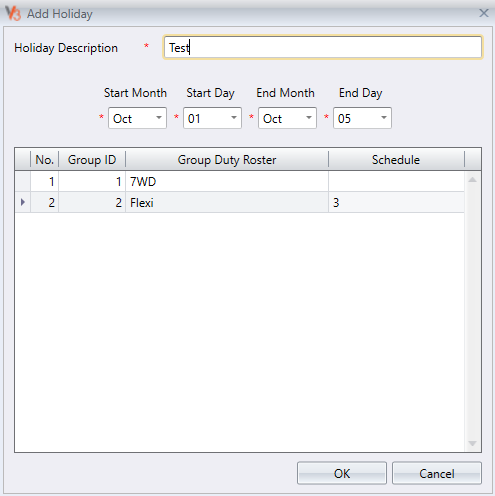
14. Allow holiday list to be assigned into different schedules when first adding holiday.


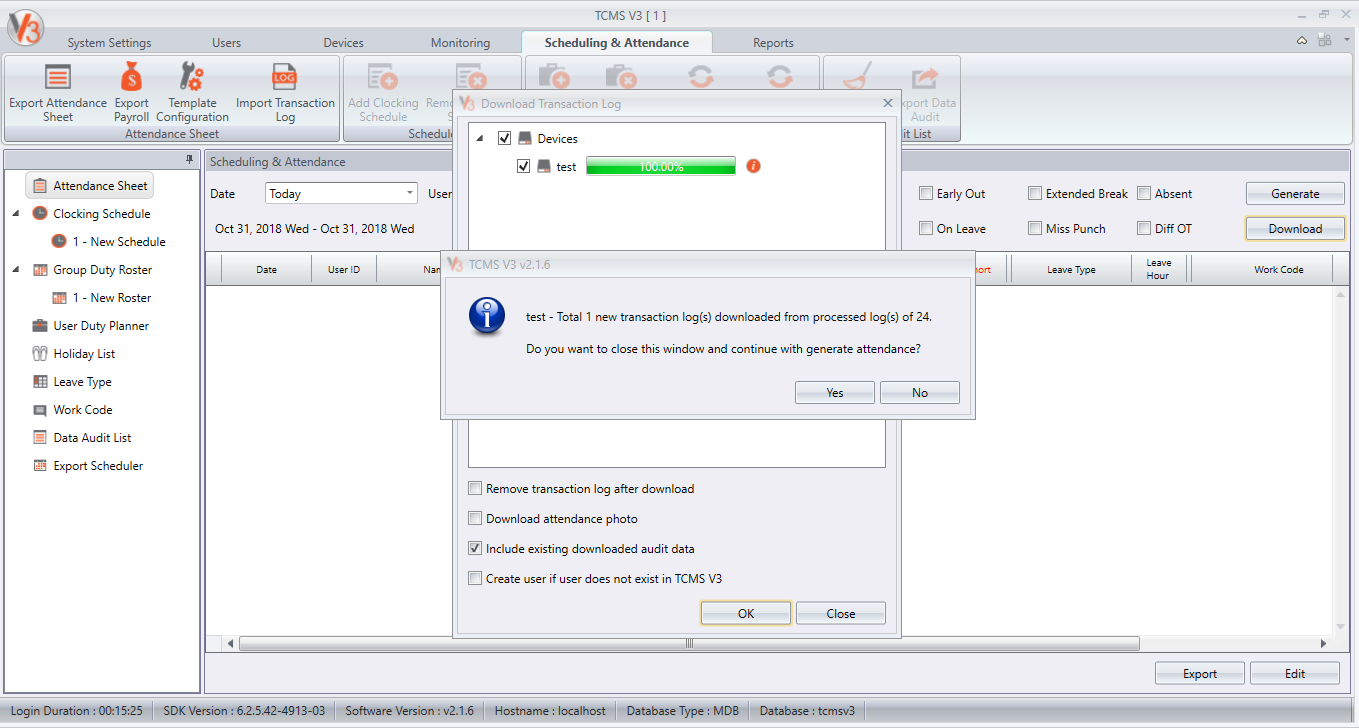
15. Show manual download of transaction logs when there is no record in Data Audit List.


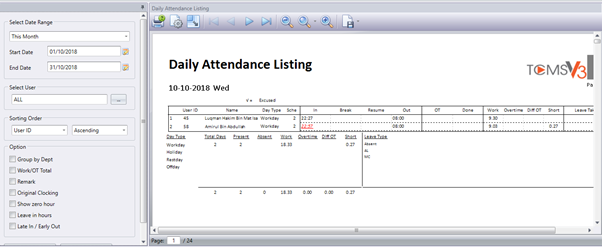
16.  Added Daily Attendance Listing & Weekly Attendance Listing with 2 columns & 4
columns instead of 6 columns.


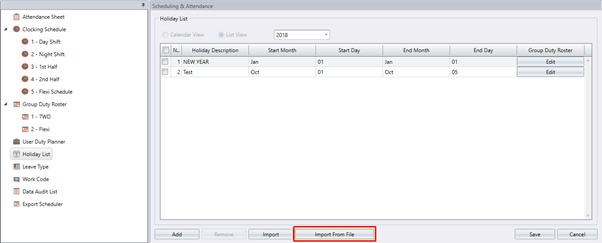
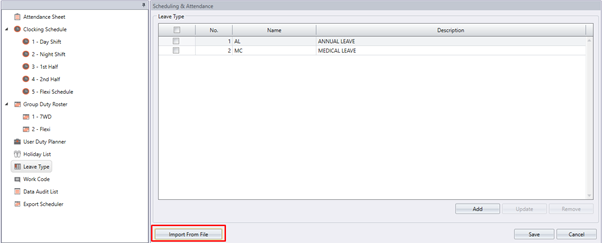
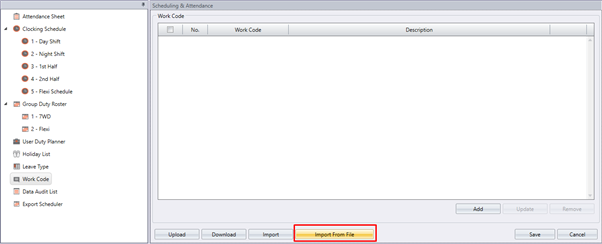
17. Added import file for Holiday List, Leave Type & Work Code.


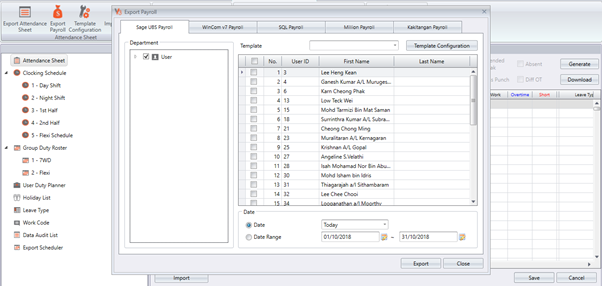
18. Revamp Export Payroll UI.


19. Added Find option at Select User and Clocking Schedule.


Bugs Fixed


1.Fixed Empty Basic Rate value after exporting attendance record to Sage UBS Payroll for
Employee ID.
2. Fixed Tardiness Report show late IN as 1.
3. Fixed Clocking Schedule - “Exclude break time from working hour” function not working when user
only specify one flexi break time.
4. Fixed Incorrect Total Overtime for Restday/Offday and Holiday if overtime differential rate interval
setting is applied.
5. Fixed Missing Employee ID option within the Export Scheduler Audit List Type 1 template.
6. Fixed Reduce to 1 column for leave export in MYOB export payroll.
7. Fixed Daily Attendance Listing Report scheduler generating report for all users even though
already filtered by department.
8. Fixed Incorrect Day Type when exporting Electronic Time Card Report into excel file format for
Indonesian language.

Note: If some of the screenshots or steps viewed here are different from the ones in the current
system, this is due to our continuous effort to improve our system from time to time. Please notify us
at info@timeteccloud.com, we will update it as soon as possible.

3 comments:

Have any questions or inquiries about FingerTec? Drop your input here.

Troubleshooting Guide For TimeTec TA GPS Location Clocking

Tuesday, October 30, 2018 TimeTec 1 Comments


Introduction
Occasionally in TimeTec TA, the GPS Clocking feature may not be able to pinpoint your location, i.e. the blue dot on the map is inaccurate or not showing up entirely. Hence, we prepare a quick guide as to what you can do to fix the problem. Refer to the process below:

Process 
1) Enabling Location Service

Steps for Android:
i) Enabling Location Service with High Accuracy
If you are using an Android smartphone, please select the High Accuracy mode within the Location settings to ensure that you are receiving accurate results during the Searching mode of your map location.

To enable High Accuracy mode, in your Android phone or tablet, go to Setting > Tap on Location. At the top corner, toggle location to ON and tap on High Accuracy as shown in the screenshot below.

ii) Go to Location setting, go to App-level permission > search for TimeTec TA > make sure the permission has been granted to the TimeTec TA app.


Steps for iOS:
If you are using an iPhone, you will only need to activate the location services in order to ensure that the GPS feature can pinpoint your location accurately.

i) Go to Settings > Privacy > Location Services.
ii) Make sure that Location Services is on.
iii) Open Settings
iv) Search for TimeTec TA
v) Select the Location option and ensure the Location Access is set to “While Using App”.


2) Check your current location on the map
On your Android phone or tablet, open the Google Maps application. In doing so, you’ll see a blue dot, which indicates your current location. If you are unable to see a blue dot, please proceed by tapping on your location located at the bottom right.

3) Test Location Service function with other 3rd party apps
If all else fails, you also can try to use other 3rd party apps which likewise require the location services to be activated. This is to ensure that the location services feature within your phone is still functioning properly. For example, you can start by using Whatsapp to send your location or any social media apps that require the location services feature.

Once done, you should be able to get the Location Services feature up and running to be utilized within TimeTec TA.

Note: If some of the screenshots or steps viewed here are different from the ones in the current system, this is due to our continuous effort to improve our system from time to time. Please notify us at info@timeteccloud.com, we will update it as soon as possible.

1 comments:

Have any questions or inquiries about FingerTec? Drop your input here.

How To Setup TimeTec BLE-2 Without Modifying The EM-Lock Wirings

Tuesday, October 30, 2018 TimeTec 0 Comments


Introduction
In this link, we’ve described how to add TimeTec BLE-2 onto existing FingerTec Device. However, we received some feedbacks on whether is it possible to retain the arrangements of the EM-Lock wiring connection as well. This is to prevent the need of a new wiring as well as to assist in cost-saving.

Process
Hence in this article, we will explain how to add TimeTec BLE-2 without modifying the EM-Lock wirings. For this case, we will only require 4 cables to set up the wiring :

1.       Two cables for power cable: +12V and GND.
2.       Other two cables for Channel 1 Output: OUT 1 and COM.

The Channel 1 Output from TimeTec BLE-2 will be connected to the Button Input at the device. Therefore, when users access the door via TimeTec Security App, the Channel 1 Output will in turn be triggered. This output will then send the signal to the device thus unlocking the door. Refer to the diagrams below for more information.


Picture 1: Wiring diagram from TimeTec BLE-2


Picture 2: From TimeTec BLE-2 to FingerTec Device.

To use this connection, we need to set TimeTec BLE-2 to Normally Open (NO) mode. You can configure this setting by looking at the right side of TimeTec BLE-2 and slide up the switch to enable Normally Open (NO) Mode.


Picture 3 : Switch for TimeTec BLE-2 door lock type

Please take note that all transaction records from TimeTec BLE-2 are saved within TimeTec Security App only, and it will not be displayed on FingerTec Software or device.

Note: If some of the screenshots or steps viewed here are different from the ones in the current system, this is due to our continuous effort to improve our system from time to time. Please notify us at info@timeteccloud.com, we will update it as soon as possible.

0 comments:

Have any questions or inquiries about FingerTec? Drop your input here.

Register Visitors in Ingress VMS (Walk-In Visitor, Visitor Check-IN/OUT)

Tuesday, October 30, 2018 TimeTec 0 Comments


Introduction
Ingress VMS is a Web Based Visitor Management System that is fully integrated with FingerTec Ingress Door Access System for a secure visitor management system. In this article, we will thus explain the required steps to setup Ingress VMS for the first time and how to register a visitor (walk-in visitor). Below are the process for the setup:

Process
A. Ensure all configurations are carried out in Ingress Software
Before we register a walk-in visitor in Ingress VMS, here are some of the initial setup that need to be carried out in Ingress Software:

1. Ensure the VMS license is valid.
 

2. Download all the users from the device into Ingress Software and proceed to create department as well as assign users into their respective departments.


3. Create Access Level and assign all users within Ingress software into the access level. Note that you can also create a new access level group for the visitors. Once all the settings are done in Ingress software, please also make sure to synchronize the settings into the door.
 

4. Add Visitor Role.
 

5. Configure Ingress VMS language and check the VMS User ID; make sure that it does not not overlap with the Staff User ID (default from 90000-910000) and choose whether is it necessary for visitors to upload their photos.
 

B. Visitor Registration and Check-IN User
For offline visitor registration, there are 2 types of visitor:
· New Visitor
· Repeated Visitor

1. New Visitor
• Within the Ingress VMS dashboard, click on “Create New”.


• Fill in the user details.


• Click Enroll Card and insert the card number. By default, the device will read the first 10 digit RFID card number. Therefore, if the card number is 0008507046 129,52902, you will just need to key in 8507046.


• Insert visitor photo (optional). Moving on, click the Check-IN button to send the visitor card information into the device.


• The message below will prompt out and user will thus be able to access the door using the visitor card. Please be informed that the Visitor User IDs exported to the devices are based on the settings in Ingress software and cannot be changed because they are automatically assigned.


2. Repeated Visitor
• Within Ingress VMS dashboard, click on “Search”.


• Insert the Visitor Name and click the Pencil icon to edit the visitor registration.


• Proceed to the registration by clicking on “Add new”.


• The system will then show the previous registration details. If everything is on order, you can start adding a Visitor Card by clicking on “Enroll Card”.


• Click Check-IN button to send the visitor card information into the device.


C. Check-OUT Visitor
For Check-OUT visitors, there are 2 options:
· Via Card
· Force Check-OUT (If card is missing)

1. Check-OUT via Card
• To checkout visitors, click on Visitor Check IN-OUT and click the Check-Out button.


• Select Card ID and retrieve the card from the visitor. Next, fill in the card number in order to checkout the visitor.


2. Check-OUT via Force Check-OUT
• If the visitor misplaced their card, you will then need to select Force Check-Out and insert the reason/remark.


• Please be informed that if the user is checkout via Force Check-OUT, his/her name will be listed in the “Blacklisted Visitor” records.


Note: If some of the screenshots or steps viewed here are different from the ones in the current system, this is due to our continuous effort to improve our system from time to time. Please notify us at info@timeteccloud.com, we will update it as soon as possible.

Related Post
Ingress VMS Installation Guide

0 comments:

Have any questions or inquiries about FingerTec? Drop your input here.