Introduction
Management is always interested in knowing employees' recent attendance trends without looking at each employee's attendance report. Hence, for a quick look at the employee's attendance, the admin can navigate the Analysis tab for the attendance chart. In this article, we will demonstrate how the Management / Head of Department / Supervisor can monitor their subordinates' attendance chart based on their attendance categories (Normal / Tardiness / Absent / On Leave, etc.) or the Work Location analysis with ease through their TimeTec HR mobile application.
Process
1. Open TimeTec HR mobile app. Switch to the TA module and then tap on the Menu grids button.
2. Click on the Analysis option.
3. Default view will be for All Division (If provided with Full Division viewing) and the date will be today. You may select the date to view a different date and select any specific division where applicable for the monitoring purpose.
The displayed chart will be colour coded based on the attendance categories which can be identified by the detailed list below. You may click on each segment on the pie chart or the category listing below the chart to further show the detailed user listing.
4. The user listing for each of the selected categories will appear accordingly for the supervisor to monitor.
5. From the Attendance Analysis chart, you may swipe the screen to the left to display the Work Location analysis chart. Similarly, you may tap on each segment on the chart or tap on the detailed location list below to show the user listing for each work location.
Note: If some of the screenshots or steps viewed here are different from the ones in the current system, this is due to our continuous effort to improve our system from time to time. Please notify us at info@timeteccloud.com, we will update it as soon as possible.
Update Device
Tablets should be updated daily to maintain up-to-date information and settings.
How to update the device
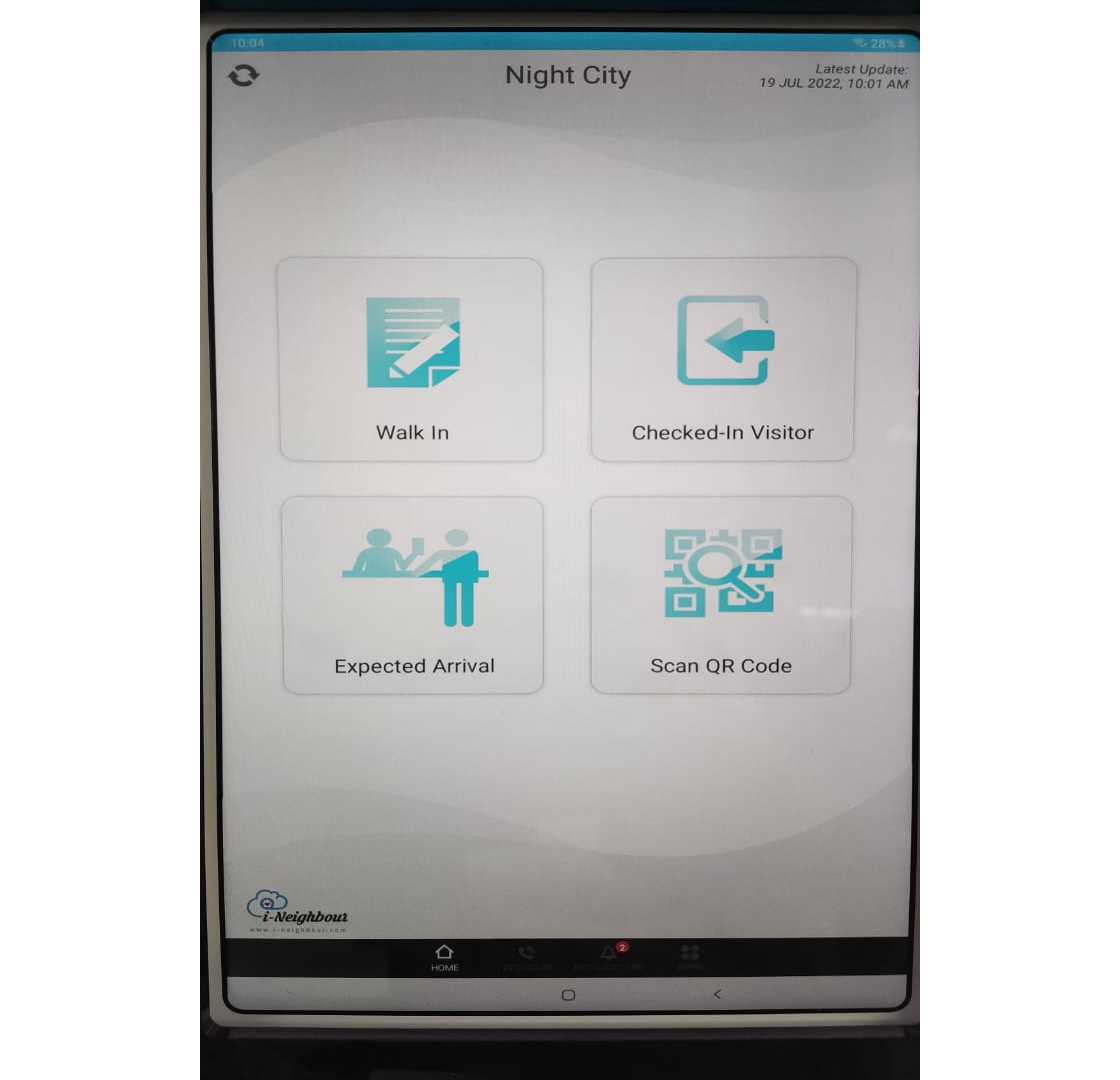
1. Tap on the Refresh icon on the top.

3. After the update completes, tap OK to finish.

Note: If some of the screenshots or steps viewed here are different from the ones in the current system, this is due to our continuous effort to improve our system from time to time. Please notify us at info@timeteccloud.com, we will update it as soon as possible.
Introduction
Users with admin access can create contractor passes for any construction related work through the i-Neighbour web portal. Once created, users can then download hardcopies of the contractor passes.
Contractor Pass Creation (Admin)
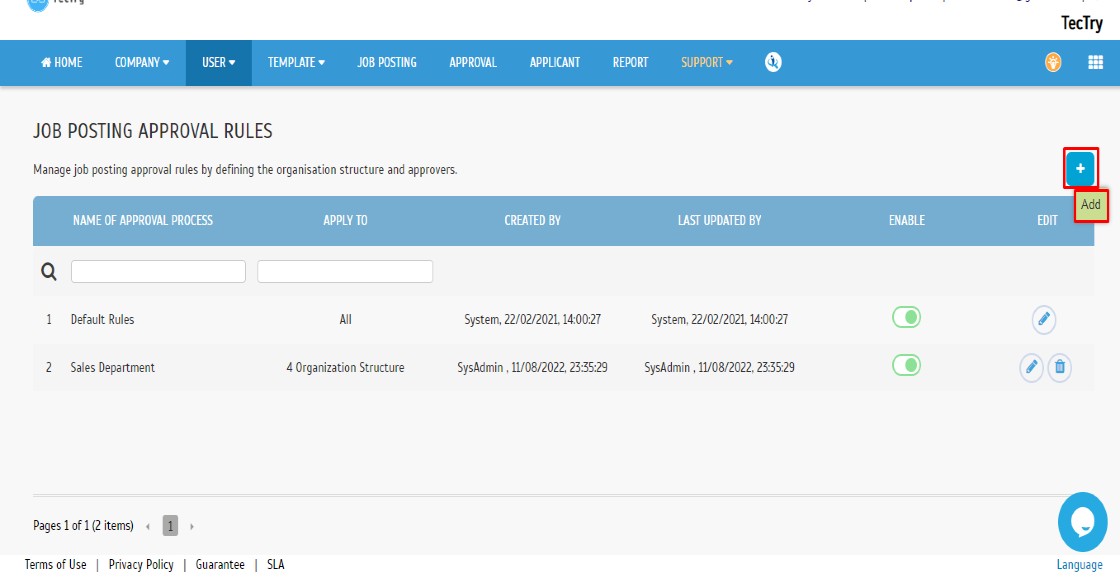
1. Click the + icon to begin.
2. Select owner details using the drop-down boxes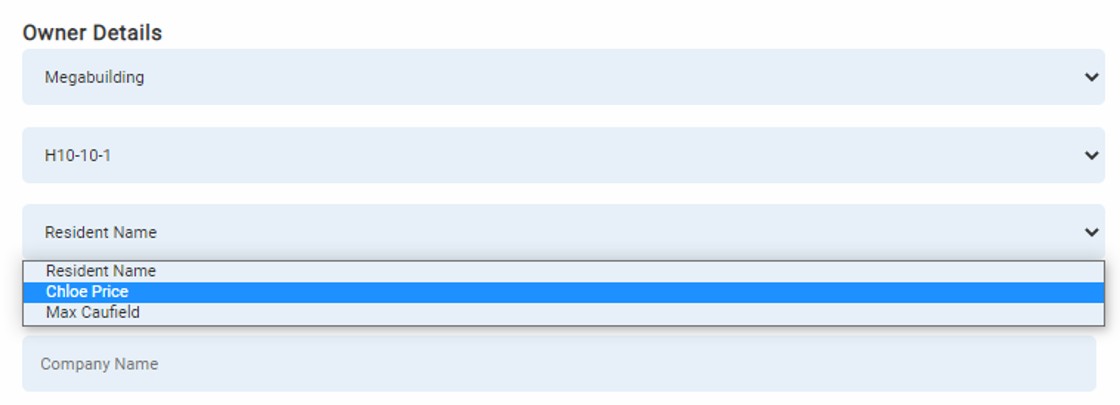 3. Fill in the Contractor’s details (Company name, address, contact, etc.) and the work start and end date using the drop-down calendar.
4. Select the scope of work using the drop-down box.
5. Fill in the worker’s details and click the profile photo icon to choose a contractor ID photo. Attachments can also be uploaded here if needed.
6. Read the guidelines and click okay to proceed to select a photo ID.
7. Add more workers if needed, then choose to “Save & download pass” or “Save” without downloading.
Example of downloaded pass

Example of contractor details after creationNote: If some of the screenshots or steps viewed here are different from the ones in the current system, this is due to our continuous effort to improve our system from time to time. Please notify us at info@timeteccloud.com, we will update it as soon as possible.
Introduction
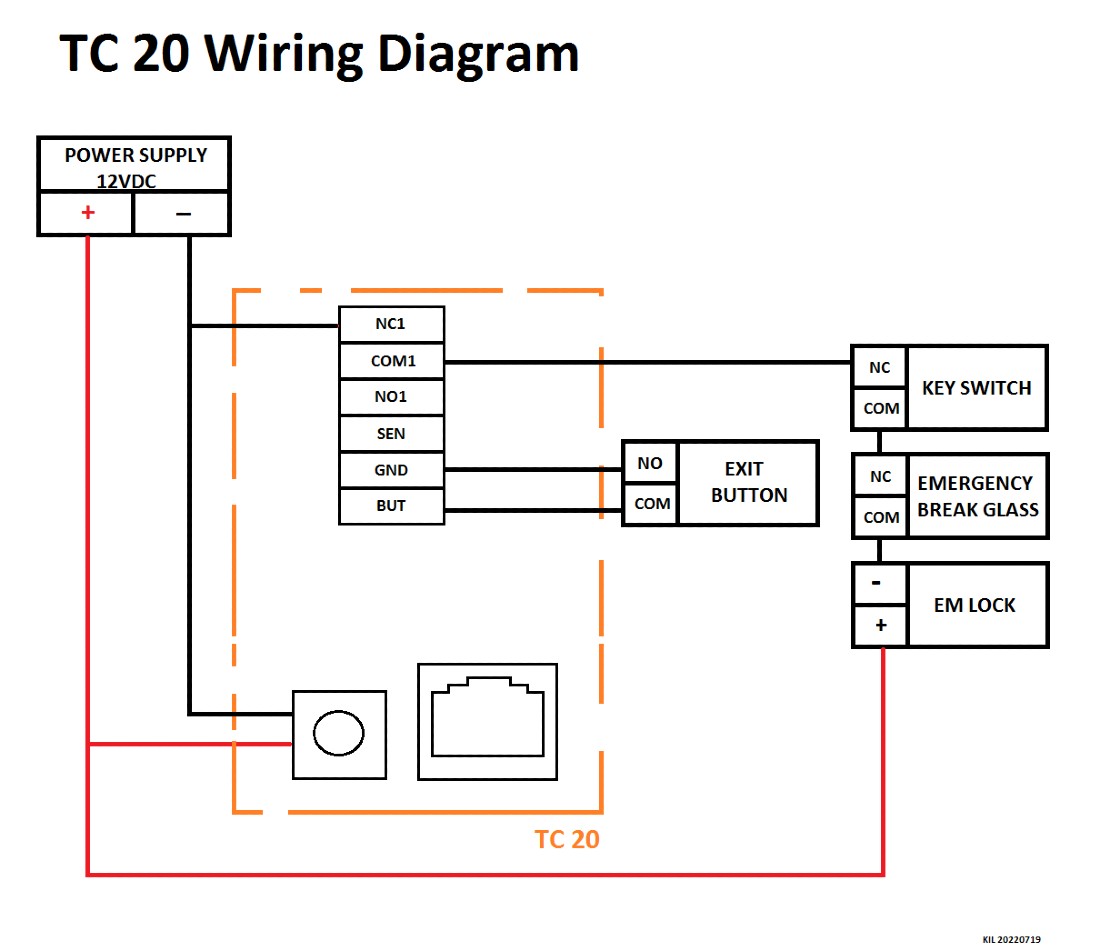
TC 20 New lineup device for TimeTec HR solution that can cater to attendance records and access control needs for any organisation. It's been equipped with facial recognition, touch-less attendance record and access equipment that fits its need.
For attendant record purposes, TC 20 can be connected with a 12Vdc male jack connector power supply (provided) and LAN cable for internet connection, TC 20 has also been equipped with a WIFI module for easy Internet connection. The device will send all attendance data to Timetec TA.
For these tips, connection for TC 20 as access door equipment has been shared as a reference on how to connect TC 20 with door access
1) TC 20 with 12Vdc power supply wiring diagram
2) TC20 With Adaptec Plus wiring diagram
3) TC20 + TC 20 with 12Vdc power supply wiring diagram
4) TC20 + TC20 with Adaptec Plus wiring diagram
Note: If some of the screenshots or steps viewed here are different from the ones in the current system, this is due to our continuous effort to improve our system from time to time. Please notify us at info@timeteccloud.com, we will update it as soon as possible.
Introduction
It is crucial to perform maintenance for attendance photos regularly to maintain the database size for Ingress and AWDMS. Too many attendance photos will cause database size to keep on increasing tremendously and cause a backup problem if there is too much data.
Device side
1) Please make sure you downloaded all the logs and attendance photos into your software
2) Delete the attendance photos in the device to avoid old attendance photos being downloaded again into the database upon performing the maintenance
Go to Menu > Data Mgt > Delete Data > Delete Attendance Photo > can select Delete All or Delete by Time Range
Software Side
1) Backup Process:
Please copy one folder that contains a user photo and attendance photo for backup purposes in case the administrators need to re-check the attendance photo for future usage
Go to C:\Program Files\BioSecurity\service\zkbiosecurity\BioSecurityFile\upload and copy the whole Upload folder then paste it elsewhere as your backup 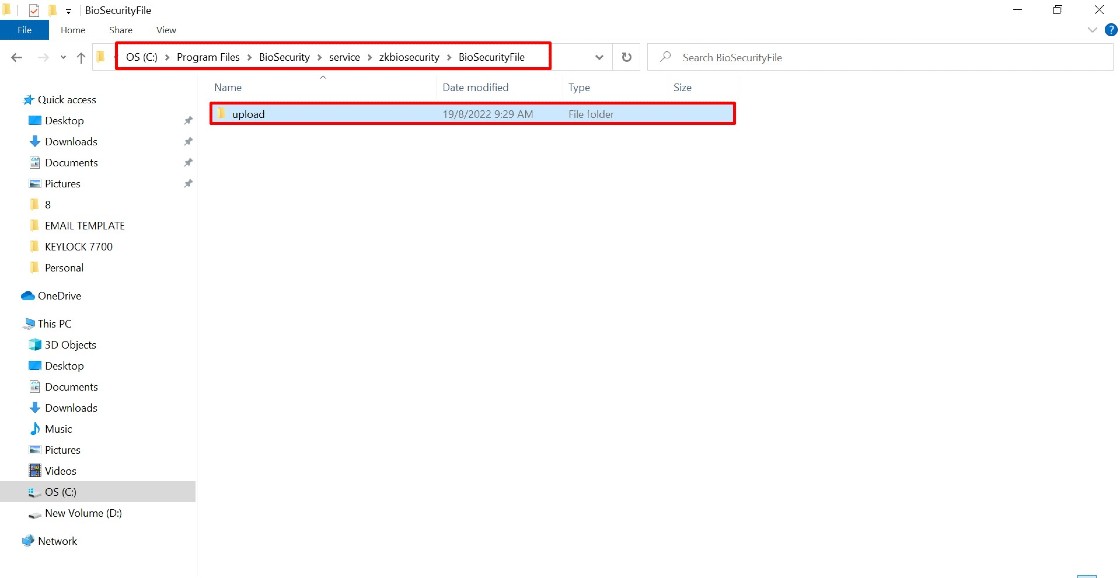
2) Delete old attendance photo in AWDMS
a. Go to the respective attendance photo folder location in Program Files C:\ProgramFiles\BioSecurity\service\zkbiosecurity\BioSecurityFile\upload\event\photo
b. Upon going to the photo folder, you can view all Face ID 5/Smart AC series device serial number
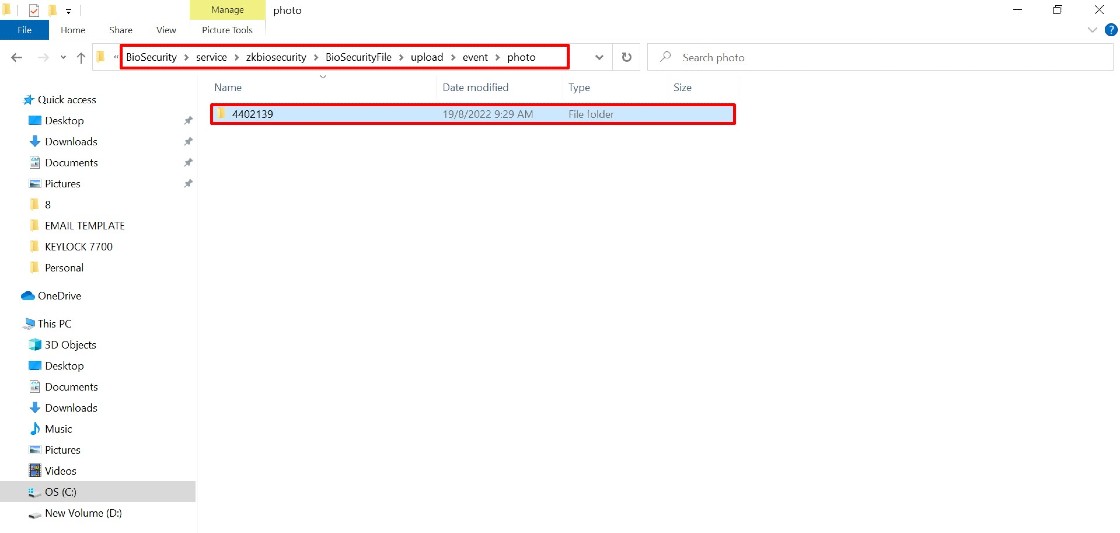
c. Open each serial number folder to delete the old attendance photo. Right-click to sort all the attendance photos by name/date to ease the selecting and deleting process
d. Select your preferred data to be deleted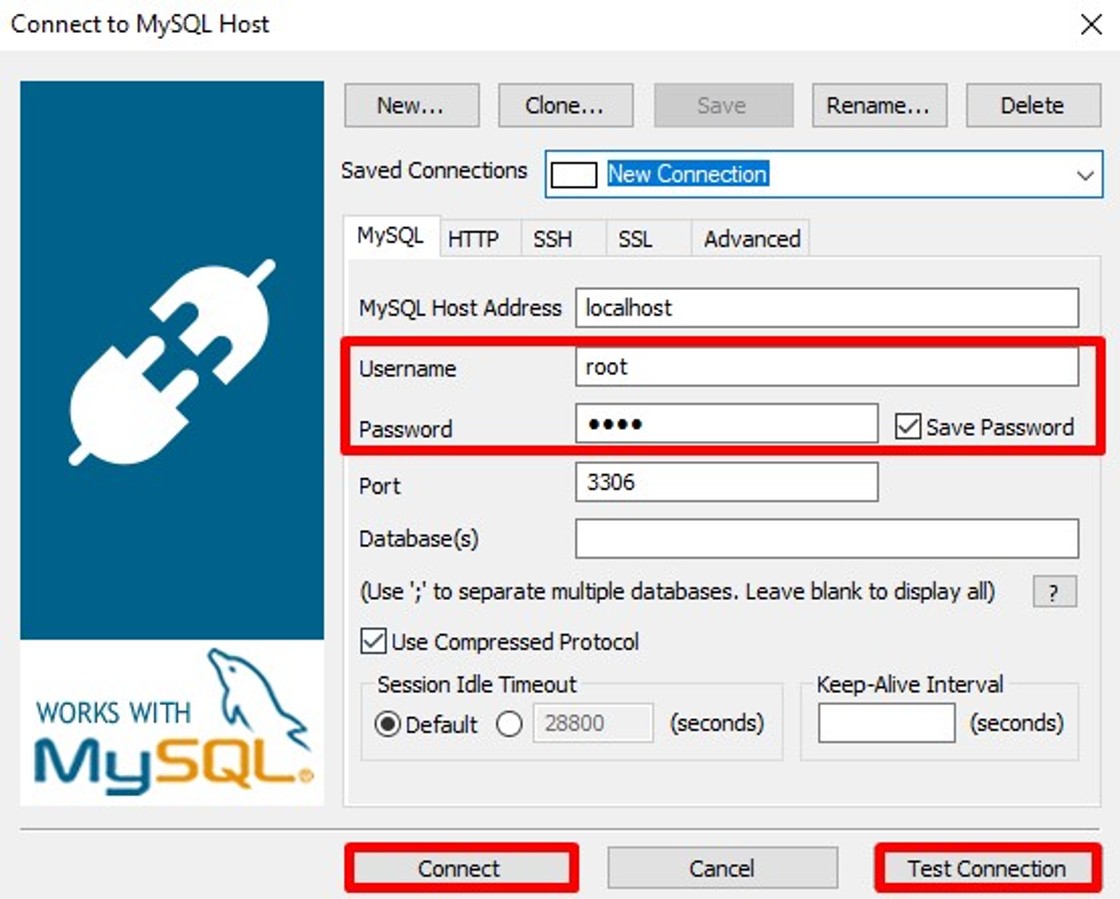
b. Upon connecting to the localhost database, you should see on the left panel of the window a list of the available databases. Next, click + on the Ingress database and + table
c. Click on att_photo and click Table Data
d. Run the command below on the query tab to delete the attendance photo based on the date range
DELETE FROM `attn_photo` WHERE checktime >= '2022-01-01' AND checktime < '2022-12-28' ;
Remark: Please adjust the date based on your preferred data to be deleted
Note: If some of the screenshots or steps viewed here are different from the ones in the current system, this is due to our continuous effort to improve our system from time to time. Please notify us at info@timeteccloud.com, we will update it as soon as possible.
Introduction
A job posting is an advertisement for an open job position. The purpose of a job posting is to inform potential job candidates about a new opening and attract them to apply. Usually, the admin will prepare the job template and will pass it to the approver to review before the job posting can be done. The steps typically involve different departments and employees who review the work and either approve or reject it. Timetec Hire also has this feature to ensure job posting can be done in a systematic and much easier way.
Process
1. Go to Timetec Hire > User > Job Posting Approval Rules.

3. Go to Step 1 > Fill up Name of Approval Process > Tick the required division > Click Next.
4. Go to Step 2 > You need to select the approval method (Auto Approve or Set Approvers).
A. Auto Approve (Automatic approval without the need for an approver)
You can tick on Auto Approve and Click Save to complete the new setup for job posting approval rules.

B. Set Approvers (Approvers are needed before the job posting process is complete)
For this setting, you have two options :
i- Sequential - This approval method lets you set the approvers for this employee and its approval sequence. Please note that the approval process will follow the sequence set, which means that the second approver cannot do an approval until the first approver has done his for the employee's expense report.
ii- Random - Requires all selected users to approve but without any multi-layer order.
Note: If some of the screenshots or steps viewed here are different from the ones in the current system, this is due to our continuous effort to improve our system from time to time. Please notify us at info@timeteccloud.com, we will update it as soon as possible.