Introduction
A Statement of Account (SOA) is a great way to provide owners with a recap of the charges billed to them and the payments already made. Furthermore, SOA can also be used as a tool for payment reminder as it informs the owners of their outstanding account balance.
Thus, to ensure that owners have updated information on their account status, Admin can generate an SOA using i-Account and upload the document to i-Neighbour. Once uploaded, owners can view their SOA in i-Neighbour’s e-Billing > Account Statement page through the web or mobile app.
Admin can follow the below steps to generate and upload the Account Statement:
How to Generate SOA in i-Account
Step 1
To generate SOA, go to Property > Account Statements .
Step 2
Click on the “+Account Statement” button to generate a new SOA.
Step 3
You will be directed to the Add Account Statement page. Fill in the details and select from the list of options provided:
Select Customer by: | Admin has the option to generate SOA by: i) Customer (Select Single Customer) ii) Customer Group (Based on the Customer Group that have been assigned previously) |
Start Date & End Date | Select the Start and End dates. The SOA will display the details of all debits and credits (billings to and payments from the owner) during this specific time period. There will be a balance b/f or beginning balance on the Start Date. |
Auto Upload to i-Neighbour | Enable this to automatically upload the SOA to i-Neighbour as soon as it is generated. This will skip the need to manually click on the upload button in the listing. |
Type of Statement: | Admin can select from the two types of SOA which are:
i) Statement of Account (Shows debit and credit arranged by date) ii) Statement of Account for Unit (Shows allocations of receipts/credit notes against invoices).
You can also generate both of these statements for your checking at the Reports module. |
Address to be Shown: | There are two options for the address: i) Property Address ii) Mailing Address |

Step 4
Once complete, click on the “Add” icon at the bottom of the page to generate the SOA.
Step 5
After the SOA is successfully generated, it will be listed on this page. You can view, upload or delete the SOA by clicking on the respective icons.
Step 6
If you already uploaded the SOA to i-Neighbour, the upload (arrow) icon will be hidden, for example:
Sample Statement of Account for Unit
Sample of Statement of Account
How to View SOA in i-Neighbour
Admin or Residents/owners can view the SOA at the e-billing module in the i-Neighbour app or website once Admin uploads the SOA to i-Neighbour.
a) Website (Admin Login)
Step 1
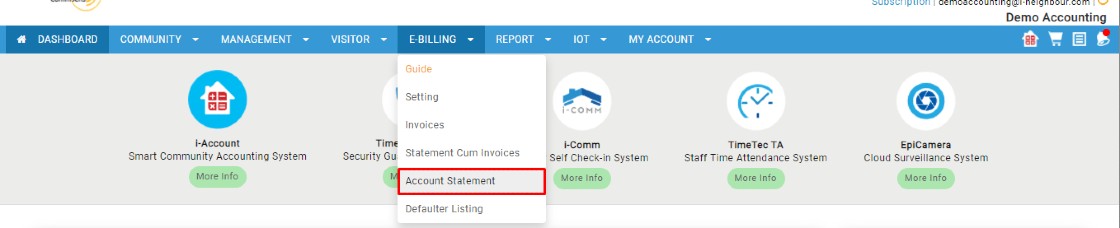
Login to i-Neighbour website and go to e-Billing module > Account Statement.
Step 2
All the uploaded Statement of Account will be displayed on this page and Admin can filter according to their preference. Admin can click the “View” icon to view the Statement of Account.
b) i-Neighbour Mobile App (Resident/Owner) Login
Step 1
Login to i-Neighbour App and tap on “More” icon as the below example:
Step 2
Once you have selected the “More” menu, then go to Billing Info and select Account Statements.
Step 3
On the Account Statements screen, Residents/Owner can view a listing of all the SOA uploaded by the Admin. Tap on one to view/download a copy (pdf) of the SOA.
Note: If some of the screenshots or steps viewed here are different from the ones in the current system, this is due to our continuous effort to improve our system from time to time. Please notify us at info@fingertec.com, we will update it as soon as possible.
Introduction
While some offices have the same office hours and public holidays, some holidays may only apply to a specific state.
This article shows how to set up working hours and public holidays. This feature is useful for Key Collection, Joint Inspection and Developer Appointment.
Process
1. Go to Admin page > Community > Setting > Working Days & Public Holidays
3. Select Country and Year.4. Once done, public holidays for the selected countries and years will show. Click the holidays that apply to your community and click submit.
5. Now your calendar has been set with its public holidays.
If you are still having problems after completing all of the steps stated above, please contact us via support@i-neighbour.com.
Note: If some of the screenshots or steps viewed here are different from the ones in the current system, this is due to our continuous effort to improve our system from time to time. Please notify us at info@i-neighbour.com, we will update it as soon as possible.
This month FingerTec has released TCMSv3 software v3.1.1.1, which adds 5 new features and 5 bug fixes to enhance the user experience of TCMSv3 Software.
1. Revamp empty value for Gender when a new User is created
2. Added option to reset empty value for Gender in the Batch Update User
3. Added option Disable User Page Break for Weekly Attendance Listing
4. Added option minimum minutes to qualify for Early In Overtime in Weekly and Daily Schedule
5. Added check option for each field in order to apply in Batch User Duty Planner
Bugs Issues Fixed
1. Fixed generate data error in attendance sheet due to Flexi schedule last log out settingconfigure as 00:00/12:00 am
2. Fixed unable to export Data Audit List Type II via Export Scheduler due to error check time value (0000-00-00 00:00:00)
3. Fixed device activation showing expired and failed to activate for some license keys
4. Fixed failed to export Attendance Details with Job Cost data that does not include Work done in hours
5. Fixed Gross Wages Report failed to generate when Job Cost option selected
Introduction
Face recognition quality can be compromised due to many factors, for example, the position of the face ID device facing a direct light source, low quality face template enrolled, a defective camera module, etc.One of the solutions to overcome this problem is by calibrating the camera of the face ID device.
This article explains the steps to calibrate the camera for better performance.
For better results, it is advisable that calibration is done on the location where the device is used or mounted.
Process
The first step is to make sure that the camera module is working.
1. Choose MENU
4. Make sure the camera module display a normal picture and an infrared picture
*If one or both don't display properly, there is a high possibility that the camera module is defective. Email FingerTec support at support@fingertec.com for assistance.
5. After testing the camera, choose Back to start the camera calibration mode.
7. The device will show 00(s) : 0(ms)
8. Click on the screen and the time will run.
Wait until the time runs to 01(s) : ++(ms) and click one more time to stop it.
Repeat 3 times.
9. After done, choose Back
11. To confirm that the device is in the camera calibration mode, both displays are in black and white, and the screen has a Save icon on the top right corner
12. Place your face in front of the camera and place it according to the display box.
Do the step until the bar reaches 140 and above, and that the face displays have nearly the same size and display quality. Once this step is done, your camera is good to go.
13. After that choose the Save icon to save the calibration
Note: If some of the screenshots or steps viewed here are different from the ones in the current system, this is due to our continuous effort to improve our system from time to time. Please notify us at info@fingertec.com, we will update it as soon as possible.
Introduction
TimeTec TA is cloud-based software; therefore, changing the user ID option is not easily available. This article demonstrates steps to change a User ID in TimeTec TA without having to add an additional user license.
The Main Process as illustrated below:
Remove Current User’s Fingerprints from All Devices
1. Go to Device > Assign Users to Device
2. Search for the old user ID. Click the ‘X’ icon on the ‘Fingerprint Count’ column to remove the fingerprint.3. Click the check symbol to confirm
4. Go to ‘Device’ > ‘Terminal’
5. Select all terminals > Manage > Upload User
6. Select the user and please make sure there is no fingerprint count displayed on that particular user. Unselect ‘Do not overwrite user's information if no fingerprint is uploaded’. Click the check button to submit
7. Go to ‘Support’ > ‘Terminal Command Queue’ to check the upload status
8. The Delete Fingerprint process takes around 5-15 minutes to be completed on an online device. Once completed, you may proceed with registration of a new ID and enroll of fingerprint on the device.
Register New ID and Enroll Fingerprint
1. Register the new user ID in TimeTec and upload it to all devices.
2. Once the uploading process is complete, go to the device to proceed with the fingerprint enrolment of the new user ID.
Download User and Fingerprint to TimeTec
1. Go to ‘Device’ > Terminal
2. Select the device that you have enrolled the fingerprint to > Manage > Download User
3. Unselect ‘Display new users only’ > Select the new user ID (please make sure the fingerprint count is stated. Otherwise you need to click the ‘sync’ button to refresh the data) > click select button to submit
Upload the New User with Fingerprint to All Devices
1. Select all terminals > Manage Terminal > Upload User2. Select the new User ID > click ‘select’ to submit
Deactivate the Old User ID
1. Go to User > Manage User > search the old User ID > Click ‘Pencil’ icon > Click ‘Deactivate User’
2. Select the Employment status > Submit
Note: If some of the screenshots or steps viewed here are different from the ones in the current system, this is due to our continuous effort to improve our system from time to time. Please notify us at info@timeteccloud.com, we will update it as soon as possible.