How to Backup & Restore MySQL Database for TimeTec


As you might already know, TimeTec does not have the function to backup or restore its database. What if you need to backup the database for emergency purposes? What if you want to migrate the database from an old server to the  new server? Not to worry as I have the solution for you.

For Backup:

  1) Install SQLyog that comes with the TimeTec installation. Click on the SQLyog Community icon.


  2) Once you are at the SQLyog Community software, click the New button and insert the name as TimeTec. After that insert the TimeTec server’s IP Address (localhost or local IP) as the MySQL Host Address, Username & Password and click Connect.


 3) Upon connecting to the TimeTec Database, right click on Timetec and select Backup/Export and   Backup database as SQL Dump.


  4) Click on the “…” icon to select backup file path and click Export to initiate the backup process.


For Restore:

  1) At the SQLyog Community software, connect into the TimeTec’s database. Right click on Timetec, select Import, and then Execute SQL Script.


   2) Click the “…” icon to select the backup file path. Click Execute to restore the database.


Initiated and Written by: Jazz


How to Install OFIS Scanner in Windows 8


Microsoft’s latest operating system Windows 8 not only encourages us to use Digitally Signed Drivers, but it also checks to see if the driver has been modified. If the driver has been modified, the operating system will abort the installation. Take the FingerTec OFIS Scanner’s driver for instance; Windows 8 will not install the driver as it is not digitally signed. Even when you update the driver, Windows 8 will not let you complete the installation.


However, we have a solution to this problem. To fix this problem:

1.     From the Start Screen, click Settings.
2.     Click Change PC Settings.
3.     Click General.
4.     Scroll down and look for Advance startup. Click Restart Now.


5.     After the restart, you are required to choose an option. Click Troubleshoot.
6.     Click Advance Options and click Startup Settings.
7.     At the Startup Settings, click Restart.
8.     In the next menu, press F7 to disable driver signature enforcement.
9.     Go to Device Manager and update the OFIS-Y Fingerprint Reader’s driver.


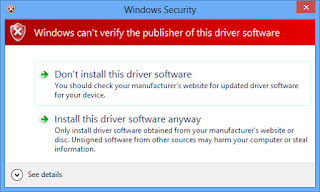
10.  This time around, Windows 8 will prompt a security window to reconfirm the installation. Click Install this driver software anyway.


11.  Once the installation has completed, you can now use the OFIS-Y with Windows 8.


Contributed by: Zul
Written by: Vincent